I thought how awesome these shadow blocks would be for a baby quilt. One problem - the little blocks measure in at 3", which would mean 80 blocks for a baby size quilt. So I emailed Debora and asked if it would be okay if I enlarged them, and change up the setting. No problem! Create away!
Since these bigger blocks are fast and easy to make, I've put together a tutorial for sewing 6 inch Shadow Blocks. And over the next few days, I'll show each quilt in more detail, as each has it's own story. There's just too much to put into one post!
Note: This block works best with focus fabrics that have a variety of medium to large distinct images throughout. Repetitive novelty fabrics could work, if there are several of them with the same theme.
Fabric Amounts
- minimum 1 yard focus fabric, with images fitting into a 5 1/2" square - 20 images needed
- 1/4 yard or one fat quarter for shadow. This can be grey, brown, or any dark fabric to coordinate with the focus fabric. Needs to be medium to dark to contrast.
- 1 1/3 yard background fabric (this amount is for a baby size quilt), light value to contrast with the shadow fabric.
Cutting for Blocks
Cut 20 (twenty) 5 1/2 " squares from the focus fabric.
Cut 2 (two) strips 1 1/2" from background.
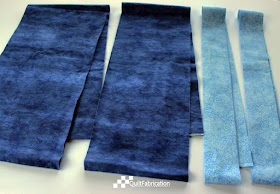
Cut 1 (one) strip 4 1/2" from shadow.
Cut 1 (one) strip 5 1/2" from shadow.
(If using a fat quarter for the shadow, cut strips 18" long which allows for two strips 4 1/2" x 18", and two strips 5 1/2" x 18". There will be very little waste.)
Making the Blocks
Sew one 1 1/2" background strip to a 4 1/2" shadow strip. Do the same for the 5 1/2" shadow strip.
Press towards the background, away from the dark 'shadow'. This will make the 'shadow' sink into the background.
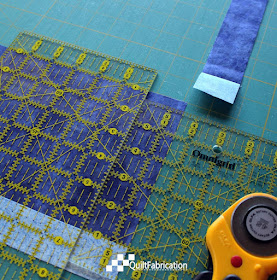
Starting with the 4 1/2" combo strip, subcut the strip into 20 (twenty) 1 1/2" pieces.
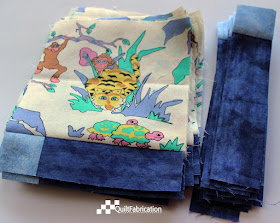
Sew these strips to the bottom of the 5 1/2" squares, with the 'shadow' on the right.
Press towards the 5 1/2" square to sink the 'shadow'.
Subcut the 5 1/2" combo strip into 20 (twenty) 1 1/2" pieces.
Sew these strips to the right side of the 5 1/2" squares, with the 'shadow' towards the bottom.
Press towards the 5 1/2" block, sinking the 'shadow'. The block is finished, measuring 6 1/2".
These blocks, along with sashing, created the three Shifting Shadow quilts, Safari, Jungle, and Polar Ice, each one just a bit different. For the full Shifting Shadows baby quilt, visit my Etsy shop.
Happy Quilting!


The baby quilts look beautiful. Such a versatile design. Great tutorial!
ReplyDeleteI love the shadow box effect!! It creates great movement and it's so easy to sew... win-win combination!! Thanks for sharing!!
ReplyDeleteLOVE! LOVE! LOVE! Looking forward to the individual stories! :)
ReplyDeleteGorgeous quilts, and what a great idea! Now I can make a larger one to match my mini.
ReplyDeleteThese look great Susan. After seeing all the minis on blogs I was thinking it would make a great I spy quilt so thank you for sharing the tut for the larger block.
ReplyDeleteThanks for providing the tutorial. This looks to be fairly easy to sew up, which is a big plus. Love your three quilts.
ReplyDeleteYour welcome! Sew away!
DeleteGreat idea! I am going to use this idea on some 6" blocks I have sewn up. Thanks for the great idea and tutorial! Cute quilts for Project Linus is what is on my mind!
ReplyDeleteThank you so much for such a fabulous tutorial! I just found the some shadow block templates for a ridiculously low price and am excited to begin my quilt! However, I was so confused about color placement! You cleared that right up! Thank you!
ReplyDelete