Showing posts with label baby quilt. Show all posts

Friday, July 22, 2022

Scrappy Heart Quilt

Yay! I have finished my pink scrappy heart quilt!


Boy, was this ever a long time in the making. There were days, weeks even, when I couldn't spend any time sewing due to all of the yardwork on our new place. I'll have more to share on that on another day.

But I managed to get some free time last week and finish it up! It felt so good to do some sewing, creating, and then the quilting with my Innova. And it's finished just in time.

This scrappy heart quilt is for a college friend of my son's. He and his wife were high school sweethearts, waiting till college was finished to tie the knot and married now for four years. They're expecting a little girl in mid-August, and as they say, 'First comes love, then comes marriage, then comes the baby in the baby carriage!' 

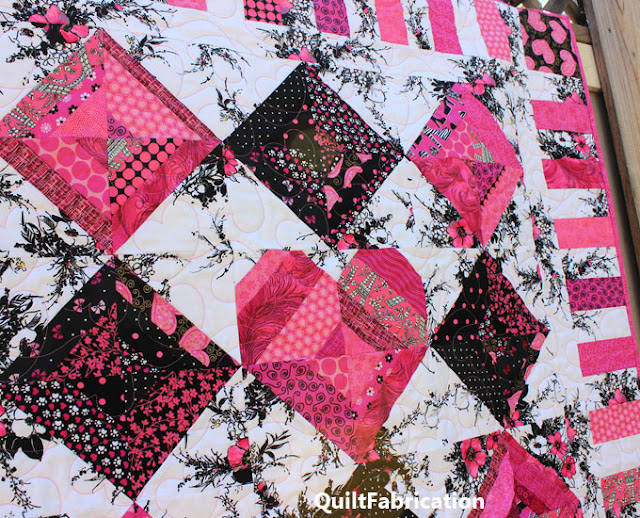
And she needs a quilt to play on! Here's a couple closeups:

the scrappy heart, for which I changed out a couple fabrics to make it more prominent.

pink string scrap heart block

Another picture of the scrappy blocks, each made as a pink or black triangle using strips then stitched to a background triangle. Each resulting block was trimmed to 5 1/2" square, which math wise, worked out great for the borders and the piano key placement.


Putting it all together is the simple heart quilting (Dear Heart pantograph) in bright pink Glide thread.


Last but not least is the backing. I had four pink pieces that were approximately 15" wide but short on the WOF side. They were only going to work if I made a center block to stitch them around. Using all of the last piece of background plus the black heart fabric, I managed to make a square large enough to finally create a backing large enough. We're talking approximately 1 1/2" on all sides, and if you know that a long arm needs extra, this was a tight squeeze!


Though it looks it, it's not perfectly centered on the back of the quilt, but hey, I came darn close. Overall, I'm pleased with how this scrappy heart quilt came out!

So now we wait for the little one's arrival. Then I can put a label with the name and birthdate on it for her to enjoy! 

Happy Quilting!


Follow on Bloglovin

Enjoyed this post? Don't miss out - get posts delivered directly to your inbox with follow.it.  

           
GET POSTS BY EMAIL


My Favorite Patterns

Friday, May 15, 2020

Brick Yard Baby Quilt

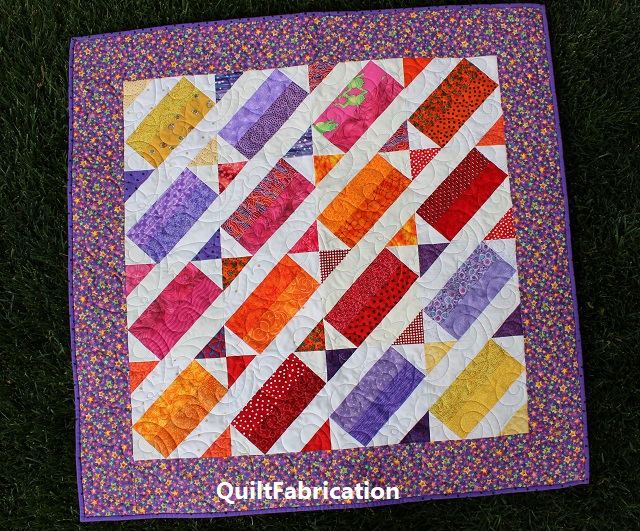
Zoom Zoom! Zip Zip! That was fast! The Brick Yard baby quilt is a finish!

Brick Yard baby quilt  at QuiltFabrication

This baby version of Brick Yard is made of 16 squares, and this time, the blocks are all set in the same direction, 


Brick Yard baby quilt

instead of making squares as in the Brick Yard lap quilt.


Brick Yard lap quilt

In making more blocks, I set out making three of orange, purple, red, and pink, for 12 more in addition to the orange original one.


Brick Yard block

Then I threw them on the floor and started playing with a layout. At first, I randomized the colors, which was ok, but then divided them up into diagonal lines. Happy with that idea, I made up the remaining 4 color blocks that were missing.


Brick Yard baby quilt directional layout

Hubby wasn't too excited about what he saw on the floor, and I knew this needed a border to tie it all together. By luck (seriously - the quilt God's were smiling upon me!), I found this scrap of purple with multi-colored stars on it in my kid's fabric bin - perfect! Isn't that a great fit?


Brick Yard baby quilt quilting

Once I had the border on, I excitedly went to show hubby my stroke of luck. And now he loved it! Last step, the quilting.

Just like Burst, the Brick Yard baby quilt also uses a variegated thread and the Passion Fruit pantograph. And the backing is a soft purple check flannel.


Brick Yard baby quilt backing

Hubby has now put a reserve on this one as a special gift for a co-worker. That's going to be one lucky baby! For me, I'm super thrilled with how this quilt came out, and the luck I had in making it -
Happy Quilting!


Follow on Bloglovin

My Favorite Patterns

Monday, December 2, 2019

McKenzie Baby Quilt

What did I do this weekend? Whipped up a baby size version of the McKenzie quilt to test out modifications to the design.


McKenzie baby quilt by QuiltFabrication

Though this turned out well, I'm still not happy with the modifications. The difference here is the strip width, which is still not quite right. But it sure looks great in the yellow and green combo, with bits of pink added in.


McKenzie baby quilt flat by QuiltFabrication

The smocking feature of the original McKenzie is not so prominent in this one. Instead, it's the on point grid created by the fabric values that stand out for me. Just amazing what a few 10 inch squares can do - this finishes at 37" x 45".

Quilting is with Glide Lemon Ice and the panto Fizz,


McKenzie baby quilt quilting

and the backing a pieced mish-mash of leftover parts!


McKenzie baby quilt backside

I think I'll let this idea rest for awhile, and revisit it at a later time, as it does have potential.

Happy Quilting!


Follow on Bloglovin

Friday, June 7, 2019

Petunia Patch Mini

Finally I get to share the tiny Petunia Patch blocks from last week! Here she is, the third Petunia Patch quilt from the Scrappy and Happy Quilts book (affiliate link), this time in a mini size.


Petunia Patch 1 and Petunia Patch Mini quilts


Remember Petunia Patch 1 was bigger than I wanted, measuring 49" x 49" because of 9" blocks? And that I wondered about the quilt's ultimate purpose? Well, for the moment, I decided to use it as the larger quilt in the local fair's 'Mini Me' contest. 


Petunia Patch 1 and Petunia Patch Mini quilts full on
                              Petunia Patch 1 and Petunia Patch Mini

After making Petunia Patch 2 with 7" blocks, I realized the blocks were very forgiving for resizing. Why not make an even smaller version specifically for the contest? With 3" blocks, Petunia Patch Mini measures in around 17" x 17". That fits the contest criteria of "the block must be less than half the size".

This little unfinished block measures 3 1/2" x 3 1/2", which is a third the size of the original.


Petunia Patch 3 inch mini block

Though not necessary, I placed all of the little petunias in the same positions as on the big quilt, Petunia Patch 1,


Petunia Patch 1 and Mini quilts fabric placements


even situating directional fabrics the same. 


Petunia Patch 1 fabric orientation
                                               Petunia Patch 1  


Petunia Patch Mini fabric orientation
                                              Petunia Patch Mini


Ditto for the green stems. Check out how the strip size really changes the look of the fabric print.


Petunia Patch 1 fabric closeup
                                           Petunia Patch 1


Petunia Patch Mini fabric closeup
                                       Petunia Patch Mini

Crazy me even miniaturized the Robinia pantograph to 39%, 


Petunia Patch mini with small Robina pantograph

though I wished I had used a thinner thread. I'm certainly not un-stitching all of that!


Petunia Patch Mini quilting closeup

Petunia Patch 2 now lives with her new owner, while Petunia Patch 1 and Petunia Patch Mini are hanging at the fair - I can't wait to see all of the quilts this year! More to come about the fair on Monday.

Happy Quilting!


Follow on Bloglovin


Friday, May 31, 2019

Between the Lines

Woo-hoo! Between the Lines is another quilt finished from the May 2019 Book of the Month selection, Scrappy and Happy Quilts (affiliate link).


Between the Lines quilt from the Scrappy and Happy Quilts book

Isn't this cute? And fast too - the top was cut and sewn together in around 2 hours - can't beat that for a quick quilt!

I went along with the color theme used in the pattern in the book, choosing bee fabrics that I had in the stash. Stacking prints with background for cutting made for fast unit assembly!


bee fabric used in the Between the Lines quilt

Since there's bees, how about some loop-de-loops for the quilting? Looks like those bees are flying all over this quilt top!


loop-de-loop quilting on Between the Lines quilt

And because I DID NOT want to add leftover strip scraps to the burgeoning scrap bag, I found another blue in the stash to help fill out the back.


backside of Between the Lines quilt

Looks just as nice as the front, doesn't it? And I remembered my little 'QuiltFabrication' tag, with care instructions.


QuiltFabrication care label on a quilt

A note on the back: the blue/white striped band is placed toward the bottom of the quilt, instead of toward the top as on the front. That way, I didn't have a lot of seams meeting in the same area, plus it lessons the show-through effect that a white backing tends to create. Looking closely at the folded back area, show through is slightly visible.


back and front of Between the Lines quilt

If ever I'm in need of a quilt that needs to be made NOW, this pattern will be on my go-to list! It looks great and sews up fast!

Happy Quilting!


Follow on Bloglovin

Monday, May 27, 2019

Petunia Patch #2

Here she is, Petunia Patch #2,


Petunia Patch quilt #2 from Scrappy and Happy Quilts book

an even more modified version of the original pattern from the Scrappy and Happy Quilts book (affiliate link).

Looks a lot like the first one, Petunia Patch #1, doesn't it? 


Petunia Patch quilt #1 from Scrappy and Happy Quilts book

Looking closely, the flowers aren't in the same spots, and another fabric has been added, as there wasn't enough of the first one. And the sizes are different. Petunia Patch #1 is 49" x 49", while Petunia Patch #2 is 39" x 39". Nine inch blocks originally, resized to seven.

BTW, has anyone ever noticed how pink and red don't photograph well outdoors? These two colors always seem to have a neon quality on film - even my hot pink roses look weird. Let's just say it's not one of my favorite colors to photograph. Or it could be me, as I'm still an amateur when it comes to photos!

Anyhoo, I have no chain stitching or stack trimming in-progress pics to share - I think we all know how that goes!
And as for the quilting, it's the same pantograph, Robinia, in Glide Silver.

Robinia pantograph on Petunia Patch quilt

And this quilt, because it's the final commissioned quilt, has a soft grey with pink birds flannel for the backing. 

Petunia Patch #2 quilt with flannel backing

It's a perfect fit, as grandma requested pink, grey, flowers, and birds for this quilt.

Overall, it was worth remaking Petunia Patch with smaller blocks. The result is a more pleasing size and scale, and a perfect quilt for that first grandchild.

Now, what to do with Petunia Patch #1? I have a wild idea, and hope to have time to follow through. As usual, I'll keep everyone posted!

Happy Quilting!

Follow on Bloglovin

Monday, May 20, 2019

Petunia Patch #1

Here she is - a modified version of the Petunia Patch quilt 


Petunia Patch #1 quilt


from my Book of the Month selection, Scrappy and Happy Quilts (affiliate link).


Scrappy and Happy Quilts by Kate Henderson


The original pattern in the book calls for 25 petunias, which makes a quilt 68" x 68". I choose to only make a portion of the quilt, one of my many techniques for altering a pattern to suit my size needs. With 13 petunia blocks, this quilt measures 49" x 49".

Here's closeup pics before the story of why this quilt is Petunia Patch #1.

Petunia Patch #1 quilting closeup

Check out that pink backing, from the stash!

Petunia Patch #1 quilt with backing

Now for the story: this quilt comes with some things I like and some I don't. First, the good.

- It was easy to make - though repetitious - chain stitching the petals and using my Stacked Trimming technique helped.

- Pink fat quarters worked great to give a variety of petunias.

- It's an overall adorable quilt, no matter what the size!

And now for the bad, which is my perception and in no way any fault of the pattern.

- It's larger than I'd like for a baby quilt, which is totally my mistake for not doing the quilt math before starting in on making the blocks. I like baby quilts around 40" x 40", and at 49" x 49", this one is big.

- The block size is more appropriate for the large quilt. In this modified version, the petunias look like they would eat up any baby laying on it! 
There really is something to be said for scale.

Notice the bad is all a size issue. So, what to do? Since this is a commissioned quilt, I talked with the grandma, explaining the outcome and my desire to remake the quilt on a smaller scale. She agreed, which means I'm off again to chain stitch and stack trim. And fortunately, I have enough of the fabrics left, so no issue there. Petunia Patch #2 coming up, hopefully, with a more pleasing size - time to get to work.

May you have a great day quilting!

Follow on Bloglovin