Friday, May 31, 2019

Between the Lines

Woo-hoo! Between the Lines is another quilt finished from the May 2019 Book of the Month selection, Scrappy and Happy Quilts (affiliate link).


Between the Lines quilt from the Scrappy and Happy Quilts book

Isn't this cute? And fast too - the top was cut and sewn together in around 2 hours - can't beat that for a quick quilt!

I went along with the color theme used in the pattern in the book, choosing bee fabrics that I had in the stash. Stacking prints with background for cutting made for fast unit assembly!


bee fabric used in the Between the Lines quilt

Since there's bees, how about some loop-de-loops for the quilting? Looks like those bees are flying all over this quilt top!


loop-de-loop quilting on Between the Lines quilt

And because I DID NOT want to add leftover strip scraps to the burgeoning scrap bag, I found another blue in the stash to help fill out the back.


backside of Between the Lines quilt

Looks just as nice as the front, doesn't it? And I remembered my little 'QuiltFabrication' tag, with care instructions.


QuiltFabrication care label on a quilt

A note on the back: the blue/white striped band is placed toward the bottom of the quilt, instead of toward the top as on the front. That way, I didn't have a lot of seams meeting in the same area, plus it lessons the show-through effect that a white backing tends to create. Looking closely at the folded back area, show through is slightly visible.


back and front of Between the Lines quilt

If ever I'm in need of a quilt that needs to be made NOW, this pattern will be on my go-to list! It looks great and sews up fast!

Happy Quilting!


Follow on Bloglovin

Monday, May 27, 2019

Petunia Patch #2

Here she is, Petunia Patch #2,


Petunia Patch quilt #2 from Scrappy and Happy Quilts book

an even more modified version of the original pattern from the Scrappy and Happy Quilts book (affiliate link).

Looks a lot like the first one, Petunia Patch #1, doesn't it? 


Petunia Patch quilt #1 from Scrappy and Happy Quilts book

Looking closely, the flowers aren't in the same spots, and another fabric has been added, as there wasn't enough of the first one. And the sizes are different. Petunia Patch #1 is 49" x 49", while Petunia Patch #2 is 39" x 39". Nine inch blocks originally, resized to seven.

BTW, has anyone ever noticed how pink and red don't photograph well outdoors? These two colors always seem to have a neon quality on film - even my hot pink roses look weird. Let's just say it's not one of my favorite colors to photograph. Or it could be me, as I'm still an amateur when it comes to photos!

Anyhoo, I have no chain stitching or stack trimming in-progress pics to share - I think we all know how that goes!
And as for the quilting, it's the same pantograph, Robinia, in Glide Silver.

Robinia pantograph on Petunia Patch quilt

And this quilt, because it's the final commissioned quilt, has a soft grey with pink birds flannel for the backing. 

Petunia Patch #2 quilt with flannel backing

It's a perfect fit, as grandma requested pink, grey, flowers, and birds for this quilt.

Overall, it was worth remaking Petunia Patch with smaller blocks. The result is a more pleasing size and scale, and a perfect quilt for that first grandchild.

Now, what to do with Petunia Patch #1? I have a wild idea, and hope to have time to follow through. As usual, I'll keep everyone posted!

Happy Quilting!

Follow on Bloglovin

Friday, May 24, 2019

Quilts In Progress

Spending time this week sewing, sewing, and sewing some more. The projects under the machine are another, smaller Petunia Patch quilt and a Between the Lines quilt, both from patterns in the Scrappy and Happy Quilts book (affiliate link).

Scrappy and Happy Quilts

The Petunia Patch looks just the first one, a sea of squares and flip n' stitch corners. It should debut on Monday.

Petunia Patch petals

The Between the Lines quilt top is done, taking around two hours to put together because of easy strip piecing.

Between the Lines quilt strip sets

Piecing this quilt top was my way of coping with the 5-0 Sharks loss against the Blues. It was an extremely difficult game to watch. So, I listened instead while stitching away. I had such high hopes for my beloved Los Tiburones!

Between the Lines quilt top

All it needs now is backing construction from leftover fabrics from the front, and another quilt will be born. Look for this one next week.

That's all that's new with me - more to come on these two next week.
Happy Quilting!


Follow on Bloglovin

Monday, May 20, 2019

Petunia Patch #1

Here she is - a modified version of the Petunia Patch quilt 


Petunia Patch #1 quilt


from my Book of the Month selection, Scrappy and Happy Quilts (affiliate link).


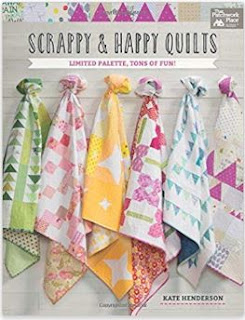
Scrappy and Happy Quilts by Kate Henderson


The original pattern in the book calls for 25 petunias, which makes a quilt 68" x 68". I choose to only make a portion of the quilt, one of my many techniques for altering a pattern to suit my size needs. With 13 petunia blocks, this quilt measures 49" x 49".

Here's closeup pics before the story of why this quilt is Petunia Patch #1.

Petunia Patch #1 quilting closeup

Check out that pink backing, from the stash!

Petunia Patch #1 quilt with backing

Now for the story: this quilt comes with some things I like and some I don't. First, the good.

- It was easy to make - though repetitious - chain stitching the petals and using my Stacked Trimming technique helped.

- Pink fat quarters worked great to give a variety of petunias.

- It's an overall adorable quilt, no matter what the size!

And now for the bad, which is my perception and in no way any fault of the pattern.

- It's larger than I'd like for a baby quilt, which is totally my mistake for not doing the quilt math before starting in on making the blocks. I like baby quilts around 40" x 40", and at 49" x 49", this one is big.

- The block size is more appropriate for the large quilt. In this modified version, the petunias look like they would eat up any baby laying on it! 
There really is something to be said for scale.

Notice the bad is all a size issue. So, what to do? Since this is a commissioned quilt, I talked with the grandma, explaining the outcome and my desire to remake the quilt on a smaller scale. She agreed, which means I'm off again to chain stitch and stack trim. And fortunately, I have enough of the fabrics left, so no issue there. Petunia Patch #2 coming up, hopefully, with a more pleasing size - time to get to work.

May you have a great day quilting!

Follow on Bloglovin

Friday, May 17, 2019

Stacked Trimming

What the heck is that?

Stacked Trimming of quilt units by QuiltFabrication

It's my idea of mass trimming all of those petal units for the Petunia Patch quilt (affiliate link). I do so like speed and efficiency!!

Remember that pile of chain pieced pink petal units from Wednesday?


chain pieced quilt units

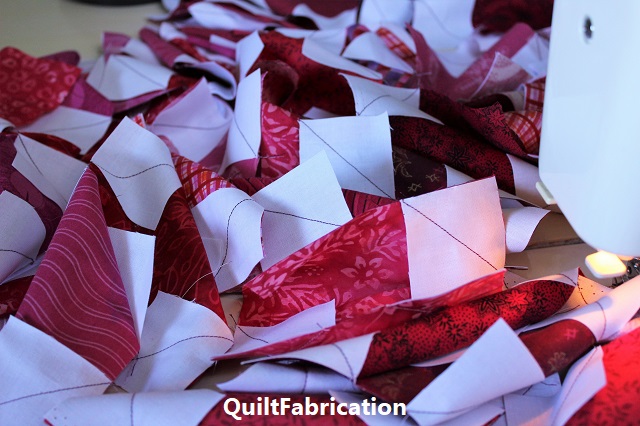
Now all of the excess fabric on the corners needs trimming. Since the units are all the same size with three sides to trim, stacking them makes for a super fast and efficient way to get the job done.

In the upper left of the picture are the stacks trimmed, the center shows the ruler lined up for a 1/4" seam allowance, and on the right are the units remaining - super fast!


stacked and trimmed quilt block units

A few hints for attempting this:

- Start with a new, sharp cutting blade. A dull one won't go through all the layers.

- Don't stack more than 4 units. This many units creates 8 layers of fabric, which is plenty to cut through.

- Stack the layers as accurately as possible.

- Use a ruler to make a 1/4" seam allowance, and press firmly. No shifting allowed!

- Seam allowances may vary from 1/8" to 3/8", depending upon how accurately the seam is sewn, and how well the units are stacked. It's ok to have this seam allowance variation.

Now that the chain piecing and the super fast stacked trimming is done, I'm moving onto block assembly, and ultimately the birth of a quilt top! More to come....

Happy Quilting!


Follow on Bloglovin

Monday, May 13, 2019

Batik Scrap Quilt

Yeah! I finally get to share the quilted batik UFO, from the pattern called Sunny Lanes.


Batik Scrap by QuiltFabrication

I was so inspired by the pantograph I put on a customer quilt, that I decided to stitch it on this one too. The only change was the choice of thread - Sunny Lanes is quilted with a bright yellow-orange, which looks quite lovely.


bright yellow orange thread on the Batik Scrap quilt

Isn't that panto just perfect on this quilt too?


pantograph quilting on Batik Scrap quilt

Why did I wait so long to finish this? My guess is that I was thinking of a custom quilt design, but couldn't come up with a design years ago. So the quilt hung in the closet, waiting. 

Waiting for that perfect idea! Forget the custom stuff - this panto looks great!


border fabric on Batik Scrap

This quilt is for my older son, who admired it when I first pieced it. The border batik is from yardage I purchased at a warehouse when in LA for one of his hockey tournaments. And I had plenty of that yardage to use on the back, plus binding.


Batik Scrap quilt backing and binding

That picture happens to show more of a pink area, though overall, the back is more orange, my son's favorite color.


orange batik quilt back

Just like Seafarer was meant for my younger son, this one is perfect for my older kid!


Batik Scrap quilt flat


I'm super happy with how this turned out, even if it did take years. I firmly believe that sometimes quilts just need to sit for awhile, waiting for the right moment to come to completion. Hopefully, that doesn't happen to the majority of them!

Happy Quilting!

Follow on Bloglovin

Friday, May 10, 2019

Seafarer Pattern Release!

Happy to announce the release of the Seafarer quilt pattern!

blue aqua ocean strip quilt with a red sailboat
 

When I made this quilt, I didn't think about writing a pattern, as this was a special quilt for my son as he embarked on his 2 year Peace Corps assignment. With so many requests for a pattern, I'm happy to announce the Seafarer pattern release today! 


Seafarer quilt pattern by QuiltFabrication

Since I was working from in-progress photos, I decided to make a baby quilt size to test the pattern. Isn't this just too cute???


Seafarer baby quilt by QuiltFabrication

The baby size version, which uses the same block size as the lap and twin/double size, measures a nice 39" x 39". And it's so soft - cotton batting, bits of flannel on the back, 


Seafarer backing by QuiltFabrication

and a nicely spaced wave design for the quilting.


Seafarer water quilting by QuiltFabrication

Looks and feels just like the bigger version!


Seafarer lap quilt by QuiltFabrication

Now a bit more about the pattern, available at Etsy

three sizes available - 
      baby (39" x 39"), 
      lap (57" x 82" - could be made shorter if desired),
      twin/double (75" x 88")

yardage amounts for all sizes given

number of blocks for all sizes given

template for sails

layout diagrams for each size

and, as always, full, detailed instructions for a confident beginner quilter to complete their own Seafarer quilt.

What's also great about this pattern is that more boats could be added for a whole fleet of sailboats!

If you've fallen in love with Seafarer, head over to Etsy - the pattern is available as an immediate downloadable PDF file. Send me a picture of your version of Seafarer - I'm sure others would love to see! 


Happy Quilting!


Follow on Bloglovin

Monday, May 6, 2019

Celebrate with Cake!

Our guild's quilt show was this past weekend, full of our members beautiful quilts, plus challenge quilts from those who desired to participate. Introducing 'Celebrate with Cake!', my creation for the guild's 
'How Do You Celebrate' challenge. 


Celebrate with Cake! by QuiltFabrication


Remember this fabric I wasn't too fond of?


SCVQA challenge fabric

Our little packages included not only these two challenging fabrics, but also the following rules: 
no larger than 24" x 24"
75% of the front is from the two fabrics
any additional fabrics ok, except white, black, or grey. 
Hmmm.

Celebrations - birthday's, weddings, baby showers, holidays, heck, even family BBQ's always involve cake. And having taken up cake decorating as a teenager, no occasion for a decorated cake passed me by. 

Thinking cake, then seeing the fabric, I was immediately struck by the tent roofs, and how one would make a perfect cake stand base. And lucky for me, one of those tent roofs was close enough to the center of the fabric along the bottom, making it the perfect spot to start building my cake.


cake base over a tent roof

With the addition of a few fused fabric scraps, ric rac, gold and silver lame, plus other trims, my tiered cake came together.


fused cake and decorations

Now for the quilting, which plays a big part in making this cake look real. I wanted this cake to puff up from the background, which meant trapunto work plus all of the quilting details on just the cake.


trapunto and detail cake quilting

With the details done, the extra batting got trimmed away,


trapunto on the cake


excess batting trimmed

and the whole top put on another piece of batting. Now to deal with that background!


echoed triangle quilting in the background

Quilting in earnest, I went for a dense, echoed triangle fill, to mute that background. Notice the dark maroon areas are even more densely quilted. The viewer gets to still feel the celebration with the circus tent background, without it overwhelming the cake. 

Check out how the cake puffs up away from the background - one could almost cut into it! And what cake isn't complete without roses? I found the perfect rose buttons - they look just like I would make them out of icing!


rose buttons on top of cake

Celebrate with Cake! looks like a delicious treat to me and another great challenge quilt to add to my collection!


Celebrate with Cake! guild challenge

I wish that I had pictures of the other entries to show - we have a lot of creative quilters in our guild. But, unfortunately, I could not attend due to an early birthday celebration for hubby - and yes, we had cake! And even if I did have pictures, I don't have permission from the creators to post them online. So, let's have cake instead!

Have a great day quilting!


Follow on Bloglovin