Tuesday, June 27, 2017

Patriotic Distraction

Fourth of July is coming up, and I'm in the mood for red, white, and blue! I've got my Patriotic Wave runner out,


Patriotic Wave table runner

and my Spangled Stars quilt.


And now I want a wall hanging! So, spent yesterday cutting up paper for patterns before actually cutting into fabric. Here's a sneak peek of how far I've gotten into the project,


which is looking good so far!

Well, I knew this would happen - the duck pinwheel quilt has taken a back seat, though it will get done soon as there is a recipient already for it. Just need to satisfy my patriotic craving first!

Happy Quilting!


Friday, June 23, 2017

A Smaller Big Spin

Got one done, despite the heat! Here's a smaller version of The Big Spin,


A Smaller Big Spin


 based on the pattern from the book Stash Lab.


Stash Lab book


The finished size for my small version is 36" x 36", and was possibly going to be given as a baby quilt. But hubby has an blank orange wall behind him at work, and wants to hang it there. Guess he can't resist that big pinwheel either - it's my favorite part!

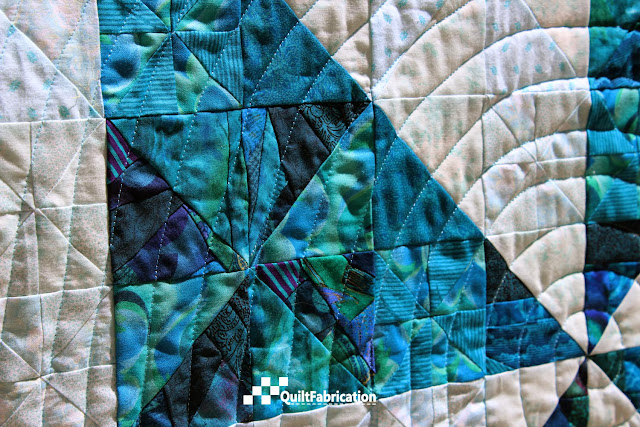
How about some closeups? The quilting follows that of the pattern, a big spiral, though I put little spirals over the smaller pinwheels.


A Smaller Big Spin quilting

I'm not that fond of those little ones, and in retrospect, probably should have just continued with the big one. But it's okay, they add some interest.


scrap fabric pinwheels from 'making fabric'

Take a close look at the pinwheels they spin over. Those, plus some of the pinwheels that make up the big one, are made from the 'making fabric' scrap project.


making fabric from scraps


There's the light ones seen above, and the dark ones in the picture below.


scrap fabric pinwheel

It's amazing how those scrap fabric pieces take on the identity of a printed fabric, a very useful illusion for scraps to make.


dark scrap fabric pinwheels

Being that this quilt is a small version, I couldn't exactly follow the layout in the pattern. That meant some designing on my part. Here's a look at three different settings before the final version.


three versions of pinwheel settings


For fun, can you guess how many pinwheels are in this quilt? And how many HST's? Leave separate guesses for each in the comments below. The person who is close without going over for each guesstimate will win a little prize! Please, one guess per question per person. Guessing game will finish next Wednesday night, June 28, 2017. Good luck!


So there you have it, a fun quilt that met lots of goals! Used 'made up fabric' in the pinwheels; marks another finish for aqua for RSC17; and another quilt from Stash Lab (affiliate link). Hip hip hooray!


Tuesday, June 20, 2017

Block 6 of the Growing Up QAL

I've done a pretty good job keeping up with Alida's Growing Up QAL, found over at Alida Tweloq Designs. This month's block is another great design!


block 6 Growing Up QAL

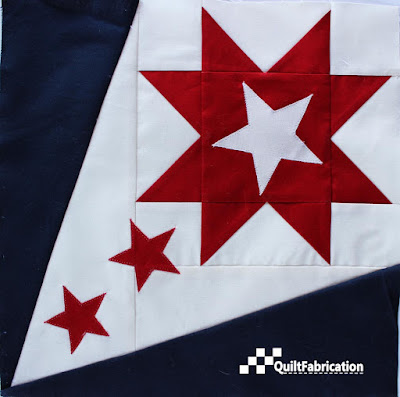
Isn't it a beauty? Can't you just see four of these making up an awesome center for a QOV quilt, either pointing in,


stars in

or my favorite, bursting out.


stars out

Give you any inspiration? Hop on over to her place if you're interested in making this block or any of the others she's created!

Now that this block is done, it's time to get back to the two scrap quilts. Hope to work on them today - it's just been incredibly hot here, and I'm trying not to turn on the iron. With no AC, the motivation to do anything is pretty low. Will keep you posted!

Have a great day quilting!


Friday, June 16, 2017

I Have a Pinwheel Problem

Good news: The Big Spin quilt top is done! The bad news: the quilting is delayed, so no more pictures till then.


The Big Spin background

And why is that? Because I got caught up in sewing pinwheels and making that aqua fabric disappear!

After many hours working on the background pinwheels for The Big SpinI ended up having a couple pinwheels leftover. Add those to the leftover pinwheels from Ducks in a Pond. There was no way I was going to pack these up for a later project - it's now or never! 

And there was that remaining small pile of aqua scraps. Granted, I've done well to use them up, as Perennial Pinwheels, Diamond Chevrons, Pixie Sticks, Fluctuate, and Ducks in the Pond are proof of my scrap busting. No way did I want to put that much back into the scrap bin. 


Then, while rummaging through a different scrap bag, 
I found two more small chunks of the cute duck fabric, a bit more than half snowballs. 


duck scrap fabric

So, after spending so much time making pinwheels, what's a few more right? And let's just put them on the design wall to see what we've got.


On the left is all of the duck fabric remains. The ten pinwheels next to that are all the same size, 6 1/2". Then moving to the right, the pinwheels get smaller, with the littlest one 5". Hmm, a bit of a size problem, but that's what happens when one works with scraps.

That's where I'm at. Somehow, some way, I will figure out how to put these pieces into a quilt. Believe me? I'm sure I'll rise to the challenge!

Happy Quilting!


Tuesday, June 13, 2017

Stash Lab Quilt 2 Update

After the detour of the Ducks in the Pond quilt, I'm back to working on the second project from the Stash Lab (affiliate link) book. The pattern on the cover of the book is called The Big Spin, and this is a quarter of the big pinwheel so far:


big pinwheel for The Big Spin

and these piles are the other three quarters.


three quarters of big pinwheel

Notice in that big pinwheel quarter, the dark squares from making fabric 


making fabric squares

make a pinwheel, though they aren't set off very well. 


dark area of big pinwheel

A bit lighter value accompanying fabric would have worked a bit better. Oh well.

And I was hoping to use the lights from making fabric in the light part of the big pinwheel, 


light area of big pinwheel

but opted to cut up yardage instead. But that's a good thing! Those scrap squares will still find a home somewhere in this quilt, just not sure where. First I'll tackle the big pinwheel, and work from there.

Happy Quilting!


Monday, June 12, 2017

Choosing a Die Cutting Machine

Last week, a post with the snowflake pieces cut by a machine generated a conversation with another blogger about die cutting machines. So I thought it high time for a discussion about what to consider if you are wanting to purchase a machine.

The quilting world has certainly been turned on it's head with these time saving fabric cutting machines, also known as die cutters. You know, those machines that easily cut strips and shapes, making our quilting life easier. There are those that are manual, such as Accuquilt 


Accuquilt
Accuquilt
 and Sizzix,


Sizzix
Sizzix

meaning they require shaped metal dies to do the cutting.

There are also machines that are digital, like my Silhouette Cameo, 


Silhouette Cameo
Silhouette Cameo

or the Brother Scan n Cut
Brother Scan n Cut
Brother Scan n Cut

Both of these machines require software to design the cuts to make.

Now this discussion is not meant as an endorsement for any one machine, nor is it a detailed discussion of the features of each. Links are provided for each machine pictured, so that features, costs and the fine details can be explored further. But today's discussion is about choosing between a manual or digital die cutting machine, which should be based on what your quilting needs are. 

Manual die cutting machines
These machines, such as Accuquilt and Sizzix, are wonderful if your style of quilting features a lot of the same shape, such as strips, squares, triangles, etc. These machines (whether hand crank or motorized) make quick work of cutting numerous pieces, making the machines especially handy for quilt groups, business owners making kits, or those with hand and/or shoulder issues who have difficulties with rotary cutters. 

The downside? The dies are limited to the variety and size set by the manufacturer, and can be expensive. And not all dies work in all machines - size and manufacturer determine which dies work with which machine.

Digital die cutting machines
These machines, made by Silhouette and Brother (and others), use software to create designs that are sent to the cutter for cutting. The software, which is usually easy to learn, allows for unlimited creativity in designs, from the most simple and basic to the elaborate and intricate - the sky's the limit!

The downsides here? Large quantities of a shape are time consuming to cut, as the system uses a 12" x 12" sticky mat to hold the fabric, paper or vinyl. Certainly can't stack layers of fabric as for the manual machines. And eventually, blades and mats need replacement after numerous cuttings.

Here's a handy chart, based on my observations of both types systems:


 Best Used for:


   Extra Costs


    Limitations


Manual

Large numbers of strips, squares, triangles, etc

Cutting dies

Limited to the manufacturers variety and size of dies


Digital

Cutting your own designed shapes – unlimited possibilities

Mats and blades


Time consuming to cut large numbers of pieces.

Though manual die cutting machines have certainly revolutionized quilting for many, I chose to purchase the Silhouette Cameo digital die cutter.


Silhouette Cameo

My reasons? I wanted a machine that gave me the ability to cut my own designs, such as the snowflake parts above. And because I don't make quilts with predetermined sized strips, squares, triangles, etc, the manual machines with dies just wasn't the right fit.

So, if you're considering investing in a die cutting machine, think about your style of quilting, and how your going to use the machine, along with the cost and features. Whichever you choose, enjoy your machine and the new directions it takes your quilting!

Happy Quilting!


Friday, June 9, 2017

Ducks in the Pond

Here it is - the duck quilt!


Ducks in the Pond

And yes, the name has been changed to Ducks in the Pond. Why? Because as the quilt design evolved, the ducks were all around, and not in a row. I think the new name fits quite well! I'll save the other for another time.

I'm very happy with how this one turned out - the fabric is fun, and the design interesting with the blue and yellow. And can't forget the fun pinwheels too! What started out as leftovers made a beautiful quilt!

Let's look at some closeups, shall we? Quilting is kept simple, to add to the overall design, and to keep the quilt soft.


Ducks in the Pond closeup 1

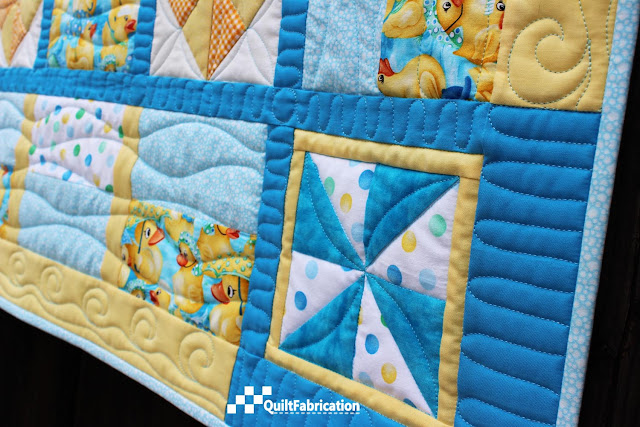
There are waves breaking on the shore (those at the edge), and soft waves for the ducks to swim in.


Ducks in the Pond closeup 2

Ripples in the pond are in the sashing. Notice the circle at the sashing intersection. That was my solution to ripples meeting from different directions - the ripples just spin off the circles and continue along. And bigger ripples occur in the border corners.


Ducks in the Pond closeup 3

Originally, I thought I'd quilt pebbles or at least stipple around the pinwheels. But after adding the arcs, I just didn't see the need for the dense quilting.

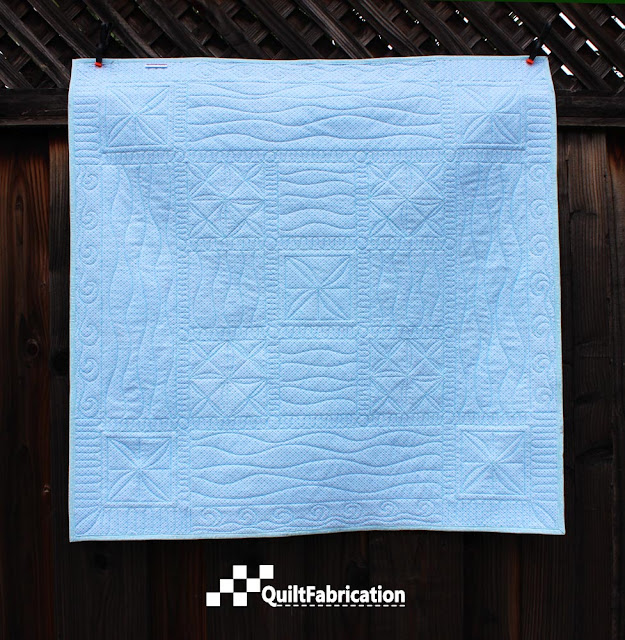
And my trademark flannel backing looks just as pretty with all the quilting -


Ducks in the Pond back

keeping it nice and soft!


Ducks in the Pond back closeup 1


Ducks in the Pond back closeup 2

This one is going to be really hard to part with - hubby is saving it for someone special, though I'm not ready to let go. And I want to thank everyone for the very sweet comments on this quilt - you are all such a wonderful, supportive group!

Wishing everyone a great weekend quilting!

Monday, June 5, 2017

Ducks in a Row?

Oh so tempted to call the second baby quilt "Ducks in a Row"! This is the progress as of Friday.


duck quilt progress

Not quite sure where this quilt is going, but that name popped in my head as soon as I saw the picture. Wish that happened more often - naming quilts is not an easy task for me.

Anyway, notice the duck fabric changes orientation, so that there is no definite top or bottom to this quilt. Doesn't matter which way it's viewed - it will look the same.

May try to squeeze out some more pinwheels out of the pile, 


duck scraps


as they really add to the fun of this quilt. There's certainly enough triangles to use up!

Alright, got to get back to it - having too much fun!
Happy Quilting!


Friday, June 2, 2017

The Dependable D9P

Ever happily cruise down the highway when someone yells 'pullover!', totally throwing a wrench in your life? That's what happened to my quilting schedule, once hubby announced he needed two boy quilts. Though I have multiple projects going right now, I really had to carve out some time to get them done. So here's the yesterday's project, Rocket Ship.


Rocket Ship disappearing 9 patch quilt

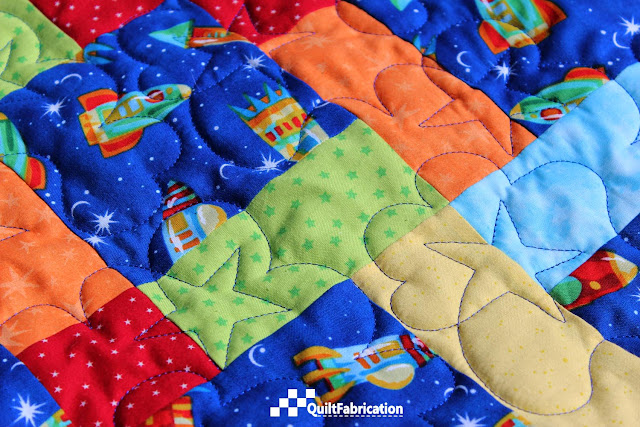
Named for the rocket ship focus fabric,


Rocket Ship closeup 2

it's combined with other fabrics that have stars. And what's more fitting than a star panto in royal Glide thread for the quilting?


Rocket Ship closeup 1

What started out as 5" squares for these 9-patch blocks,


rocket ship 9 patch block

turned into these 13 1/4" disappearing 9-Patch blocks.

disappearing 9 patch block


Final quilt size is 38 1/2" square - a great baby quilt size! It's a wonderful, dependable quilt pattern, especially for a quick quilt. Check out the Disappearing 9-patch tutorial, or the Double Disappearing 9-patch tutorial for instructions on making one.
As for the back of this quilt, it's a multi-colored polka dot print, 

Rocket Ship back

with the added interest of two red corners on the binding.


red corner binding

That's what's called a 'creative solution' when there's not enough fabric to bind the whole quilt!

As for the second quilt, it's going to be from these scraps that were with the small amount of that cute duck fabric,


aqua duck fabric scraps

found in a separate bag with the aqua scraps. Only have the aqua pinwheels for the Stash Lab project left to go, then I'll declare aqua a finish. Phew!

Have a wonderful weekend quilting!