I'm really big on bindings that match the piecing. And Light at the End of the Spiral was no exception - another binding match adventure, this time with pieced angles.
So here's a tutorial on Matching Angled Binding, specifically to match angled piecing.
Starting with enough length of binding strips, both in the main color (green) and accent color (purple), they're joined as usual.
A quick double check shows that the sewn angle fits one of the piecing angles, and will be the start point.
After matching the seams, a few stitches are taken to make sure it's perfect. It's a lot easier to rip out a few stitches than inches, in case it's not perfect.
The match is good, and the rest of the accent binding is pinned to the top until the next match point, as an estimate of length.
To keep angle confusion down, a pin is placed on the side of the binding that will show on the front of the quilt, and placed such that it points in the same direction as the pieced angle. That's the red pin below.
The binding is laid on the quilt again, with a pin placed at the point of matching, allowing for the seam.
The pink pin marks where the stitching line is for matching, and the red pin marks the direction of the seam join.
Opening up the binding, a 45 degree line is marked, to match the piecing angle. The accent binding is joined to the main color binding along this mark, but not trimmed.
Laying the binding flat again, a few stitches are sewn at the match point to check accuracy and binding length.
The match is good, and the binding length not slack or taught. If the binding length were off, an adjustment can be made in the binding join seam. Once the binding fits, the test stitches are removed so the join seam can be trimmed and pressed.
Once again, the seams are matched up, and a few stitches taken. When it's perfect, the binding can be completely stitched down.
Since my start point is the first angled match point, the
binding was sewn in small sections, starting a 4-6" back and stitching forward to the previous sewing. This eliminated guessing the binding length, or having an inaccurate binding length.
After turning the corner, a point was reached that the two ends could be joined. For the final finish, this one got a hand sewn treatment.
Matching binding to piecing takes some patience, which is helped by taking a few stitches for matching, but the results are worth it!
Have a great day quilting!
Yesterday I showed off one of my HST Challenge quilts, Light at the End of the Spiral. Today, it's a short tut on quilting those straight lines.
What's the magic? Blue painters tape!
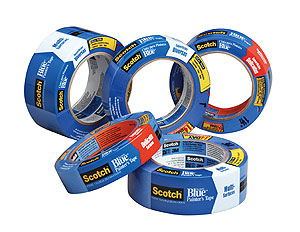 Scotch Blue Painters Tape
Personally, I use .70" and .94", but it comes in several other sizes to suite any need. For this project, I used .70".
Scotch Blue Painters Tape
Personally, I use .70" and .94", but it comes in several other sizes to suite any need. For this project, I used .70".
On this little quilt, the purple spirals are 1" wide, which I wanted to repeat in the quilting. The .70" tape, in addition to the distance of the ruler foot outside edge from the needle, made for an almost perfect 1".
On a domestic machine, the walking foot should be used, with the distance from the foot edge to the needle taken into account when choosing the appropriate tape size.
Setting up the tape is easy. A 12" to 18" length is best, otherwise it can get bent when applying, and tangled when removed. The tape is pressed down next to the straight edge to follow, in this case, the spiral edge.
On the longarm, place the ruler on the other side of the tape, and quilt the line with the foot just skimming the tape edge. If using a domestic machine, use the edge of the machine's walking foot along the side of the tape as the guide.
Reposition the tape for the next line, using the previously stitched line as a guide. The tape can be reused around six times before it looses it's stickiness.
Continue stitching, and repositioning until all lines are quilted.
Such an easy way to achieve no mark straight lines.
What else can be done with tape?
What an incredibly corny, common, and mundane title. Light at the End of the Spiral.
Thinking that this really wasn't a thing, I Googled the term, and was stunned at how many spiral images with center lights there were. Ok, so I'm not crazy after all! Maybe I just don't get out much.
But really, this is an appropriate title, as I had been working on some blocks with a lot of black in them that were really dragging me down. Funneling that dark energy into this, then stirring it around to come to lightness and the feeling that it has all worked. I felt the quilting gods smiling down upon me after finding the perfect fabric for the funnel, then a beautiful batik for the back,
and designing a simple, complimentary quilting design in minutes. One of those Zen moments of being totally involved in the experience.
Made from 2" unfinished HST's, this finishes at 23 1/2" x 25", here are a few closeups.
See that squiggly line in the second spiral on the right? At first I thought it was a piece of thread, but no, it's in the print. Funny what the eye picks up on!
Straight line quilting, 1" apart in the green, 1/4" apart in the purple.
Now I know this isn't made with the prettiest or trending fabrics, or that the design may need more tweaking, but what's important is my experience in making it. Not only did I succeed in my HST Challenge, using up fabric scraps from Roundabout that would have been tossed, but designing something with meaning, at least for me. Now to find a place to hang it in the studio. And by the way, Roundabout was given to a dear friend who absolutely loves it.
Check out the tutorials for no mark straight lines and matching angled binding that were used on this quilt.
HST project #2 is still in the works, waiting for it's 'moment'.
The Notan inspired piece is sewn together, but needs some playing with as I have no more background fabric. But you know me, I'll figure something out.
Here's to your Zen moment! Have a great day quilting!

My Favorite Patterns
Lone Starburst, the second project started at Road2CA with Kimberly Einmo, is a wrap!
Made with a Miss Kate jelly roll by Bonnie and Camille for Moda and Kona Snow yardage, this quilt was designed to be around 70"x 70", but I wanted it longer. What to do? Well, I still had strip sets, so I continued to cut those at the same angle, and added triangles to make a rectangular unit. Put them all together, and the top and bottom borders are born!
Now, she measures in at 62" x 80", a nice size.
Stitched with lovely cream Glide thread, the quilting on this is another panto, Chinook, which looks fabulous!
More pictures of the field of stars.
And the center star, which has pieces from the corner stars, rotated around for the best effect.
The orientation of the red and blue center is opposite of the red and blue bordering stars, providing balance.
And a few more star closeups.
Can't forget the back! Searching through 75% of the stash for appropriate colors and not-too-dated prints, this pieced back works quite nicely.
Fortunately, there were eight strips left from the jelly roll, enough for the binding, with one strip left. Yeah!
The Lone Starburst quilt pattern has several variations, and piecing was a snap! Give it a try sometime!
Happy Quilting!
Today, it's about removing wrinkles. Everyone, at some point in their life, has to deal with them. I wish there was a miracle cure, but alas, no.
The best solution I've found is a damp towel and 5-10 minutes in the dryer.
Huh? So sorry but this isn't about how to remove those wrinkles that mar the beauty of our faces. Instead, it's softening up those hard fold lines in batting!
Today, I'm using a 100% cotton packaged batt that has sat on a shelf with other items piled on top of it. You get the idea of how heavy the fold creases are. Silly me, didn't take a picture!
So, off to the dryer, with a damp hand sized towel thrown in. Set on high heat, the two tumbled for 5-10 minutes. Upon removal, a warm, smooth, soft batt filled my arms! Immediately spreading the batt out to avoid setting in cooling wrinkles, she now looks like this:
Faint creases are all that remain of the folds.
Now, I have to admit, I do this same technique on my husband's shirts. Usually, I leave them in too long and they get all wrinkled. Throw them back in with a damp towel for a few minutes, and I've just saved myself precious ironing time. Really, who likes to iron shirts??? (Oh, wait, my mother loves to iron sheets! Yes, sheets.)
So the next time you've got a wrinkled batt, give this a try - I'm sure you'll be thrilled with the results!
Happy Quilting!
Perfect Pinless Pinwheels is done, and she's soft and pretty!
After so much angst about how to quilt her, I decided on a pretty panto called Spring Vine. An open design of flowers and leaves,
plus 80/20 batting, gave the quilt the desired softness and drape. On the front, Glide gold, lightly bringing out the yellow in the floral print, and on the back, Glide lilac to match the backing.
This quilt was started in a class at Road 2 California in January, and finally finished up.
A lovely pattern designed by Kimberly Einmo, it looks like a beautiful garden!
A few more closeups.
And the pretty soft purple backing has a bit of leftover parts from the front.
Happy with how this turned out - a simple design, but a great looking quilt!


