Updated 6-2020
So excited to share my DIY sewing table! Using an Ikea Ingo table, a few extra nuts, bolts, and wood plus the necessary tools, the instructions below made it an inexpensive and easy way to have a sewing machine seated in a table, making the bed flush with the table surface - every quilters dream!
The original source for the sewing table construction was from a site called From Marta With Love, but with added tweaks and additions along the way. Follow along for instructions to make an inexpensive sewing table, complete with knee lift!
Supplies
- Ikea Ingo table or other table with edge support rails under the top
- 3/4" plywood support board, 2" wider and longer than the sewing machine
- a 2x2, at least 56" long
- jigsaw
- miter or hand saw
- jig kit
- medium grit sandpaper
- drill with a 1/4" bit and a countersink bit
- clamps
- (4) 1 1/4" wood screws
- (4) 4" long 1/4" diameter bolts with threads at least halfway up the bolt
- (8) washers and nuts to fit the bolts
- (4) bolt caps
Placement and Cutting
Assemble the Ikea Ingo table, but don't fully attach the table top.
Measure in from the table top edge to the support rails at both the front and the right side. Add the width of the support rails to this measurement. Transfer these measurements to the front right corner of the table top, again from the edge, with several small marks. Also mark where the bracket attaches. These marks will help in machine placement, preventing rail interference.
Place the sewing machine on the table top, avoiding the rail marks. There are no hard and fast rules for sewing machine placement - it's more of a personal preference of what's a comfortable sewing distance. For my table, I marked my Janome 6500 footprint at 3" from the front and 3 5/8" from the right side, leaving 24 3/4" on the left. I want as much room as possible on my left!
Note: If you do slide the machine far to the right, the added right support rail underneath will have to be modified as it will probably hit the corner bracket. Do this only if you are comfortable making adjustments to that rail. We made the rail shorter (see the open space in the corner above), then added a third support rail along the back of the opening, putting two bolts there, and only one on the right side. All total, we used five bolts to support the machine.
Once positioning is determined, trace around the footprint of the sewing machine, making sure to leave enough space to accommodate the cords. My 'opening' is approximately 1/4" bigger than my machine, which also helps getting the machine in and out.
Remove the table top from the legs, placing it on a supporting surface to cut the hole. Drill a large starter hole inside the tracing, near an edge for easy insertion of the jigsaw blade. Then cut, using a wood blade, carefully following the drawn line and going slowly around any curves.
After cutting, check the machine's fit in the hole and make any adjustments. Sand the edges, and use wood filler if necessary on any mistakes or wood chips. Reassemble the table, but don't tighten anything yet.
Supports
Flip the table onto it's top, with legs in the air. Measure between the front and back rails - for the Ikea Ingo table, it should be 26". Cut the 2x2 at this measurement for 2 pieces.
On the back of the table top, measure 2" over from each short side of the hole, marking a line from the front rail to the back rail. These are guides for attaching the 2x2x26 pieces.
Using a jig kit, drill 4 pocket holes (one on each end of each 2x2x26) for the 1 1/4" wood screws.
Place the outer edge of these pieces on the drawn lines (they are placed between the hole and the line) and screw in place to the rails.
Mark the bolt positions on the new support rails, approximately 1" down from each long hole edge, avoiding the wood screws on the ends. (Refer to drawing above).
Remove the table top from the table frame, and legs still in the air, drill 1/4" holes all the way through the 2x2's. Flip the table frame over, and countersink the tops of the holes. Test that the bolts fit in the holes, and that they don't stick out on top.
Remove the bolts, and turn the table frame over again. Place the 3/4" plywood support board under the frame, centering it within the hole/bolt/support framework, with equal amounts of overhang. Using the drilled holes as a guide, drill small pilot holes into the support board - don't drill all the way through! Remove the support board and continue drilling the holes through the board.
Assembly
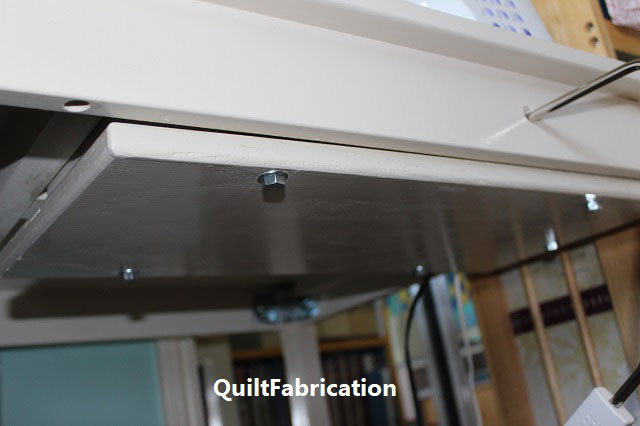
Place the table on it's legs, and put the bolts through the holes, checking again that they are countersunk enough. Place the table top on top, and reattach the top to the frame per the Ikea instructions. The bolts should be hanging through the support rails.
Attach the 3/4" plywood support board underneath, using the following hardware sequence:
nut -- washer -- SHELF -- washer -- nut
Tighten both nuts, and use them to adjust for level of the support board after inserting the sewing machine. Tighten/loosen until the machine bed is level with the table. When all's good, add the bolt covers to lessen injuries. Bring the cords up through the hole, attach, and done!
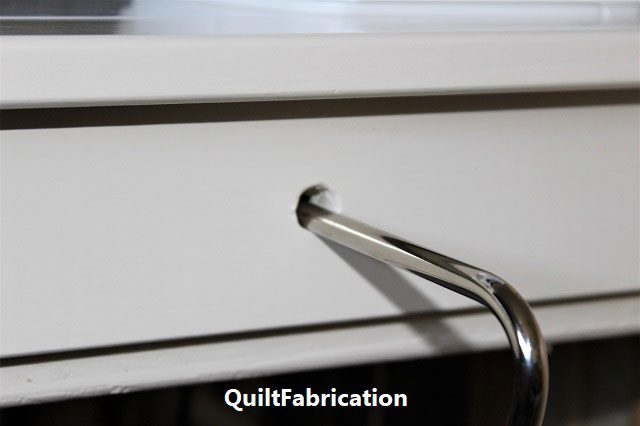
To make this extra special, drill a hole for a knee lift.
Unfortunately, I can't tell the exact spot for that, but I recommend measuring from different areas on both the machine and the table to determine where the knee lift hole is. Then drill a 5/8" hole, bigger than needed, in the front support rail to insert the knee lift bar.
And for added table stability, since sewing machines produce a lot of vibration, use a few more 2x2's as support bars between the legs. Check them out in the picture below.
So with a bit of extra wood and some time, I've now got myself a sewing table with a set in machine, for under $125. Awesome!
Happy Quilting!