Monday, March 14, 2022

Pi Day!

Happy Pi Day! I'm celebrating 3.14 with some delicious Lattice Fruit Pie Trivets and a free tutorial to make your own!

fruit fabric plus strips and ric rac make a pie

Don't these look delicious? I can't decide which is my favorite: blueberry or the mixed fruit of strawberries, raspberries, blueberries, and blackberries. Either makes for some mouth-watering trivets to pretty up the table!

Ready to make some? Then grab the following ingredients and let's make a pie!

Lattice Fruit Pie Trivet Ingredients

Makes 2 pie trivets

  • 1/4 yard fruit themed cotton prints
  • 1/4 yard insul-fleece (the one with the metal sandwiched between fleece)
  • 1/4 yard all cotton batting
  • 1/4 yard backing (I used beige, a 'crust' color)
  • 1 1/2 yard (or 1 pkg) medium or .5 inch beige ric rac
  • 1 1/2 yard (or 1 pkg) 5/8" wide beige double fold bias tape
  • 1 new, sharp, size 14 needle 


Step 1 - Cut circles

Use a circle cutting tool or an 8" plate or bowl as a template to cut the following number of circles:

2 (two) from beige backing, and insul-fleece 

4 (four) from cotton batting

1 (one) from each of the fruit prints, for a total of 2 (two) 

cutting circles with a half circle template


Step 2 - Layer the pie

Stack the cut circles in the following order to make two pies:

beige backing, cotton, insul-fleece, cotton, fruit print

BTW, I placed the exposed metal of the insul-fleece up to (hopefully) better reflect the heat back to the dish and not onto my table

batting and a fruit print in circles


Step 3 - Baste

To keep layers from shifting, use a long stitch length to baste circles together, with a line parallel on two sides, as shown next to white lines. Baste a group of 2 circles and a group of 3 circles, 
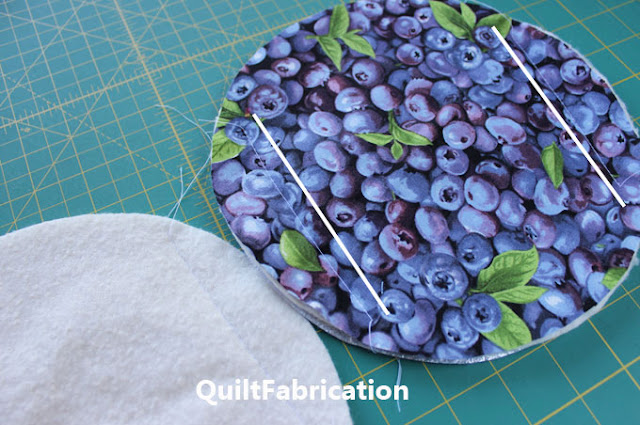
basting circles together


then baste all 5 together. Finish the basting by stitching close to the circle edge.

Remove straight line basting stitches before proceeding to Step 4.


Step 4 - Add lattice

Cut bias tape lattice strips for the center and each side, 6 (six) pieces total. Stitch in place using a zig zag stitch and thread to match the 'crust'. Trim lattice ends even with circle edge when done.

Easy lattice:

Add bias tape lattice strips in the center and on each side. Add the remaining three lattice strips perpendicular to the first set.

applying bias tape to make a lattice pie trivet

 
Woven lattice

If weaving the lattice strips, cut all six bias strip pieces, weaving them over and under each other. Start stitching with the 'under' center piece, keeping pieces that go on top folded back out of the way. Continue stitching any 'under' strips to achieve the woven effect.

weaving lattice on a pie trivet


Step 5 - Apply bias binding

Pin bias binding to the edge, overlapping and folding back final end for a nice finish. If necessary, use a bit of glue to hold binding in place.


Stitch binding with trivet backside up (fruit print face down) for even zig zag stitches along binding edge. Do not worry about catching the binding on the front of the trivet - it gets covered in the next step.


Step 6 - Apply ric rac to front

Using a longer straight stitch, around 3.5-4, stitch ric rac to the front, covering the inside binding edge and ric rac extending slightly over trivet edge. Fold back the meeting ends for a clean finish.


Step 7 - Enjoy some Pie!

Happy Quilting!


Follow on Bloglovin

My Favorite Patterns

Friday, March 11, 2022

EQ8 - Learning from the Copy/Paste Tutorial

I love Electric Quilt design software, and have used it to design numerous quilts ever since EQ6 debuted. It's a terrific software, and I'm sure I only use a fraction of it!

I'm one of those who always opens the educational emails from the Electric Quilt Company - there's usually something new to learn! A most recent email contained a very useful tutorial addressing copying and paste within the EQ8 software.

Copy and paste seems simple enough. Highlight what you want to copy, hit Control + C or Command + C to copy, then Control + V or Command + V to paste. That works fine when working within a block.

But where I have gotten hung up is copying an item in one block, then trying to paste it in a completely different block. That's my tricky part! 

Over the years, I developed a workaround to accomplish pasting into another, new block. I'd start the new block in the same block format, drawing in a random line or closed element for deletion later, just to get the new block to saveI wish I could be more specific about why I do it this way, but this workaround saves me lots of time and frustration. 

Now, I don't know if my workaround is the way to paste into a new block per EQ, but it works for me. The tutorial doesn't mention pasting into new blocks - it pastes into blocks already drawn and provides a VERY handy chart showing copy and paste functions between the different block formats (easy draw, applique, motif, etc). Take a look at this:


an easy, at-a-glance guidance for copying and pasting between different block formats. I also didn't know about converting the pasted elements to guides. That sure beats trying to get those points to snap to the drawing!

I highly recommend viewing EQ's full Copying Elements of Blocks post, where the chart can be enlarged, and detailed instructions for Easy Draw, Applique, and PolyDraw formats are shown. Electric Quilt does a terrific job of explaining their software that it would be silly of me to try to do it here. 

With the use of this chart from EQ's Copy/Paste tutorial, using the functions of EQ just got a bit clearer - I hope they are for you too!

Happy Quilting!


Follow on Bloglovin

Enjoyed this post? Don't miss out - get posts delivered directly to your inbox with follow.it.  

           
GET POSTS BY EMAIL


My Favorite Patterns

Wednesday, March 9, 2022

Midweek Makers 322

Welcome to Midweek Makers! Let's do some sharing!


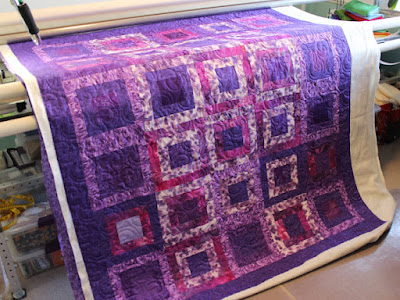
My share is 3 large client quilts I've quilted over the last week. Robyn brought me her Purple Passion,


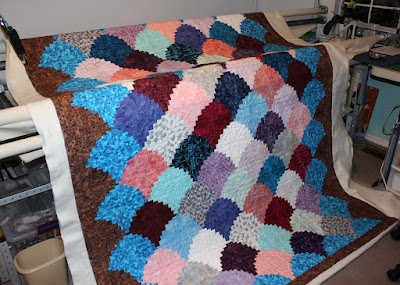
Mitsuko brought me a perfectly pieced Clamshell quilt, 


and Karen brought me an older top, hand-pieced by her great-grandmother.


All of these have certainly kept my machine humming!

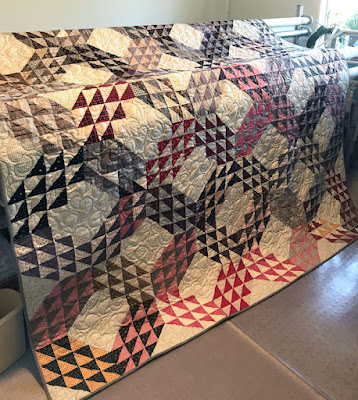
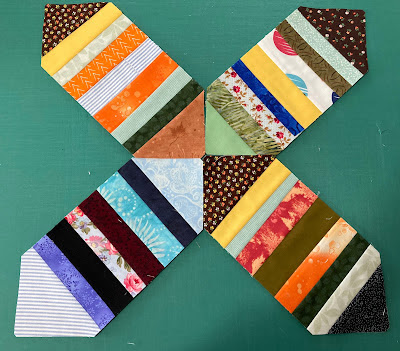
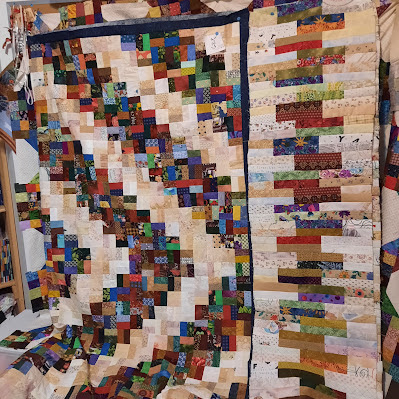
As for this week, I'm featuring three quilt projects in which the colors play well together. Check out the Indian Hatchet blocks at Gretchen's Little Corner,


a quilt full of scrappy goodness at A Scrappy Quilter,


and this Hunter's Star project at Quilts Etc. Love those colors together!


And now it's your turn to share!
  • please link directly to your post not your homepage
  • please link a quilt related item
  • visit with the other guests and leave some comment love
Have fun!


Follow on Bloglovin

You are invited to the Inlinkz link party!

Click here to enter