Friday, June 29, 2018

Salute the Fourth of July

The Fourth of July is just around the corner! I'm decorating with my newest runner pattern, Salute, available at Etsy.


Salute Fourth of July runner by QuiltFabrication

Made with my favorite colors - red, white, and blue - this one sews up quickly and easily. Simple paper piecing keeps those stripes in line, making for perfect blocks. Add a few applique stars, and ta-dah! The Salute runner for the Fourth of July is born!


Salute Fourth of July table runner by QuiltFabrication

Measuring approximately 15" x 51", this one adorns the counter by my dining room table, surrounded by other patriotic decorations, including the flag outside. 


Salute runner for the Fourth of July

This way, it doesn't compete with the Patriotic Wave.

Patriotic Wave runner by QuiltFabrication

How about some closeups on Salute? The blue background has an echoed triangle fill.


Echoed triangle fill on Salute


And because the stripes are so bold, there's no need to go overboard with the quilting there. Stitch-in-the-ditch and a line down the middle complete the runner.


Salute stripes quilting

The stars are the same way - simple lines from point to center.


Salute runner star quilting

The Salute pattern is now available on Etsy. All templates are included: two for the stars, and full size paper piecing patterns for the blocks. Plus, I include an introduction to paper piecing and fusible applique, and tips on seam matching, techniques a confident beginner will be able to manage.

Have a wonderful Fourth of July!


Follow on Bloglovin

My Favorite Patterns

Friday, June 22, 2018

Sunflowers Runner Pattern Release!

It's here - the much anticipated Sunflowers Runner pattern release!


Sunflowers Runner pattern by QuiltFabrication


I don't know about you, but I'm just in love with these sunflowers for the summer! 


Sunflowers by QuiltFabrication


And oh, the ladybugs too - how cute are they???


ladybugs by QuiltFabrication

The Sunflowers Runner pattern has something for everyone - piecing, Dresden plates, and applique - techniques a very confident beginner or intermediate quilter can handle. Of course, my detailed instructions are there to guide you every step of the way!


Sunflowers runner by QuiltFabrication pattern snippet
                                     Sunflowers pattern snippet


Sunflowers Runner full view by QuiltFabrication

Finishing at 41 1/2" x 16", with simple stippling and straight line quilting, the flowers and ladybugs just shine!

Sunflowers Runner closeup by QuiltFabrication

The Sunflowers Runner pattern is offered at Etsy
With that, may your summer be sunny and bright, and full of sunflowers!

Happy Quilting!

Follow on Bloglovin
 

Monday, June 18, 2018

Regatta Quilt

Here it is - the Regatta quilt from Kelly Young's Stash Statement (affiliate link), my June Book of the Month!

Regatta Quilt by QuiltFabrication


Using Kelly's system of block creation with scraps, this quilt was a great way to use up all of my blues. Here's Kelly's version that I saw at Quilt Market:


Kelly Young's Regatta quilt

and here's my version, a bit bluer and bigger.


Regatta Quilt full on

Of course, what sailboat quilt wouldn't be complete without some water in the background? And it was ready to sail away with all the wind as I was taking pictures!


Regatta Quilt water side

My Regatta is three rows longer than the one in the book, so it fits on a twin size bed. No more sails were added - they were just shifted around a bit to create my version.

And about those sails. Each one is quilted differently with straight lines - no two match. Here's a sample of some:


Regatta sails 1


Regatta sails 2


Regatta sails 3


Regatta sails 4

Notice all that wave quilting? Makes me want to spend a lazy day on a sailboat!

Almost forgot the back - it has sailboats too!


Regatta quilt backing


Be sure to check out the other Regatta quilt made by Debbie at A Quilter's Table. And maybe you want to see all the scrap quilts form this book? Kelly's Stash Statement (affiliate link) has been on a blog tour since April. 


Hope you become inspired to use your scraps!

Happy Quilting!


Follow on Bloglovin

Monday, June 4, 2018

Machine Stitched Binding

A new tutorial today - how to apply binding completely by machine, giving you more time to make quilts!


Wait! There's a knock at the door - OMG! It's the quilt police!
They could easily lock me away for 20 years if they find out about this!

I don't know about you, but I don't have the time or inclination to hand stitch binding anymore. I switched completely to binding by machine over 5 years ago, and haven't looked back. Check out the stitching line below.


Machine stitched binding on the back

So, how do I get this even, consistent finish? The secret is, well, glue. Yes, glue. Throw me in jail and toss the key!

It's taken me these five years to finally admit that I use glue on a quilt. And frankly, I've reached a point where I don't care what the quilt police say. It gives me the results I want, and because it's school glue, it washes out. When that quilt needs finishing, this gets the job done.

Come follow along, so that you too can have a beautiful, quick finish on your quilt!


Apply binding

We all know how to apply binding to the front, right? For useful hints, see Reducing Bulky Corners and Joining Binding in 3 Easy Steps. Those will bring you up to speed.
Be sure to give the front seam of the binding a good press for a crisp fold. 


Press binding on the front

This makes for maximum fabric to turn over the edge, and it makes stitch-in-the-ditch easier.


Backside view of binding stitched to the front

Apply Glue

On the backside, apply a thin line of glue within the seam line.


Apply glue on the backside within the seam allowance


In the picture, the bottom part of the glue line is too much. The top part after the bulge is more appropriate.

Try to achieve a line that has enough glue to hold the binding, but not so much that it floods through the fabric, like below.


Too much glue soaks through after pressing


Turn Binding and Press

Work in sections, applying glue, then turning the binding over, PAST THE STITCH LINE, and PRESS WITH AN IRON.


Fold binding to the back to cover the seam line

Keep the line covered, and the binding even along the edge.


Glued and pressed binding ready for stitching

This edge is pressed, and ready for stitching.


Corners

Apply glue to the corner, as below, and glue to the next side of binding.


Apply glue to the corner and next edge


Neatly miter the corner, folding the edge to match the opposing edge.


Fold binding over forming a mitered corner

Give it a good press, and continue glue/pressing the remaining side.


Glued corner on the backside


Stitching

On the front, stitch-in-the-ditch with thread to match the front, and bobbin thread to match the binding.


Stitch in the ditch on the front

Trust yourself on this - the glue should have done the work for you! And if you pay attention, you can hear that the needle is in the binding in the back, as there are at 4 layers of fabric plus batting to go through. When it goes off the binding in the back, the sound changes, as now there are only 2 layers of fabric.

If all goes well, the back should look like this:


Stitch line on the back

And if it doesn't go well, it may look like this:


Stitching missed the binding

Don't despair! It's an easy fix! Either the binding doesn't cover the stitch line, which will need pulling over more to cover, OR the stitching really isn't in the ditch. 
Mine was the second case.


Stitching not in the ditch

After applying a touch of glue, go back and restitch the area, getting closer to the seam. Now the back looks like this:


Binding now stitched

Binding attached!!


Machine stitching binding on the back


And the front:


Machine stitching binding on the front

I hope you try this on your next quilt, freeing up valuable time. And if there's a knock at the door, don't answer it!!!

Happy Quilting Everyone!


Follow on Bloglovin

My Favorite Patterns

Friday, June 1, 2018

June 2018 Book of the Month

Wow! Here we are in June already - this year is flying by! And that means there's a new Book of the Month feature!

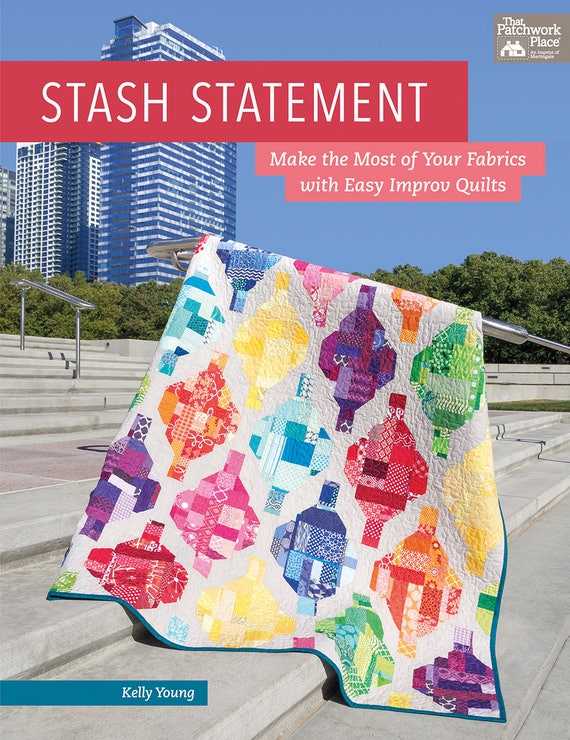
                                                       Stash Statement by Kelly Young

This month, it's all about using those scraps in  Stash Statement (affiliate link) by Kelly Young of My Quilt Infatuation.

I had the pleasure of seeing several quilts from this book, up close and personal at Quilt Market, Portland. It was especially awesome to see the original of the quilt I'm making, Regatta.


I've shown you progress over the last few weeks, with this being my version of the quilt, as the size given in the book.


Measuring 60" x 60", I asked Kelly if I could make it bigger - she said sure, it's your quilt! So now I'm in the process of making more blocks to add 2 or 3 more rows, bringing the size to either 60" x 72" or 60" x 78".

Be sure to take a look at all of these quilts - Kelly has a great system for using fabric scraps, and goodness knows we could all use ideas on how to tame those beasts. Just think how wonderful it would be to see your scraps turned into beautiful quilts!

More to come!


Follow on Bloglovin