Monday, December 30, 2019

The X-Long T-Shirt Quilt

Yeah! Christmas has come and gone, so I can finally post about the commissioned twin extra-long t-shirt quilt made over three weeks ago.


extra long t-shirt quilt

Since this was a gift for her musically inclined son, my client requested no social sharing until after Christmas. Now I can share the whole quilt - hope you're not tired of seeing t-shirt quilts!

This quilt measures 73" x 98", which is just a smidge bigger than the recommended 71" x 96" for an extra-long twin bed. Sashing and borders bring the quilt to size, as I had 9 shirts with large logos and 6 shirts with narrow logos to work with. 


first round of design layout of t-shirts

To start the design process, I laid out the shirts on a sheet marked off with four measuring tapes of the quilt size. The above is the first layout round. As I worked, fusing sheer weight fusible, trimming to size, and adding sashing for a row construction method, I moved a few shirts around for this final layout.


fused shirts with sashing added

Then I switched to both block and column construction, as the 6 shirts in the lower half can't be put together in a row. 


column and block construction of a t-shirt quilt


And that's part of the fun of t-shirt quilts - figuring out how to put them together. Just a bit of creativity and the need to remember to add a 1/2" seam allowance are all that's needed. For more information, check out the T-Shirt Quilt Hints and Tips post, which goes over more fine details on t-shirt quilt construction.

With the top complete, I messaged the client about thread choices, either a purple or grey, which are both dribbled onto the quilt to see what they look like.


thread choices for quilting

She kept her first choice, which was the purple. Turned out to be a great choice, especially with the musically related pantograph, Bebop.


t-shirt quilt after quilting

Because this quilt is so large, I didn't dare take it outside for a full size photo. Instead, it's back on a sheet on the floor,


t-shirt quilt for an extra long twin bed

looking fabulous, even with sunlight streaming onto it! She was very happy, and looks forward to seeing on her son's bed.

And some fun facts: this quilt used 6.5 yards of sheer weight fusible, 10 yards of fabric, including the back, and 2.5 yards of batting. Yes, quilts take a lot of material. But it is possible to keep that to a minimum, especially if there are a lot of shirts - check out the LinkedIn t-shirt wall hanging.

Have I inspired you to try a t-shirt quilt? Go ahead, jump in!

Happy Quilting!


Follow on Bloglovin
Thanks for following!

Friday, December 27, 2019

2019 Quilts In Review

So long 2019! Time to highlight my favorite quilts made this year. 


For first-time visitors - Welcome! You're sure to see lots of great quilts here at QuiltFabrication, along with all the others sharing their 2019 finishes through The Best of 2019 Linky Party hosted by Cheryl of Meadow Mist Designs.

Faced with some very tough decisions, I've chosen a total of nine quilts, divided into the following categories: large quilts, table decor, and wall hangings. Each group of three also includes a fan favorite, based upon the popularity of the quilt pattern.

To know more about each quilt, click on the quilt's picture to go to the original post - there you'll find the story behind the quilt and more detailed pictures. Clicking on the pink quilt name links directly to the pattern on EtsyNow, let's get on with the show - enjoy!


Large Quilts


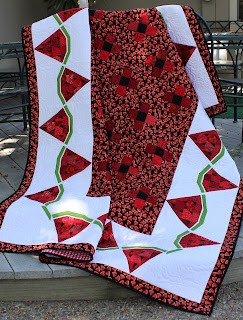
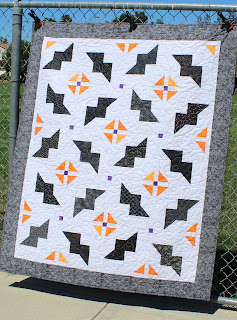
My favorites to snuggle under are Seafarer, Watermelon Delight, and Just Batty, all three, very different quilts. And the fan favorite? Hands down - Seafarer.


Table Decor


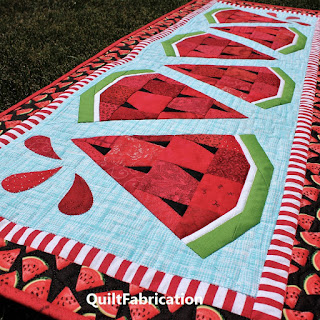
I do love smaller projects, especially those that decorate my various table surfaces in the house - there's a runner just about everywhere there can be! I have Clover Field for St Patrick's Day, Watermelon Twist for summer fun, and Winter Forest for January. And everyone's favorite? Watermelon Twist.


Wall Hangings

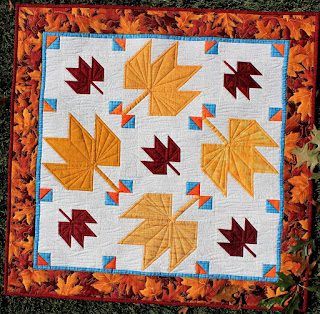
Who doesn't like a pretty quilted piece to decorate a wall? They make great instant seasonal decorations too - Ladybug Dance, which could also be a kid's quilt, ushers in spring, Fall Leaves bring fall color, and decorated Christmas Trees brighten up winter. Fan favorite? Christmas Trees!


Look for some of these quilts to grace the new QuiltFabrication header, and enjoy all the quilts of 2019. 

Happy New Year!


Follow on Bloglovin

Monday, December 23, 2019

LinkedIn T-Shirt Quilt

Another quilt finish, just before the holidays!

LinkedIn t-shirt quilt

And I'm super happy with how this 41" x 49" wall hanging turned out - I just love that there's no sashing, which really makes the tightly cut logos stand out and very interesting to look at. 

There's a lot of history in this quilt, especially with three logos in this picture - the grey 10 years of 'in', the 'in' surrounded with blue M's, and the rows of multi-color dots.


LinkedIn t-shirt quilt closeup 1

These are from the beginning days of LinkedIn, when membership milestones were reached. Now, they're a company with over 575 million members!

Couple other favorites are Women in Tech; Tux, who appreciates LinkedIn; and the three stacked logos in the corner - they look like one shirt.


LinkedIn t-shirt quilt closeup 2


The quilting is a dark grey thread and a geometric design, which I've lost the name of :(


LinkedIn t-shirt quilt quilting detail

Together, they work great on this quilt! Believe it or not, I almost ran out of top thread, with just a few inches left - that's a bit close, don't you think?

a few inches of quilting thread left


And in keeping with the LinkedIn colors, the back is also blue with a hint of aqua, with one of my labels along the edge.


LinkedIn t-shirt quilt backing and QuiltFabrication label

I believe the owner of this one intends to hang it in a LinkedIn office - I'm looking forward to hearing all the reactions!

Happy Holidays!


Follow on Bloglovin

Friday, December 20, 2019

T-Shirt Quilt Hints and Tips

The extent of my creativity right now runs to t-shirt quilts - there's another on the way! This time, it's a small one to hang on the wall. 


LinkedIn t-shirt layout


That's the initial layout, using approximately 21 shirts, including some of the backs. Notice there's no space created for sashing, no additional fabric anywhere. I'm keeping all the cuts tight to the logos for this one. And I like it, especially that stack of three in the lower right.

Here's another in-progress photo, which looks pretty much the same except the shirts along the bottom and left side have a sheerweight fusible on the back, are trimmed to size, and some even sewn together.


LinkedIn t-shirt quilt in progress


I will admit to a slight cutting goof. This little guy was supposed to go all the way to the right edge.


LinkedIn quilt


But I measured incorrectly and cut him too narrow. Thankfully, I still had an unused narrow LinkedIn piece to fill in the space.


LinkedIn quilt detail

That's the only spot where LinkedIn appears vertically, and you probably wouldn't have noticed had I not told you!

So, now that I've had plenty of practice making t-shirt quilts, here's a few hints to pass along:

  • start by cutting out all the logos as large as possible, so there's plenty to play with for adjusting the size
  • never, ever iron on the front of the t-shirt, or there will be a mess of logo paint on the iron, and on the shirt
  • fuse a large piece of sheer weight fusible to the back and avoid butting two pieces together - the joint will show on the front
  • when shopping for a fusible, choose one that is light weight and has ample sized glue dots on the back - this should stick without adding a ton of weight to the shirt
  • set up measuring tapes on the floor of the final size of the quilt and work within those parameters
  • layout the untrimmed shirts within the measuring tape quilt size, refining the design with logo size and sashing
  • an easy way to design is by rows, or block units - whichever way makes sewing construction the easiest
  • once the plan is determined, proceed with trimming the shirts to size
  • remember to add a 1/2" for seam allowances!
Sounds easy enough, right? I won't deny that t-shirt quilts take quite a bit of time and creativity, but if you're willing to cut and fuse the shirts, and play with designing, they can be quite fun to create. I hope you take the plunge!

Happy Quilting!


Follow on Bloglovin

My Favorite Patterns

Monday, December 16, 2019

The Ultimate Thread Guide Review

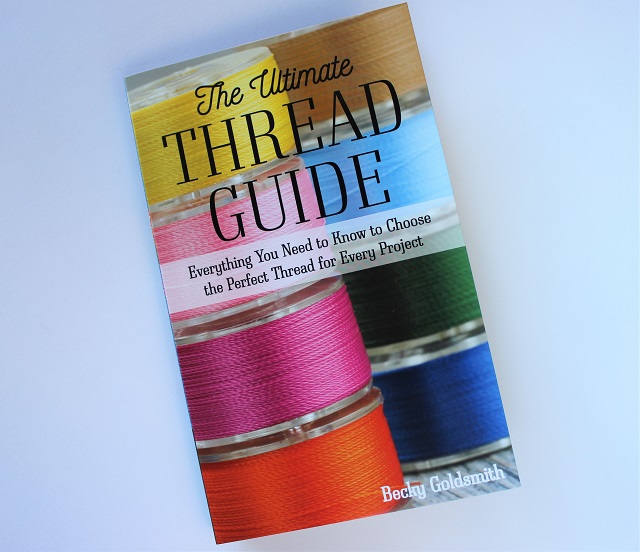
I recently received a brand new book, The Ultimate Thread Guide (affiliate link), from my favorite book company, C&T Publishing. And what a wealth of information contained in these pages!


The Ultimate Thread Guide by Becky Goldsmith


Written by the prolific quilter and author Becky Goldsmith, this guide is incredibly thorough and is a must read for everyone that sews. Though everyone's stand-by, all-purpose thread, works fine for a majority of projects, there are many more threads to choose from these days making this a handy, comprehensive thread guide to take along when shopping. 

The Ultimate Thread Guide (affiliate link) starts with discussing thread types, fibers, weight, and thickness, then moves into choosing the right thread and needle for the project. 


table of contents in The Ultimate Thread Guide by Becky Goldsmith


There's tons of information contained here, such as how the fibers are made and spun, what they're blended with to improve strength, how they hold up over time, and their tolerance to heat. Becky presents all of this and more in an informative style, which is well worth reading to increase everyone's knowledge about thread. There is no preference for one thread over another, nor a manufacturer over another. This book is pure information for choosing the right thread for the project.

a variety of threads for different sewing uses


The last portion of The Ultimate Thread Guide (affiliate link) consists of handy charts describing content, weight, use, and needle size for all threads available from 14 thread manufacturers. These charts are incredibly useful to have when pondering the rainbow of thread choices at the quilt shop. 


Mettler thread choices by chart


Wouldn't it be wonderful to walk up to a thread display and be able to decipher the thread labels? And to narrow down choices based on content or weight? Well, the charts in The Ultimate Thread Guide (affiliate link) will help with making those decisions.

As for me, I feel armed with new thread knowledge - detailed information about all the threads available - so that I can make a more informed decision when choosing thread for a project. Thank you, C&T Publishing for generously providing The Ultimate Thread Guide (affiliate link) - it's another great resource to add to my book shelf!

Happy Quilting!


Follow on Bloglovin

Friday, December 13, 2019

How to Make a Pressing Board

Time to freshen up my pressing board with a new cover. 


how to make a pressing board

A pressing board is one of my favorite quilting tools - it has a firm surface for pressing crisp seams, is portable, and super easy to make. 

All that's needed to make a pressing board are a piece of wood, a few layers of cotton batting, a sturdy cotton fabric covering, a staple gun, and a bit of glue - let's get started!


Supplies:


  • 3/4" thick plywood, approximately 15" x 20" or a size of your choice that's easy to handle
  • 2-3 layers of 100% cotton batting - do not use cotton/poly. For thick cotton use 2 layers; thin, use 3. After many uses, the batting gets crushed.
  • sturdy cotton fabric covering, such as canvas or pillow ticking a minimum of 5" larger than the board (ex: 20" x 25")
  • 1/4" staples and staple gun
  • cotton or poly batting for the bottom, slightly smaller than the board
  • glue


Step 1:

Cut the 100% cotton batting to the size of the board plus enough to go up the board's sides without going over the back. This eliminates a build up of layers on the board's backside, and allows the board to lay flat. The first picture, after Step 3, shows these first two steps.


Step 2:


Center the 100% cotton batting on top of the cotton covering, then center the board on that.


Step 3:


Snugly pull the cotton covering to the back, and staple every 2" along the long edges, starting approximately 3" from the corners.


snugly staple sides of covering to back of pressing board


Step 4: 


Create angled folds at the corners, laying excess fabric along the edge of the board, 


angled fold at corner with excess in crease


tucking it into the crevice.


tuck excess fabric at corner fold into crease


Fold the covering over to the board back, and staple the flap in place. 


staple covering in place


Step 5:


Repeat Step 4 on the opposite corner, then snugly staple down the remainder of the flap. Repeat steps for the other side.


stapled covering on backside of pressing board


Step 6:

Cut a piece of cotton, cotton/poly, or poly batting slightly smaller than the size of the board. Place glue along the outside edges, and a wiggle or two down the center to attach batting to the backside.


attach backing with glue

Press firmly in place and let dry.


backside of pressing board

Not only does this make the back look nice, it also helps to keep the board from slipping.

Turn it over for a beautiful pressing surface!


how to make a pressing board tutorial

And when the surface gets ugly or scorched, or the batting gets crushed and thin, just tear off the backing, remove the staples and start fresh with new batting and a new cover. 
Until then, wishing you crisp seams with the new pressing board!

Happy Quilting!


Follow on Bloglovin

My Favorite Patterns