Wednesday, April 27, 2022

Midweek Makers 329

Welcome to Midweek Makers - let's do some sharing!


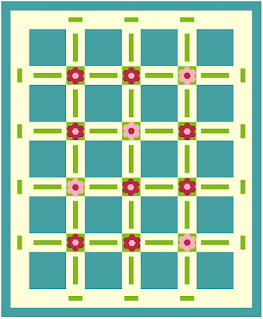
My share this week is on-going progress on the hexie flower quilt. Turns out, the last time I showed progress, the top was too long. I had forgotten I had extra teal blocks, which added another row. The debate was on to go with it but that meant making more hexie flowers. Hmm, no time for that. 

So, off came that last row, allowing me to proceed with the hexie flower columns and yellow borders. Currently I'm at the stage of making scrap teal border strips, another time consumer. Test widths are seen on the right side.

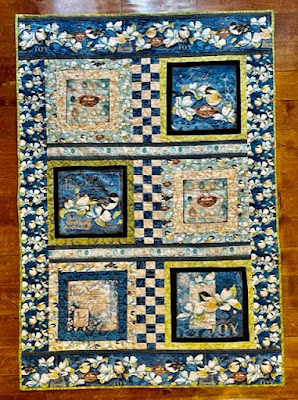
Now that my share is done, it's time to highlight a few pretties from last week's party.

From Quilts etc, these pretty blocks,


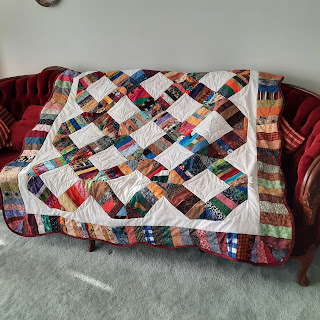
some fantastic quilting shown at Rebecca Grace Quilting,


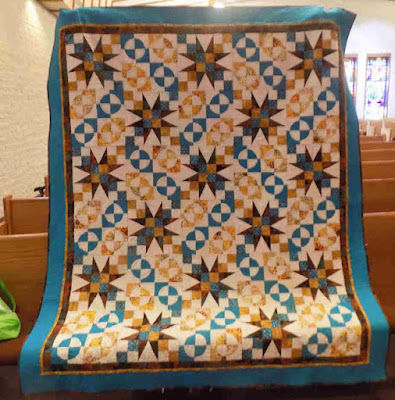
and this fun primary color challenge quilt from Den syende himmel.


Now it's your turn to share!

  • please link directly to your post
  • please link a quilt related item
  • visit with the other guests and leave some comment love
That's it - have fun!


Follow on Bloglovin

You are invited to the Inlinkz link party!

Click here to enter

Friday, April 22, 2022

Ivy Pull Update

Thought I'd give everyone an update on what has been occupying my time, taking me away from quilting. The graphic below is pretty much on target - clearing ivy around small trees - though I'm usually more covered up to protect myself from scrapes and ticks.


I briefly shared this project back in December on a Midweek Makers post, when we purchased a property within an hour's drive for my son to rent from us. Little did I realize how much work this property needed due to all of the ivy and dead trees!


Above is a fig tree covered in ivy.

Here's that fig tree from a few weeks ago and it currently has fruit on it!


We've made impressive progress in clearing our 0.55 acre of ivy, though there's still a lot to go. With all of the vertical ivy, dead trees and about a third of the ground ivy gone, views have opened up, fruit trees are thrilled to see the sun again, and now what's remaining is the rest of the ivy rooted in the ground - ugh!

Below are a couple before and after pictures. I've tried to take them from the same locations for comparison, though I'll say the pictures just don't do the progress justice. It's much more impressive in person!


Hard to believe there was a fence under all of that growth! 

That fence continues around into the back of the picture and was completely overgrown. There was no view into the ravine behind it.


The picture below is taken from the side of the ravine, rather than a straight on as above. It gives a better perspective of the clearing involved.


And as of two weeks ago, that entire fence (up on the right) is gone and the ravine is within view from the rest of the yard. 

That's it for yard clean up updates. I really have to do better at taking more progress pictures - I'm usually too focused on the work at hand. But from what I have, we're making great progress. And thank you to all who have sent us the good wishes that it will be beautiful when we're done - it's a ton of work and we hope it stays clear of ivy and becomes a beautiful sanctuary.

Have a wonderful weekend!


Follow on Bloglovin

Enjoyed this post? Don't miss out - get posts delivered directly to your inbox with follow.it.  

           
GET POSTS BY EMAIL


My Favorite Patterns

Wednesday, April 20, 2022

Midweek Makers 328

Welcome to Midweek Makers - let's do some sharing!


Progress is still happening with my hexie flower quilt. Because of how I sewed the test sashing pieces together and the hexie flower orientation, I'm sewing this in columns instead of rows. This is where I'm currently at, with flower columns and borders left to go.


With rain in the forecast this week, it means I'll be home to spend more time working on this rather than pulling ivy. Can't wait to get this one together!

And how about these quilts finishes from last week?

From Vicki's Crafts and Quilting, an awesome Welcome Patriotic banner,


this gorgeous quilt in pink from Scrapbox Quilts,


and this pretty number from J Biggs Scrap Pieces.


Now it's your turn - come share your projects!

  • please link directly to your post
  • please link a quilt related item
  • visit the other guests and leave some comment love
Have fun!


Follow on Bloglovin

You are invited to the Inlinkz link party!

Click here to enter

Monday, April 18, 2022

Hexie Flower Quilt Idea

Now that my hexie flower appliques are finished, it's time to make the sashing and get this quilt finished up.

pink hexie flower appliques


Though the test sashing pieces seen above were made with individual pieces, I've now gone the more efficient route by making a strip set for this quilt plan that I've dreamed up, below.


With the hexie flower blocks at an unfinished size of 4 1/2" square, the sashing needs to be that wide too. That makes the strip set composed of a 6 1/2" x WOF green background strip and 2 (two) 1 1/2" x WOF yellow strips. With the yellow sewn on each side of the green, I've got a strip set.

green and yellow strip set


Cutting 1 1/2" strips will make up the center of the sashing pieces. All I need to add are the two yellow side pieces, at 2" x 8 1/2".

green and yellow strips for sashing units


For the border pieces, I'll make another strip set of green background 3 1/2" x WOF with 2 (two) smaller yellow strips at 1" x WOF. 


Finally, I'll add 2 (two) 2" x 4 1/2" yellow side pieces for those little 4 1/2" square blocks. 


To finish off the inner border, I have yet to cut 14 (fourteen) 4 1/2" x 8 1/2" yellow pieces and 4 (four) 4 1/2" x 12 1/2" yellow pieces for the corners. Add on the final teal border at 2 1/4" and the top will be finished.

More updates to come - Happy Quilting!


Follow on Bloglovin

Enjoyed this post? Don't miss out - get posts delivered directly to your inbox with follow.it.  

           
GET POSTS BY EMAIL


My Favorite Patterns

Friday, April 15, 2022

Appliqued Hexies

My hexie flowers have become adorable appliques!

pink hexie flowers on a green block

When I posted about these before, I had several people ask me my process for appliqueing the hexies to a background block. So, I thought I share my process since hexies are usually joined together for make a quilt, not appliqued.

I started with hexie flowers, leaving the papers and basting intact.

pink hexie flowers on green


A bit of glue applied in the seam allowances at the side joining seams helps to keep the hexie applique in position on the background - see the white ovals below for locations. Don't overdo the glue as it makes it harder to cut out the background later.


I tried pins, but with the papers, both the flower and the background got distorted. Glue was an easier option. And as for the background block, it's cut 1/4" larger than the finished size needed. Trimming to the correct size is the last step.

Using a hand applique stitch, the outside edge is stitched to the background with an approximate 3/16 inch stitch length. It's also a good idea to have a stitch at the points and the inner corners to keep that flower secure. Once the stitching is complete, the background can carefully be trimmed out.

pink hexie flowers on green fabric


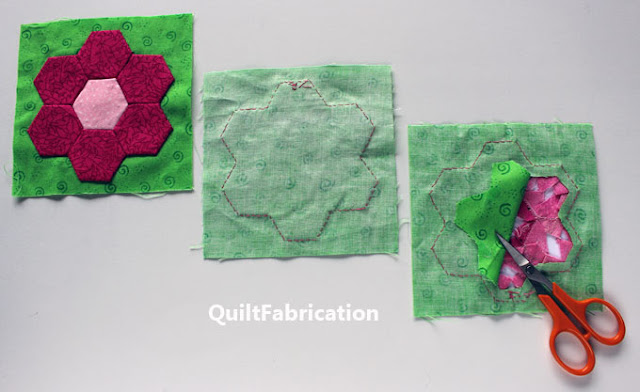
When I say carefully, I do mean carefully as in just cutting the background fabric. This does require a bit of tugging to release the background from the hexies at the glue points, easily done by slipping the scissor or the Purple Thang in the background opening. It's important to only cut the background at this stage and not the fabric that makes up the hexies.

Once the background is removed, trim all of the excess hexie fabric seam allowances to 1/4" to remove fabric bulk. Below is the background trimming in progress, then the background fully removed, and finally, the hexies with a 1/4" seam allowance.

pink hexie flowers on green


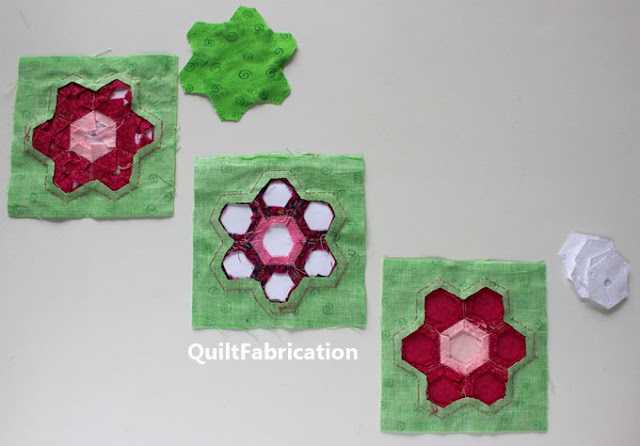
Now all of those hexie papers can be removed for use again until the edges get worn down, they have too many holes, or have turned soft and flexible. I will say that the hexie papers with a hole punched in the center are super easy to remove. Those without require a bit of digging along the seam edge, but they do come out.

Below are backside pictures of an untrimmed hexie, a trimmed hexie with papers intact, and finally, a hexie flower with the papers removed.

pink hexies on green


The final touch is to trim the background to the proper block size, making sure the hexies are centered in the block. Though a bit time consuming, all of that trimming work was worth it - these hexie flower appliques feel wonderful! Pliable and with no extra fabric weight - perfect!


Isn't nice to know that there are options for hexies? Makes me want to stitch up some more, though this time I'd feel better if I had a quilt idea first! 

Happy Quilting!


Follow on Bloglovin

Enjoyed this post? Don't miss out - get posts delivered directly to your inbox with follow.it.  

           
GET POSTS BY EMAIL


My Favorite Patterns

Wednesday, April 13, 2022

Midweek Makers 327

It's Wednesday, which means it's a Midweek Makers day!


This time of year is for Cherry Blossom festivals, and how I do so wish I could recreate those beautiful flowers in a quilt! Instead, I'll content myself with the Midweek Makers flower border and my hexie flowers, which are still in-progress. By Friday, I should have more to share.

Meanwhile, let's check out these finishes from last week:

From A Scrappy Quilter, this beauty using hatchet blocks and a scalloped edge border,


from Scrapbox Quilts, this one called Paradise Puzzle,


and from Kathy's Quilting Blog, her finished Full Stop quilt.


And now it's your turn - what do you have to share this week?
  • please link directly to your post
  • please link a quilt related item
  • visit the other guests and leave some comment love
Have fun!


Follow on Bloglovin

You are invited to the Inlinkz link party!

Click here to enter

Monday, April 11, 2022

FREE Sew Much Fun Quilt Blocks 30 - 37

Here's the next group of eight sewing themed blocks from the Sew Much Fun Tour! 


Just discovering these free quilt blocks? Missing any? Then look no further than these posts to catch up!


Blocks 9 -12

Blocks 1 - 8


Now on to the next set of eight blocks to add to the collection.

Block 30, a measuring tape from Sunflower Stitcheries


Block 31, an embroidery hoop from the Inquiring Quilter


Block 32, a rotary cutter from Katie Mae Quilts,


Block 33, a cup of tea from Sunflower Stitcheries.


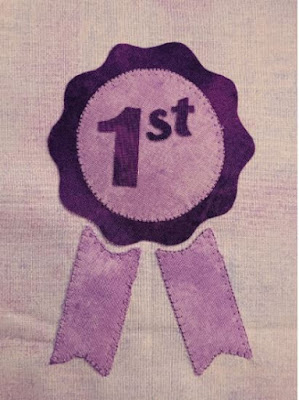
Block 34, a prize ribbon from Sunflower Stitcheries,


Block 35, a Featherweight machine from Tourmaline and Thyme Quilts,


Block 36, a hands block from Sweet Potato Quilts,


and Block 37, an embroidery hoop from Appliques Quilts and More. 


I hope you enjoy these blocks - be sure to thank all the designers. There's still more to come!

Happy Quilting!


Follow on Bloglovin

Enjoyed this post? Don't miss out - get posts delivered directly to your inbox with follow.it.  

           
GET POSTS BY EMAIL


My Favorite Patterns