Showing posts with label quilt binding. Show all posts

Friday, January 29, 2021

No Show Binding Video Tutorial

As promised, I'm sharing how I did the no show binding on the Snowflake table runner.

white snowflakes on blue

Notice it's not the traditional 1/4" binding edge, but instead a technique I call 'no show binding'. As you can see in the picture below from my No Show Binding tutorial on a previous quilt, the binding is not visible at all.

white quilt with no binding showing

Some may call this a 'faced binding', though I prefer to call it 'no show', and it's perfect for art quilts, landscape quilts, and quilts that would just look better without the binding showing. Here's the binding on the backside of the Snowflake runner, with a small reveal of the front in the lower left corner.

backside of a blue quilt

Looks great, doesn't it? The Snowflake runner definitely needed this style of binding so as not to detract from the snowflakes falling off the edge. A blue line cutting through half a snowflake would just look awkward!

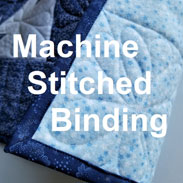
Though I do have a very thorough written tutorial on how to stitch a No Show binding, I'm happy to say I now have a No Show Binding video tutorial.

For a really quick summary of the process, here's some screen captures from the No Show Binding video. Cut 2" wide strips, with 2 strips 1" shorter than the quilt's longest edge, and 2 strips 3" longer than the quilt's other, shorter edge.

binding strips

Press a fold on all strips for a finished edge, stitch the cut edge to the quilt front after centering the strips, 

turn, press, and hand stitch. 


For the long strips, fold the excess to the back at the corners, 


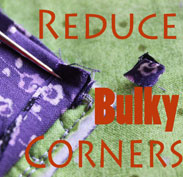
stitch, turn, press, clip out the corner excess,


and hand stitch. 


How's that for a summary? Pretty fast - maybe I've had too much caffeine! Being so abbreviated, I highly recommend watching the
No Show Binding video for more details plus tips and tricks, or at least reading the written No-Show Binding tutorial

For more binding ideas or just tips and tricks, check out the other 9 binding tutorials on the Tutorial page - learn something new or just read to refresh.

Happy Quilting!


Follow on Bloglovin

My Favorite Patterns

Friday, August 28, 2020

How to Join Quilt Binding Ends

Listen up quilters - here's a tutorial that will make you one happy quilter! 

No matter your skill level, today's tutorial is all about joining the ends of quilt binding using a super quick and easy method. It's guaranteed to take away any confusion, hassle, or headache that you've ever experienced in the past, and turn quilt binding into a pleasurable part of the quilting process. 

black and white check binding ends stitched together

There's no complicated measuring or confusing angles to deal with. Once you learn the process, it will become second nature, changing your quilting life forever!

Not only is joining binding ends in the written format below, but it can also be seen in action, with the video 'How to Join Quilt Binding Ends - Step by Step.'


How to Join Quilt Binding Ends

Start with a fold

Prepare binding strips, cutting 2.5" WOF strips and joining on the diagonal. Square off one end.

Fold back the squared off end 2.5" and pin to the side of the quilt. If using a narrower binding strip, 2.25" for example, fold back that measurement and pin.

fold over binding the width of the binding strip


Leave a 6" tail

Start stitching the binding to the quilt approximately 6" away from the fold.
Continue around the quilt. Tip: use the reducing bulky corners technique at each corner for flat, square corners. 

Stitch to within 6" of fold

Stop stitching to within 6" of the fold. This gives another 6" tail at the end, which is 12" of working space to join the binding.

black and white check binding stitched to a quilt


Cut the end binding at the fold

Lay the end binding along the quilt and on top of the folded beginning binding. Cut the end binding where it touches the fold. Tip: cut the end binding 1/8" short of the fold for a better fit along the quilt.

black and white check binding being cut


Open binding for joining

Open the end binding piece, laying it flat and right side up. Open the beginning binding piece, laying it on top of the other, right side down. Align the top and side edges.

quilt binding right sides together


Stitch on the diagonal

Join the ends by stitching on the diagonal from the upper corner to the lower corner of the piece underneath. Draw a diagonal line if necessary.

binding stitched on the diagonal


Check the fit

Before trimming excess, check the binding's fit against the quilt. If all was done correctly, it should lay smooth and straight on the quilt. Trim out the excess, and finger press the seam to one side, or open if preferred. 

Finish stitching

Pin the binding in place, and stitch to finish, overlapping the stitching by 1". Avoid letting the machine push the binding to the beginning stitching spot, resulting in a wrinkle. Tip: use a walking foot if necessary.

stitched down black and white checked binding


Wasn't that easy? Such a super simple method - it certainly changed my quilting life and I hope it does for you too. Now all that's left is to turn it to the other side and either machine stitch or hand stitch the other side - your choice.

Happy Quilting!


Follow on Bloglovin

Monday, June 29, 2020

How to Reduce Bulky Quilt Corners - Step by Step Video

Tired of having thick, lumpy quilt corners? Or fighting to pull enough fabric to the back because of multiple fabric layers in the corner? Want to learn how to avoid that? 

Quilt Binding - Reducing Bulky Corners - tutorial with video by QuiltFabrication
 

All that's needed is a simple change in stitching the binding at the corner, a snipping of a bit of fabric, and that corner binding will fold nicely, making flat, beautiful quilt corners!

I learned this fabulous binding trick several years ago, and it's how I finish all of my binding corners. I've demonstrated this technique several times to members of my guild, most recently via a Zoom meeting. After several quilters tried it, many raved and excitedly thanked me for sharing how easy it is to now make beautiful corners - this corner binding trick is certainly all the rage!

Having recently posted my favorite binding tutorials, in the written-with-photos form, I thought of an even better way to share them: by making a video! With a video, it's more than a front row seat - it's the opportunity to see exactly how I'm demonstrating the technique, right on my own quilts. How awesome is that??

Have a look at the first video in the binding series, How to Reduce Bulky Quilt Corners - Step by Step. It's full of up close, detailed video footage showing how to sew the binding at the corner, and clipping the excess fabric. Just check out those beautiful flat corners in the picture!

flat beautiful quilt corners using the reduce bulky corners tutorial from QuiltFabrication

I'm excited to bring my tutorials to video, to share with everyone quilting techniques that not only save time and frustration, but to also show new or different methods to advance everyone's quilting skills. 

And now it's time to share! Here's the link to How to Reduce Bulky Quilt Corners - Step by Step video! Feel free to share this with your quilt friends, and please consider subscribing to my YouTube channel. There's more quilting tutorials I plan to share!

Happy Quilting!


Follow on Bloglovin

My Favorite Patterns

Friday, May 29, 2020

Binding a Quilt - Tips and Tricks

Last week, I had the opportunity to give a binding tutorial over Zoom, and thought I would go over 3 of my favorite binding tutorials. 


The first one, joining binding in 3 easy steps


was an absolute game changer for me! Years ago, I struggled with the angles, the right sides of the fabric, where to cut, etc, and spending waaaay too much time joining binding. 

But then, an ah-ha moment, and my binding woes were over! A simple fold of 2.5" was all I needed - pop over to the joining binding tutorial to see the whole process.

The next big game changer was reducing bulky corners. 


All that requires is sewing the binding at a right angle in the corner instead of the traditional angle. 


Just this one simple change allows for a triangle of fabric to be trimmed out of the corner, leaving four less layers of fabric. For more details on this technique, check out the reducing bulky corners tutorial.


And the last binding technique that saves a ton of time - a machine stitched binding


Now, I know that there are those out there who are purists and want to stitch the binding by hand. And, yes, I used to do that, so I get it. But it took forever, eating up time that I could better spend elsewhere. Then glue came into my life. 

At first I resisted, trying to stay with the purist group, worrying about fabric degradation. But I wash my quilts, and I don't intend for my quilts to stay around for 100 years, so why not use glue? For me, it's old fashioned washable school glue.

I'm very happy to say I've been using glue and a machine stitched binding for several years now, with the whole process taking me a lot less time than hand stitching would. Check out the machine binding tutorial for a ton of up-close pictures on perfecting this technique.

Both my Zoom buddies, and guild members have thanked me for these binding tutorials - they've been game changers for them too. Give them a try, and see what you think!

Happy Quilting!


Follow on Bloglovin

My Favorite Patterns

Monday, September 2, 2019

Joining Binding the Easy Way!

Do you struggle to join quilt binding ends? Can't figure out how much binding length to leave, or which direction to sew the diagonal seam? 
Then struggle no more! Today's class is for you, and I'm going to change your quilting life forever with a tutorial for joining binding ends the easy way.


My original tutorial on this subject, Joining Binding in 3 Easy Steps, is my #1 viewed tutorial, which tells me the binding struggle is real. And what I'm showing you today is such an awesome technique, it bears repeating. So say goodbye to complicated measuring, confusing angles, and binding that doesn't fit. Just try this method for joining quilt binding once, and I guarantee you won't look back!

Before we get started, let's talk about binding width. I cut all of my bindings to a 2 1/2" strip width, which gives me enough to turn to the back and catch when finishing with a machine stitched binding. Some quilters like less, and if that's you, just be sure to fold back the same amount as your strip width in the first step.


Step 1: Fold back the binding end


Fold back 2 1/2" (or your strip width) at the binding beginning and pin. Start stitching approximately 6" away from the fold. 

joining quilt binding-start with a fold

Continue all around the quilt, stopping the stitching within 6" of the folded binding.

stop the stitching within 6" of the folded binding

I like to leave as short a gap as necessary, 

short gap between stitched binding ends

as I've found that a larger gap can cause the binding to ripple toward the end of the final stitch down. 


Step 2: Trim the binding where it meets the folded piece.


Lay the quilt flat, then adjust the binding flat against the quilt. Trim the free end where it meets the fold. I usually trim that end piece a wee bit less - no more than 1/8" - which helps to make a snugger fit along the quilt edge. 

joining quilt binding-trim at the fold

Step 3: Join the binding ends


Unpin, unfold, and open up both pieces. Don't twist them - just let them open naturally. Overlap the pieces, right sides together, at right angles, with the piece that had the 2 1/2" folded end on top of the piece that was cut. Line up the two outer edges, placing a pin to hold them together. 

binding ends right sides together at right angles to each other

If necessary, mark a diagonal line to follow when stitching, from strip tip to strip tip. Notice the direction of the line creates excess to trim off. Any other direction is incorrect as there is no excess created.

diagonal line for stitching and cutting excess binding

Stitch along the diagonal line, then check the length against the quilt for snugness. Now is the time to make adjustments before trimming. When the length is good, then trim the excess and finger press the diagonal seam open. 

joining quilt binding-trimming and pressing

Step 4: Finish attaching the binding to the quilt top 


Pin the binding in place,

pinned binding join

and finish stitching it on. Fold it to the back of the quilt and either machine stitch, or hand stitch it in place.

finished binding join

Wasn't that easy? I know this technique has changed my quilting life - it's so simple that I don't fret over bindings all!
And if you would like to improve your binding corners, check out my Reduce Bulky Corners tutorial - it too will change how you finish a quilt. 

Feel free to share your new-found quilting knowledge with all your friends - Happy Quilting!


Follow on Bloglovin

My Favorite Patterns

Friday, November 9, 2018

Inserting a Decorative Flange

Got a quilt that needs a little something to snazz it up, but you don't know what? How about adding a tiny extra decorative flange?


Inserting a Decorative Flange into a quilt border

That's what I did within the border of the Pumpkin block table runner, making this project go from ho-hum to wow!


Pumpkin Applique Block table runner by QuiltFabrication

Notice this is within the border, not at the binding edge, which is the Piped Binding technique. The tutorial today is for placing a flange within the border or around a block with sashing.

And it's easy to do! Of course, on this project, I had to take off the outer border first after discovering how boring the borders were without the green flange. But what's a little seam ripping? Better to bite the bullet and make it right/beautiful, than to have a project that one is not happy with.

So, just how easy?

Cut narrow strips

For a tiny flange, approximately 1/8" wide, cut enough strips 3/4" wide. 

If the project needs a wider flange, use the chart below to determine the cutting size for the desired width:


Desired width of Flange
            1/8”
                1/4”
                 3/8”


Cut width of strips
            3/4”
          1”
                1 ¼”


Anything more than 3/8" doesn't need to be an inserted flange, and should be a wide enough strip to just be sewn in.

If needed, stitch pieces together as if making binding (on the diagonal) to get the necessary length for the project.


Press the strips

Then, carefully press the strips in half, matching the cut edges. This step is important, so take the time to match those edges!


cut and pressed flange strips for quilt border


Baste the flange

Carefully line up the cut edges of the flange piece with the cut edge of the project. Use glue if necessary to hold it in place. If the edges are not in line, the flange will narrow and widen on the project, which is noticeable when dealing with such narrow widths.

Baste the flange to the project (border or block), 1/8" from the cut edges.


quilt flange basting

Overlap cut ends in the corners - do not apply like binding and fold to go around the corner.


Apply border or sashing strip

Attach the border or block sashing strip, carefully stitching a 1/4" seam allowance after lining up the cut edges. 


applying outer border strip


This is another area where precision counts - a wavy seam results in a wavy flange. Take your time - no need to rush!

If you're feeling super confident, the flange and border/block sashing can be stitched to the project at the same time, eliminating the flange basting step. I, personally, would rather do it one at a time, so as not to risk the flange moving.


Finishing up

Once the border/block sashing strip is on, carefully press open that strip, exposing the flange and keeping it flat.


flange insert in border on Pumpkin applique table runner

When quilting, stitch-in-the-ditch in the seam of the flange/border or block sashing. If quilting on the free side of the flange, try not to catch it the quilting by lifting the flange up and out of the way, if necessary. Then admire your work!

Happy Quilting!


Follow on Bloglovin

My Favorite Patterns