Monday, September 5, 2016

Shadow Block Mini Quiltalong Reveal and Blog Hop

It's time for the big reveal and blog hop for the Shadow Block Mini!


Shadow Block Mini quilt

I think mine grew into a Shadow Block Maxi due to all the extra borders! Just couldn't stop creating with that really pretty floral print. And now it's all gone, though it certainly made a gorgeous quilt!

And notice anything different? The blocks don't have shadows. Instead, the flowers are above squares of light, and glowing through a black background. Told you I was going to surprise you! Just a different way of thinking about this block, given the right fabric to work with. 

So now on to more fun! Check out the list below of all the other participants, as mine is just one of the many that were created for the Shadow Block Mini Quiltalong, sponsored by Janice at Color, Creating, and Quilting, and Jen at A Dream and a Stitch. Thank you ladies for organizing this, and thank you to Debora at Studio Dragonfly, for the tutorial. 

Here's a few more pictures, since all I gave you last week were teasers!

The Quilting.

Shadow Block Mini quilting closeup

The Back.

Shadow Block Mini quilt back

The Label.

label

Yes, I now have labels! How cool are those??? Name on the front, and washing instructions on the back. Hubby says they look so professional people will think the quilt was store bought. Hmm, is that a good thing?

Okay, time to go check out all the other quilts, after one last look at mine!

Shadow Block Mini quilt

I'll be linking this beauty up to all the linky parties on the sidebar - be sure to visit those too!

Happy Quilting!

Friday, September 2, 2016

Pantographs plus Custom Quilting

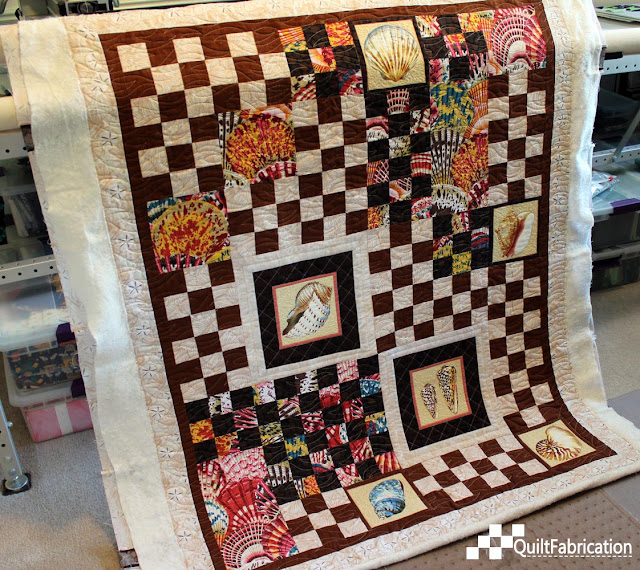
Last week, I had the opportunity to quilt Sally Sells Seashells for a friend of mine. 

Sally Sells Seashells quilt

Her top is based on the Nine Patch Pizzazz (affiliate link) book by Judy Sisneros,


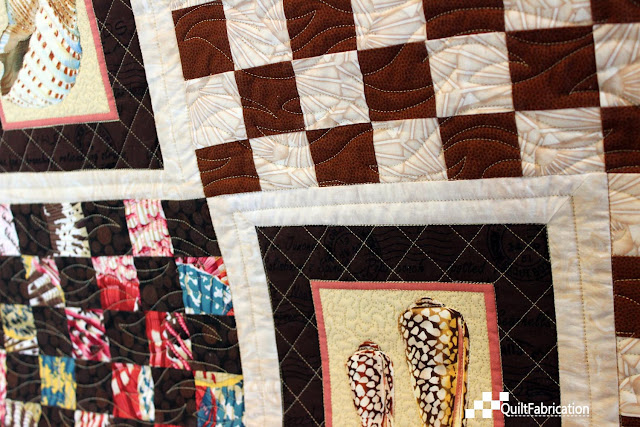
and when we talked about the quilting for it, I suggested using a pantograph in most areas, with some custom quilting in the seashell blocks. She said, "Go for it!", and I must say, the quilt turned out FANTASTIC!


pantograph with custom quilting


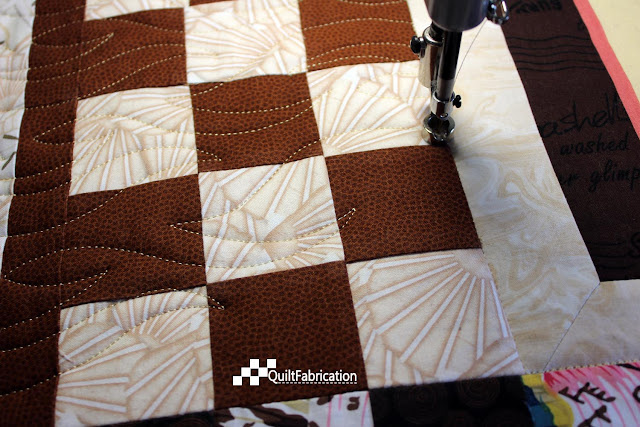
pantograph stitching detail

For all the non-computerized longarmers out there, here's a tutorial on how to insert custom quilting into a pantograph design.

For this quilt, the pantograph Ebb and Flow was chosen, 


as it has a lovely, repetitive wave design. Yes, the waves could have been free handed, but regular repetition was what we were after.

After deciding what areas receive custom quilting, in this case, the six seashell blocks, the quilt is loaded onto the frame. The first step involves stitching-in-the-ditch around the seashell blocks, then stitching as much of the pantograph as possible without running into those seashell blocks. And now the fun begins!

Blocking out the custom quilting area

Remembering that the laser pointer on the back of the machine represents where the needle is, the needle is moved to  a corner of the block. Note: what's shown is the lower corner of the block, since the top section is already done.


needle marking corner point

Keeping the needle in position, at the back of the machine
place an item to mark the laser point. I have rulers that I use, but you could use paper, tape, or sticky notes.


laser marking corner


In  the picture above, the arrow points to the laser dot, representing where the needle is, and thus the corner of the block.

Moving the machine along the block edge


needle marking block edge

gives another spot to mark on the pantograph in back.


marking edge

The drawn white line marks the bottom of the block.

Moving to the corner,


marking block corner

makes another spot to mark on the pantograph in back.


block corner

The sides of the block are checked in the same way, to make sure the ruler guides are straight, and not angled. The pantograph now looks like this,


custom block blocked out

with the white lines marking out the block, and the X meaning "don't quilt here!"

Quilting around the custom area

The pantograph is set up, the block area not to be quilted is marked, and everything is set to go! I will give you fair warning: this technique involves a lot of moving between the front and back of the machine. Just think of it as extra exercise, with the result worth it in more ways than one!

Starting the row as usual, the pantograph is stitched out, stopping until it comes just shy of the ruler. 


pantograph stitching stop

Moving to the front of the machine, a few stitches are taken to finish the pantograph line, and move the needle into the ditch.


pantograph up to block


Using ditch stitching allows for a continues line (no thread tie-offs! Yeah!!) to where the next pantograph line picks up in order to continue the pantograph back the other direction.


pantograph starting and stopping


To  figure out where I was in the ditch in relation to the pantograph, I stitched a few stitches from the front, then peeked around to the laser/pantograph in back to see how close I was to the next stitch line. Once there, I went around to the back again to follow the pantograph.


pantograph plus custom quilting

Continuing with this technique throughout the quilt, each time stitching-in-the-ditch around the seashell blocks first before stitching the pantograph, made for beautiful background quilting.


pantograph plus custom quilting


Custom quilting

Once the pantograph quilting is in place, the custom quilting of the squares happens. This is the place to have fun! Using more stitch-in-the-ditch, some cross-hatching, stippling, and detail stitching on the shells made for blocks that really popped!


pantograph plus custom quilting detail closeup

pantograph plus custom quilting closeup

My  friend was so happy that this quilt went from ho-hum to WOW! with this extra bit of care and detail. She exclaimed, "You really made my piecing look good!", and with a comment like that, it was totally worth it!

Next time you have a quilt that could use a bit of extra WOW, try some custom quilting with your pantograph.

Happy Quilting!

Thursday, September 1, 2016

September 2016 Book of the Month

The calendar pages keep turning, and here we are in September - where has the year gone? And with the start of a new month, it's also time to explore another book. The September Book of the Month honor goes to Flip and Fuse Quilts (affiliate link) by Marcia Harmening.


Flip and Fuse Quilt book

Many of you wrote that you enjoy seeing what I make from the books I choose. So as not to disappoint, I'm sticking with the Book of the Month feature, though on this book it will be more of an exploration of the technique than actually making a quilt from the book.

And here's why. I flipped (how fitting!) through this book at least six months ago, and found the applique technique one that would be interesting to try. But since so many things were going on for me, I didn't feel I could do it justice. 

Fast forward to a month ago. While at a bank, I saw a design on someone's cup, and thought how a variation of that would make a cool quilt. Working totally from memory (silly me didn't have her cell phone to take a picture), I designed said quilt last week. 

Then I remembered this book, and the chance to use it has arrived. So come along, and let's learn a different applique technique and see how it goes!

Have a great day quilting!