Showing posts with label quilting tutorials. Show all posts

Monday, February 7, 2022

Blended Quilting Revisited

While zipping around the background of the Love runner, filling it with stippling, I was reminded of how important it is to blend the stitching in with the piecing. 

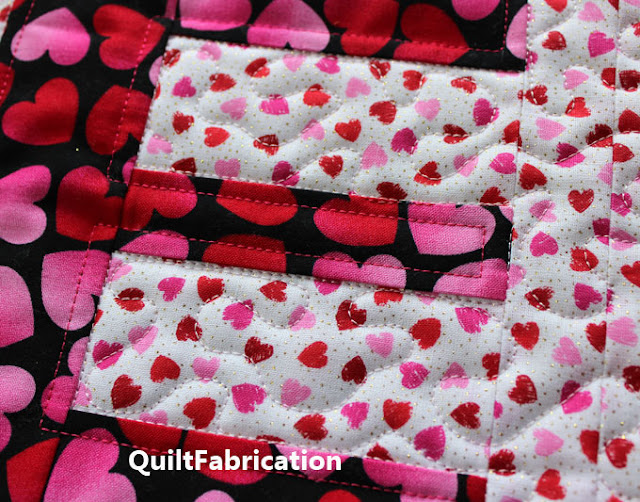
valentine fabrics make an E

Personally, I think any background fill just looks better when the piecing seam is used as a travel line for the fill, giving the impression that the piecing sits on top of the fill. The fill is, after all, in the background, right?

Look closely at the picture above of the letter E from the Love runner. I've stitched those stipple lines right up to the piecing, traveled along the seam, then come back out into the background to complete the fill. Doesn't it look as if some of that stippling is behind the piecing of the E?

Thinking about this prompts me to revisit my Blended Quilting tutorial, which explains in more detail how to do this. Let me show you!


This all started while quilting the Holiday Forest runner. The background fill is similar to a stipple, though here it's in a more horizontal direction to imitate a  landscape of hills or of a breeze blowing through the trees. 

It was important that the background quilting blend in with the trees. And by that I mean making the background quilting in the small areas relate to each other, creating unity between all the small spaces and a consistent landscape theme.


Notice the landscape lines in between the trunks. See how they hit the trunks, follow the trunk for a small distance, and come back out again? Just like the stippling for the E block.


So here's what I mean by 'blended'. When there is a small amount of piecing separating areas, align the quilting lines on each side of the piecing. Then, just like my stippling for the E block, it will look as if the piecing is on top of the background fill.

This creates not only unified quilting between separately quilted areas, but it's also visually pleasing as the eye tends to follow these lines. 


The drawn example below is what not to do. It creates a quilted area that doesn't relate to the other piecing - it just bounces back and forth. The background doesn't flow from one area to the next.


The correct way is to quilt around pieced shapes, letting the quilting bump into the object with stitching that follows the seam line, and then resuming in the background. 


This concept applies to any background fill, not just the landscape lines or stipple I've shown you. All it takes is a bit of planning, and the willingness to do a bit of stitch-in-the-ditch to follow the piecing. Hope you give this a try as the results are worth it!


Happy Quilting!


Follow on Bloglovin

Enjoyed this post? Don't miss out - get posts delivered directly to your inbox with follow.it.  

           
GET POSTS BY EMAIL


My Favorite Patterns

Monday, November 22, 2021

Quilt Fills - A Few Favorites

A couple of recent quilts, Jack O Lantern and my in-progress cat quilt, have left me pondering quilt fills that fit the quilt. There is no one fill that fits for every situation, though for me, stippling comes darn close. 

With that aside, I'm going to go over three of my favorite fills, with links to the tutorials and videos on how to make them. 

- - - - - - - - - - - - - - - - - - - - - - - - - - - - - - - - - - - - - - - - - - - - -

- - - - - - - - - - - - - - - - - - - - - - - - - - - - - - - - - - - - - - - - - - - - -

First up is the Structured Doodle Weave, a terrific freehand fill that's quite impressive!


All that's required is marking a grid on-point, then filling in each square on the diagonal, changing direction from square to square.


Here's a completed grid,


and another view on the completed project, the Sweetheart runner.


My next favorite, and one I considered for Jack O Lantern, is the Echoed Triangle Fill.


I love the spikey randomness of this fill and I think you can see why it was considered for Jack. Ultimately, Jack O Lantern has a an un-echoed version as the triangles were perfect for him.

Anyway, the Echoed Triangle Fill is easy but does take a bit of concentration to determine the direction the fill needs to go due to the echoing.


With more echoed triangles, the fill looks like this,


making for a great background texture. Take a look at the Echo Triangle Quilt Fill video to see it quilted in real time.


My last favorite fill is what I call a Dragon Fruit Fill, with a combo of curls and spikes.


The Dragon Fruit fill is a fun, organic fill that's soft and sharp at the same time. It all starts with the curls, then the addition of three spikes around the curl, a bit of echoing, then it starts again.


Definitely a great fill! See this one quilted in action with my YouTube video, Dragon Fruit Quilt Fill.

Of course, this post is just a quick overview of favorite fills. I highly recommend checking the links to go directly to the tutorial or video where there's more detail on creating these fills. Enjoy!

Happy Quilting!


Follow on Bloglovin

Enjoyed this post? Don't miss out - get posts delivered directly to your inbox with follow.it.             
GET POSTS BY EMAIL


My Favorite Patterns

Friday, August 20, 2021

No Mark Triangle Quilt Motif

As promised, a new video on how I quilted the diamond/triangle motif used on Qubix.


This motif looks so pretty, especially on that star fabric! And yes, you read it correctly - no marking was involved to quilt this motif. It's all about putting ruler lines to good use.

That's what this tutorial is all about - how to use ruler lines as reference points to stitch a design. Check out my No Mark Triangle Quilt Motif video to see this diamond/triangle design stitched out in real time.

***

As far as rulers go, my favorite is the 2" x 7" Little Girl longarm ruler by The Gadget Girls, who unfortunately, have retired. But the ruler is still available through Hab and Dash, my favorite thread supplier. I like it because it's easy to control, and comes with several 1/4" lines horizontally, a few vertically, and 2 lines at 45 degree angles, all just enough to help map out a quilt design.

Those ruler lines plus the block corners are all I needed to create this motif. Starting my stitching 1/4" away from the sashing, in the center of the triangle, I liked the angle that occurred for the next stitching line when positioning my ruler edge at the block corner.


Then it's the customary stop 1/4" away from the seam, creating echo lines.

For the mirror angle on the other side, the stopping location is total guess-work. I'd rather stop short, test my ruler measurement/placement on that side to see how much further I need to go before starting the angled stitch line.


Once everything is lined up with the corner and the center point, the stitching can continue. And now I have a diamond shape in my triangle.

For the triangles on the sides of the motif, I played with the angle I wanted, taking note of where the block corner was in relation to the ruler lines. For this size block, it's 1 1/2 lines. I'm also using the ruler's 45 degree line to help placement.


That's an easy line to stitch, again stopping at the seam, echoing, then continuing with an echo along the sashing to get to the other side of the block.

Once again, it's guess-work as to where to stop but the ruler lines come in handy for placement. In this case, I was a couple stitches short, so after adding those, stitching the last angle to complete the triangle was a breeze.


Here's the motif again - oh so simple yet perfect for the space.


I hope this pretty little diamond/triangle motif has served as inspiration for using more rulers in your quilting.

Happy Quilting!


Follow on Bloglovin

Enjoyed this post? Don't miss out - get posts delivered directly to your inbox with follow.it.  

           
GET POSTS BY EMAIL


My Favorite Patterns

Friday, August 28, 2020

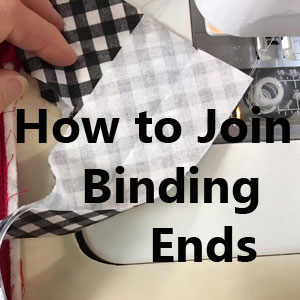
How to Join Quilt Binding Ends

Listen up quilters - here's a tutorial that will make you one happy quilter! 

No matter your skill level, today's tutorial is all about joining the ends of quilt binding using a super quick and easy method. It's guaranteed to take away any confusion, hassle, or headache that you've ever experienced in the past, and turn quilt binding into a pleasurable part of the quilting process. 

black and white check binding ends stitched together

There's no complicated measuring or confusing angles to deal with. Once you learn the process, it will become second nature, changing your quilting life forever!

Not only is joining binding ends in the written format below, but it can also be seen in action, with the video 'How to Join Quilt Binding Ends - Step by Step.'


How to Join Quilt Binding Ends

Start with a fold

Prepare binding strips, cutting 2.5" WOF strips and joining on the diagonal. Square off one end.

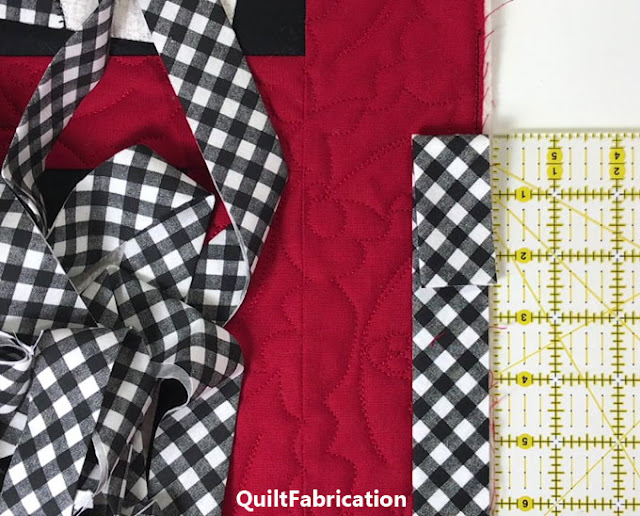
Fold back the squared off end 2.5" and pin to the side of the quilt. If using a narrower binding strip, 2.25" for example, fold back that measurement and pin.

fold over binding the width of the binding strip


Leave a 6" tail

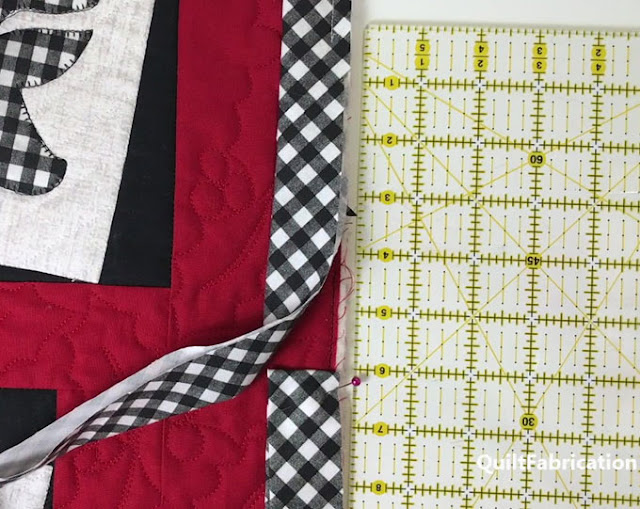
Start stitching the binding to the quilt approximately 6" away from the fold.
Continue around the quilt. Tip: use the reducing bulky corners technique at each corner for flat, square corners. 

Stitch to within 6" of fold

Stop stitching to within 6" of the fold. This gives another 6" tail at the end, which is 12" of working space to join the binding.

black and white check binding stitched to a quilt


Cut the end binding at the fold

Lay the end binding along the quilt and on top of the folded beginning binding. Cut the end binding where it touches the fold. Tip: cut the end binding 1/8" short of the fold for a better fit along the quilt.

black and white check binding being cut


Open binding for joining

Open the end binding piece, laying it flat and right side up. Open the beginning binding piece, laying it on top of the other, right side down. Align the top and side edges.

quilt binding right sides together


Stitch on the diagonal

Join the ends by stitching on the diagonal from the upper corner to the lower corner of the piece underneath. Draw a diagonal line if necessary.

binding stitched on the diagonal


Check the fit

Before trimming excess, check the binding's fit against the quilt. If all was done correctly, it should lay smooth and straight on the quilt. Trim out the excess, and finger press the seam to one side, or open if preferred. 

Finish stitching

Pin the binding in place, and stitch to finish, overlapping the stitching by 1". Avoid letting the machine push the binding to the beginning stitching spot, resulting in a wrinkle. Tip: use a walking foot if necessary.

stitched down black and white checked binding


Wasn't that easy? Such a super simple method - it certainly changed my quilting life and I hope it does for you too. Now all that's left is to turn it to the other side and either machine stitch or hand stitch the other side - your choice.

Happy Quilting!


Follow on Bloglovin

Friday, August 7, 2020

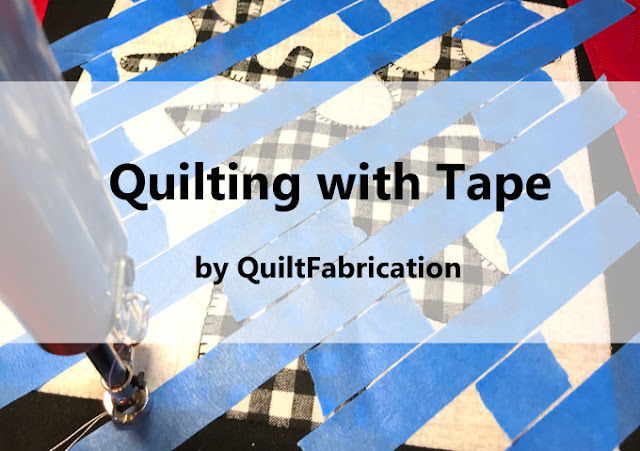
Quilting with Tape

Do you have difficulty quilting straight lines? Have you struggled with any of the following:
  • keeping lines consistent at the same angle?
  • maintaining even spacing across a block or quilt?  
  • matching lines on opposite sides of a motif or applique?
Then consider quilting with tape!

applique quilt block with blue painters tape to mark straight lines for quilting

Yes, tape. Painters tape, masking tape, or even quilters tape will keep those stitches in line!

I always have a couple of different widths on hand, usually a multi-sized pack of 1/4", 1/2", and 3/4" blue painters tape (affiliate link) giving me just the right amount of stickiness in an easy to see blue. A multi-size pack of masking tape (affiliate link) is another great choice, if I can't find the size I need in blue. Quilters tape (affiliate link) is limited to a 1/4" width, which, depending on the application, would also work fine.                                                                         

Of course, this is not the first time I've used tape, finding it very useful for stitching the straight line background fill on Light at the End, plus other quilts. Tape is so useful - it's what I recently used to create the straight line quilting behind the deer heads of Reindeer Wreath

Finding 3/4" blue painters tape provided the right scale for my design, I used it to mark and space my lines. 


The longest piece, the design anchor, is laid down corner to corner in the block. Short pieces are used as spacers since straight line quilting can be stitched on both sides of the long piece. No need to cover everything with tape!

Then all I needed to do was stitch next to the tape, lifting the end up here and there to travel to the next line via the block edges or motif. Super easy! Check out the Quilting with Tape video to watch it in action.


Notice that all of that straight line quilting is continuous - no stops, starts, and tie-offs to deal with. Here's a valuable tip: only travel over previous stitching 2 times, for a total of 3 layers of stitching. Any more than that and the thread buildup becomes noticeable.

Though quilting with tape may seem time consuming, it's worth it! Here's why:
  • the angle was always correct
  • the stitch lines on opposite sides of the head applique matched and lined up
  • the spacing between lines was consistent
  • the line was straight, not wobbly or shifted as sometimes happens with long rulers
  • the ruler and my hand was always safely in front of the needle and not awkwardly trying to align stitch lines with ruler markings behind the needle
  • the whole design stitched continuously by traveling around the applique and block edges
Need I say more?

If you watched the Quilting with Tape video, you'll see I did all of this straight line stitching on an Innova longarm. But this technique is also possible on a domestic machine. The steps are the same: use the tape to mark the stitching lines, stitch, and travel to the next line using the block edges or motif. What an easy way to take your quilting to the next level - nothing like having a few more tools in the quilting toolbox!

Happy Quilting!

Follow on Bloglovin

My Favorite Patterns

Monday, July 20, 2020

3 Ideas to Find the Perfect Color Palette

Who of us hasn't gone to the quilt shop and needed help putting together fabrics that will make a quilt go from ho-hum to WOW? Choosing fabrics and colors can be such a struggle, one we've all been through at some point in our quilting journey. But it doesn't have to be.

three ideas for finding the perfect color palette for a quilt

Though I'm certainly not an expert at choosing colors, there are a few tools I find extremely helpful in finding a color palette for my quilts. Let's take a look, starting with the easiest.

Use the Color Scheme in a Favorite Fabric

This idea is so simple! We all have favorite fabrics in our stash, full of beautiful colors, those that really speak to us - otherwise we wouldn't have bought them. Well, it's time to pull those out for color inspiration! That's what I did when choosing the color palette for Zen Garden.

green gold red orange fabrics for a quilt


Though that floral print in the upper left corner is a really old print, I just love the warm, rich colors in it, and pulled fabrics using those colors as my inspiration. I tend to look at the colors in the print, but fabric manufacturers make it even easier by printing color palette dots in the selvage. 

printed color palette in the fabric selvage


Once a group of fabrics are put together, the initial inspirational fabric can be included in the final quilt, or not - it's your choice. I recently found the fabric seen above at a local LQS and love the palette, but I'm really not interested in using the fabric in a quilt. Right now, I'll file this palette idea away for another time.

Note: when fabric shopping, if you see a color palette you like, but maybe not the fabric print, take a picture of the selvage palette. Then you can start building your own personal library of color palettes to draw upon for future inspiration.

Use a Pre-designed Color Palette

Just as palettes are on fabric, an already made color palette found online is another great option. There are a ton of websites, some of them better than others, devoted to pre-designed color palettes.  A couple of my favorites are:

This site is fun to use - just hit the space bar to generate a new and different palette - tons of palettes to be inspired by.

tan cream red black brown color palette randomly generated by coolor.co
 

This particular page of their site offers a wide range of colors to start with. Choose one, then choose monochrome, analogous, contrast, or triad for additional colors that play well with the chosen color.

seafoam green color palette from shutterstock


Or, choose any of the 101 pre-designed color palettes that Shutterstock offers - there's plenty here to get excited about. This one, called Grunge Graffiti, is another I'll add to my palette library.

grey blue sienna eggplant color palette from grunge graffiti


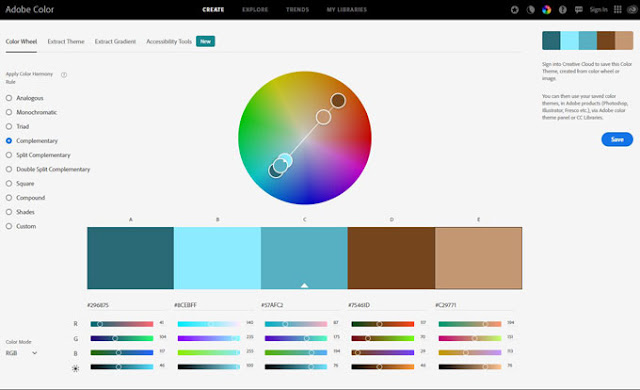
If your skills are a bit more advanced in using the color wheel, then create a palette using Adobe's Color Wheel. Settings for a palette theme include analogous, monochromatic, triad, complimentary, split complimentary, double split complimentary, square, compound, shades, and custom. That's a lot to play with!

three values of teal and two of brown for an ocean themed color palette from Adobe color wheel


And one site that's a particular favorite is iColorPalette.com. Clicking on 'Color Palettes' in the header bar reveals a list of pre-designed palettes by color or by theme. I love the theme palettes, as there are pages and pages of palettes, all based off of pictures - what better color inspiration is there than a picture!

beach color palettes from iColorpalette.com

Pull Colors from a Photo

As seen above, pictures are always a great way to find color palettes. And again, there are a ton of sites that will pull out the colors from a photo, providing an instant color palette. As a member of Canva.com, under 'colors', there's four places to get ideas: a palette generator, palette ideas, color wheel, and the meaning behind colors. All do a nice job, but the palette generator only returns four colors, not five like most of the others. I was a bit disappointed that the generator did not return the red from this picture.

four color palette generated by Canva from sunflowers

  
But over at iColorPalette.com, the uploaded image returned a beautiful color palette that included the red, which I saved for future use.

red yellow green and amber color palette from sunflower picture and icolorpalette.com


Coolors.co/image-picker can also make a palette from a photo, with an option of increasing or decreasing the number of colors in the palette. 

coolors.co sunflower color palette


Adobe.com/create/image-gradient will also pull colors from a photo, though you get to choose which colors to pull by moving the circles around. For me, that's a bit more work!

cream red yellow green sunflower color palette from Adobe image gradient


Isn't that a lot of great resources to use in choosing color palettes for quilts? Fabric shopping will be so much easier now with a color palette in hand, and the confidence to choose fabrics in colors that go well together. Start making it a habit of creating and collecting color palettes for beautiful quilts. And if you know of more color palette sites out there or have any favorites, let us know in the comments.

Happy Quilting!


Follow on Bloglovin