Showing posts with label hst. Show all posts

Friday, September 8, 2017

A Quick and Easy Way to HST's

Looking through this year's quilt gallery, I've certainly made lots of HST (half square triangle) projects this year.

So how about a tutorial on making multiple HST's from yardage? We're talking 8 HST's from just two squares of fabric - say what??? Yep, that's right  - two squares=eight HST's. What an incredible time saver! And we all want to save time so that we can make more quilts, right?

So let's go over the following handy-dandy reference chart for making any size HST for your project.

HST Size Chart


HST size and cutting chart

The first column, "Finished HST size needed" is the HST size after it's sewn into a quilt top. 

The second column, "Unfinished HST size After Trimming" is the HST block size before it's sewn into a quilt top. 

The last column, "Size of 2 Squares to Cut" is the size of the starting two squares needed to make 8 HST's for the required finished size. 
Please note: This is an over-sized square which allows for seam width errors. The resulting HST's will require trimming to the proper size, as given in the second column.

My quilts for the Making Connections Free Motion Quilting Workbook use 5" finished HST's. Following the 5" row on the chart, I'll make 5 1/2" unfinished HST's, like these below,


half square triangles

starting with 2 pieces of fabric, each 12" square. 


two squares to make eight half square triangles


Now the fun begins!

Mark guidelines for stitching
On one square, place a ruler corner to corner, and with a pencil, mark a diagonal line.


mark first diagonal line

Rotate the ruler, and mark the other diagonal.


mark second diagonal line

Pin the squares together.


pin squares together

Stitch a scant 1/4" seam on each side of the line.


scant quarter inch seam

This part goes really fast - nothing like zipping through straight line stitching!! Zoom zoom!


hst stitching


Make the first cut
Place the ruler vertically, with the edge in the middle of the block, and lined up with the outer edge. Make the cut.


hst cut 1

Make the second cut
Lay the ruler horizontally, again with the edge in the middle, and lined up with the outer block edge. Make the cut.


hst cut 2

Make the third cut
Place the ruler edge along one drawn diagonal line, then cut between the stitching.


hst cut 3

Make the fourth cut
Rotate the ruler to the other drawn diagonal line, and make the cut in between the stitching.


hst cut 4

Open the HST's and press 


eight hst blocks

Trim the HST's to the correct size
Be sure to line up the diagonal lines of the block and the ruler. Below, you can see the block is a bit larger than 5 1/2", and will trim to be perfect!


hst trimming

And there you have it! Multiple HST's, easily made, and trimmed to an accurate size - the perfect ingredients for a well constructed quilt!

Happy Quilting!


Friday, June 23, 2017

A Smaller Big Spin

Got one done, despite the heat! Here's a smaller version of The Big Spin,


A Smaller Big Spin


 based on the pattern from the book Stash Lab.


Stash Lab book


The finished size for my small version is 36" x 36", and was possibly going to be given as a baby quilt. But hubby has an blank orange wall behind him at work, and wants to hang it there. Guess he can't resist that big pinwheel either - it's my favorite part!

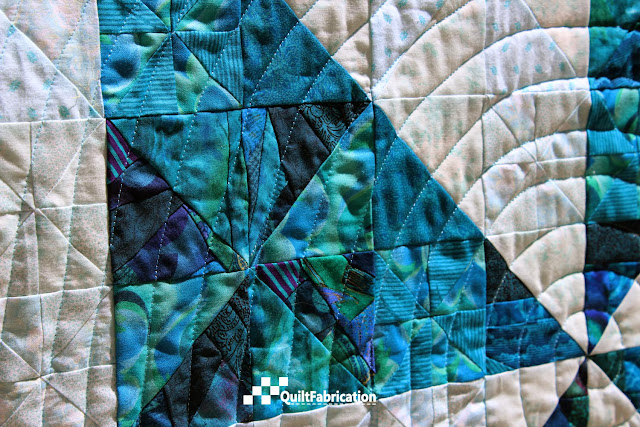
How about some closeups? The quilting follows that of the pattern, a big spiral, though I put little spirals over the smaller pinwheels.


A Smaller Big Spin quilting

I'm not that fond of those little ones, and in retrospect, probably should have just continued with the big one. But it's okay, they add some interest.


scrap fabric pinwheels from 'making fabric'

Take a close look at the pinwheels they spin over. Those, plus some of the pinwheels that make up the big one, are made from the 'making fabric' scrap project.


making fabric from scraps


There's the light ones seen above, and the dark ones in the picture below.


scrap fabric pinwheel

It's amazing how those scrap fabric pieces take on the identity of a printed fabric, a very useful illusion for scraps to make.


dark scrap fabric pinwheels

Being that this quilt is a small version, I couldn't exactly follow the layout in the pattern. That meant some designing on my part. Here's a look at three different settings before the final version.


three versions of pinwheel settings


For fun, can you guess how many pinwheels are in this quilt? And how many HST's? Leave separate guesses for each in the comments below. The person who is close without going over for each guesstimate will win a little prize! Please, one guess per question per person. Guessing game will finish next Wednesday night, June 28, 2017. Good luck!


So there you have it, a fun quilt that met lots of goals! Used 'made up fabric' in the pinwheels; marks another finish for aqua for RSC17; and another quilt from Stash Lab (affiliate link). Hip hip hooray!


Thursday, April 28, 2016

Little Bit of Sweetness plus tutorial

Who doesn't love a Little Bit of Sweetness? And all that great puff!

This is the latest in my Think Outside the Box HST Challenge, though I wouldn't say it's as creative as the last two, Light at the End of the Spiral and Jagged.


Light at the End of the Spiral

                                                                 
Jagged

But it is an adorable baby quilt! Here's a straight on shot.


Based on the log cabin block, I've included some rough instructions if you would like to make one too. The quilt finishes at 39 1/2" x 39 1/2".

I started with triangles left over from the Heart to Heart table runner, pairing them up to make HST's, but squares can also be used. One HST/square measures 3 1/4".


Choosing one light and one medium value fabric to go around these blocks, they're cut into 2 1/2" strips. I got really lucky to find a pink dot and an adorable girly print in my stash - just enough for this quilt. 

From the light, a 3 1/4" x 2 1/2" rectangle is sewn to the larger triangle, with the 90 degree point on the right. This helps with consistency in the quilt, since blocks get rotated.


A 5 1/4" x 2 1/2" light rectangle is added on the other side of the large triangle, on the right.


Now for the dark side. Oh scary! Just kidding! A 5 1/4" x 2 1/2" rectangle is sewn along the top of the previous units.


And finally, a 7 1/4" x 2 1/2" dark rectangle finishes off the left edge.


Block measures 7 1/4" x 7 1/4". At this point, settings can be played with, but this is the one I liked. Every other block is rotated 90 degrees. 


The plain block color can also be played with. I thought about using pink, but just didn't like it, so I went with white throughout. Glad I did because of the pretty quilting design I came up with.


Some closeups, petals first.


Lots of starts and stops, so if you look closely you can see some of the thread build up from that. This is not a show quilt, and I'm sure a baby won't mind the thickness.

Here's a closeup of the block quilting.


And can't forget the back, where the quilting looks really awesome on pink polka dot flannel.


Now it's time to go make you're own Little Bit of Sweetness!

Monday, April 18, 2016

Jagged

Say hello to Jagged, my second HST quilt.


A bit of a rocky road getting this one finished, as some unstitching was necessary to get the top border to fit with the design. All of the light green triangles were removed,


and replaced with border strips,


so that the design was not interrupted by horizontal lines.


It looks so much better this way, and I'm glad I took the time to do it right.

Thankfully, the bottom was much easier since there were already dark triangles to work with, so no unstitching there.


For this one, I let the walking foot do the quilting. Using a clear monofilament thread on the top, and a purple cotton in the bobbin, the quilt was stitched in the ditch. In the top and bottom borders, the jagged design was continued. But for the side borders, I chose to keep it simple with a horizontal line that corresponded with the jagged points.


I could have done a fill in either the light or dark area, but because this design follows the notan principle, I didn't want one to dominate.


I'm pretty happy with this one, and it's sister, Light at the End of the Spiral.


It's been a good challenge, creating different designs from scrap HST's, so that the little bits didn't go to waste. I still have a couple more out there, just a matter of time to get to them.

I do wish you a wonderful day quilting!


Thursday, March 24, 2016

Light at the End of the Spiral

What an incredibly corny, common, and mundane title. Light at the End of the Spiral.


Thinking that this really wasn't a thing, I Googled the term, and was stunned at how many spiral images with center lights there were. Ok, so I'm not crazy after all! Maybe I just don't get out much.

But really, this is an appropriate title, as I had been working on some blocks with a lot of black in them that were really dragging me down. Funneling that dark energy into this, then stirring it around to come to lightness and the feeling that it has all worked. I felt the quilting gods smiling down upon me after finding the perfect fabric for the funnel, then a beautiful batik for the back,


and designing a simple, complimentary quilting design in minutes. One of those Zen moments of being totally involved in the experience. 

Made from 2" unfinished HST's, this finishes at 23 1/2" x 25", here are a few closeups.


See that squiggly line in the second spiral on the right? At first I thought it was a piece of thread, but no, it's in the print. Funny what the eye picks up on!


Straight line quilting, 1" apart in the green, 1/4" apart in the purple.


Now I know this isn't made with the prettiest or trending fabrics, or that the design may need more tweaking, but what's important is my experience in making it. Not only did I succeed in my HST Challenge, using up fabric scraps from Roundabout that would have been tossed, but designing something with meaning, at least for me. Now to find a place to hang it in the studio. And by the way, Roundabout was given to a dear friend who absolutely loves it.

Check out the tutorials for no mark straight lines and matching angled binding that were used on this quilt.

HST project #2 is still in the works, waiting for it's 'moment'. 


The Notan inspired piece is sewn together, but needs some playing with as I have no more background fabric. But you know me, I'll figure something out. 

Here's to your Zen moment! Have a great day quilting!


Follow on Bloglovin

My Favorite Patterns