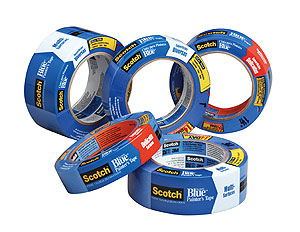
What's the magic? Blue painters tape!

Scotch Blue Painters Tape
Personally, I use .70" and .94", but it comes in several other sizes to suite any need. For this project, I used .70".
On this little quilt, the purple spirals are 1" wide, which I wanted to repeat in the quilting. The .70" tape, in addition to the distance of the ruler foot outside edge from the needle, made for an almost perfect 1".
On a domestic machine, the walking foot should be used, with the distance from the foot edge to the needle taken into account when choosing the appropriate tape size.
Setting up the tape is easy. A 12" to 18" length is best, otherwise it can get bent when applying, and tangled when removed. The tape is pressed down next to the straight edge to follow, in this case, the spiral edge.
On the longarm, place the ruler on the other side of the tape, and quilt the line with the foot just skimming the tape edge. If using a domestic machine, use the edge of the machine's walking foot along the side of the tape as the guide.
Reposition the tape for the next line, using the previously stitched line as a guide. The tape can be reused around six times before it looses it's stickiness.
Continue stitching, and repositioning until all lines are quilted.
Such an easy way to achieve no mark straight lines.
What else can be done with tape?


Great tip Susan, thanks!
ReplyDeleteWould never have thought of using this method with my longarm. Great tip thanks Susan. And I love this little quilt.
ReplyDelete