Wednesday, October 6, 2021

Fall Foliage Mini Quilt

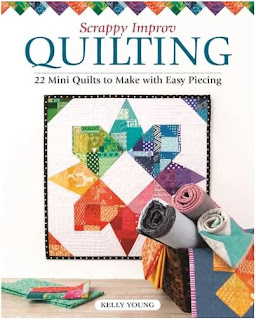
Yay! After sharing the orange bounty last week, it's time to reveal my project for Kelly Young's new book, Scrappy Improv Quilting (affiliate link). Kelly is the creative quilter behind not just this book, but also Stash Statement (affiliate link). She blogs about her quilts over at My Quilt Infatuation, where there's always some great eye candy!

And now, with a ton of scrappy goodness, here's my version of Fall Foliage, one of my favorite quilts from her new book.

orange scrap fabrics make a maple leaf


I just love how Fall Foliage turned out - this leaf has such a colorful personality with scraps from orange, yellow, red, and a few bits of brown. Certainly more colorful than the all-brown oak leaves my tree provides this time of year. Oh how I miss fall in New England!

orange scraps to make a maple leaf


Now, this is not the first time I've made a quilt using scraps to make blocks, which then make a quilt. I find stitching my scraps into usable blocks to be my go-to scrap reduction method. It's easy, creative, and the results are always good looking.

For this project, I started with these small and wonky bits,


trimming them for the next scrap additions,


and then they ultimately look like this - blocks.


If you're new to what Kelly terms 'improv piecing', then you need one of her books. She does a fantastic job of explaining the process, making it simple and stress-free, to make beautiful quilts. You'll be thrilled with the results while reducing that scrap pile!

quilt book cover


quilt book cover


Here's a few more closeups showing both the scrap blocks and the quilting.

gold quilting on a maple leaf quilt


I chose Glide Military Gold thread and a pantograph called Maple Syrup, resizing it to fit plus redrawing it to make curlicues instead of big open curls. Well worth the extra effort!

gold quilting on a maple leaf


The Scrappy Improv Quilting book tour has just a few more weeks to go. Visit my fellow quilter, Preeti, of Sew Preeti Quilts to see her version of Birds of a Feather today, and view the entire list of quilters and their projects at my Scrappy Improv Quilting post. Also, check out my interview with Kelly to learn more about this creative quilter!

Happy Quilting!


Follow on Bloglovin

Enjoyed this post? Don't miss out - get posts delivered directly to your inbox with follow.it.  

           
GET POSTS BY EMAIL


My Favorite Patterns

Tuesday, October 5, 2021

Benzene Ring for QBM Science

Welcome! The Quilt Block Mania group is playing with science this month! And right up my alley too, as I have a degree in Biology, with a minor in Chemistry. Of course that was years ago, but I do remember my classroom note taking required the drawing of benzene rings. My future hubby gave me a small plastic engineering template to make drawing those hexies so much easier - maybe that's why I married him! 

Nowadays, I let the computer do any hexie drawing that I need, which is how I came up with my Benzene Ring block.


Not that this really matters much, but notice my real block is in a different color palette than the given Design Seeds autumn colors we were to use this month.


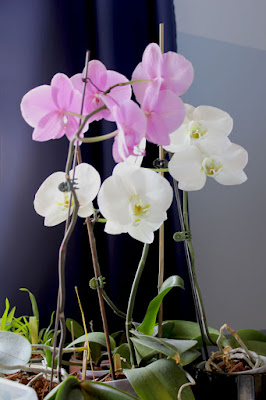
That's because I was inspired by this color scheme of my orchids against an indigo curtain, 


and want to ultimately make a quilt using both this Benzene Ring block and my color inspiration. While I have no problem with the QBM palette choice, I just didn't want another orphan block hanging around!

Don't worry though, here's the Benzene Ring block in the Design Seeds palette, which looks quite nice.

dark, medium and light greens make a benzene ring


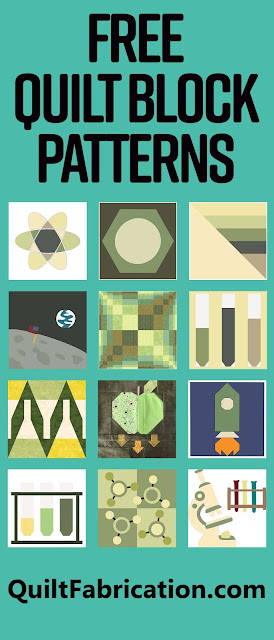
If you haven't already, visit with the other quilters of Quilt Block Mania quilters to see what they came up with using the autumn palette and the science theme.


Rocket Ship Quilt Block by Carolina Moore
Using Fibonacci in Quilts at Scrapdash
Microscope & Test Tubes by Appliques Quilts and More
Test Tubes FPP Block at Penny Spool Quilts
Benzene Ring from QuiltFabrication
Erlenmeyer flask at Patti's Patchwork
Fall Prism at Blue Bear Quilts
Atomic at Pretty Piney Quilts
Test Tubes by Mom and Me Quilting Co
Discovery by Inquiring Quilter
Molecules at Perkins Dry Goods
Gravity at Duck Creek Mountain Quilting

My finished 12" x 12" Benzene Ring block includes two methods for sewing the circle. The first and easiest, is to use fusible applique. The second method is a bit more challenging, but I think it looks nicer - an inset circle. It's what I used on my test block. 

For the inset circle, the pattern has full instructions for cutting the circle, using freezer paper plus glue for the seam, and techniques on how to stitch it in. If you're curious, I have a tutorial on Inset Circles for reference.  

***** Sorry, the Benzene Ring block is unavailable at this time. ***** 

Feel free to tell others about QuiltFabrication and become a follower yourself through any or all of the following: direct delivery of posts to your inbox, or by following on Bloglovin, Pinterest, Instagram, Facebook, or YouTube.

Happy Quilting!


My Favorite Patterns


Friday, October 1, 2021

Making a Memory Quilt

A while ago, my neighbor approached me about taking some of her recently passed father's clothing and turning them into quilts. She already had a friend take a number of shirts to make them into pillow covers, to give to family as gifts, and now wanted quilts as gifts for a few special people in his life.


So, after a bit of design discussion and sorting, I came home with 2 bags full of lined jackets and heavy flannel shirts to make into 3 quilts. Here's group 1, which have flannel or denim fronts with fleece lining. Two are just shirts, so I'm adding the red/black plaid fleece to the back.

denim and fleece jackets


Given these items to work with, this is not going to be a standard t-shirt quilt. No, we decided to use a quilt-as-you-go technique, abutting large pieces next to each other, then using sashing to hold them together. Because I have a longarm, the quilting part will be done when it's all put together. 

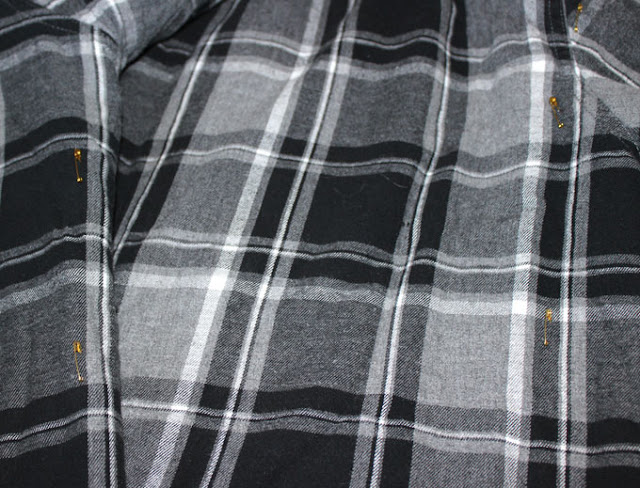
So, where to start? First thing I did was pin the front and back together near the side seams, to keep the parts together throughout the trimming and sewing process.

safety pins on a shirt


Then I cut the garment apart at the side seams, extending the line into the sleeves, to get two large chunks. I'm going for as much fabric as I can here.

fleece jacket cut into squares


After a bit of smoothing and pin readjustment, it's off to cutting straight edges. Again, I'm going for as much fabric as possible, not concerning myself with a particular size. All I need are parallel edges and square corners. I'm certainly using the grid on the mat to help with that!

trimmed fleece jacket front


Before these pieces get handled further, I did stitch down the front opening, leaving the buttons intact. The same on the back, if needed. There's also a tuck stitched down at the spot where the sleeve meets at the underarm, to take care of excess sleeve fabric. Now this piece is ready for the sashing.

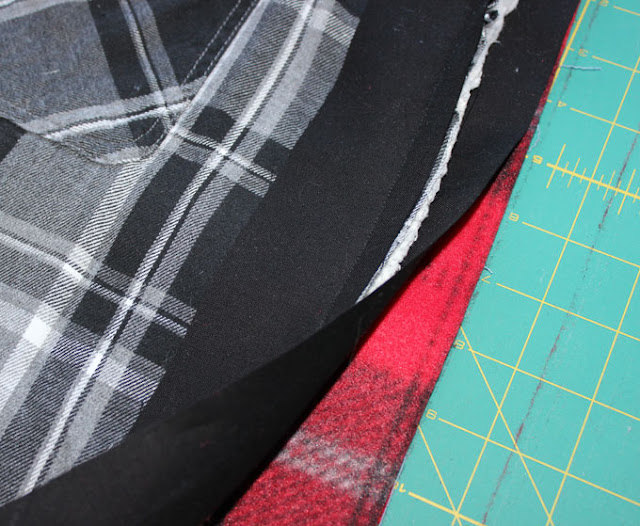
After sandwiching 2" wide black sashing strips around the front and back of the jacket, 


I sewed a 1/2" seam. In the picture below, the sashing on the back of the jacket is folded forward and extends past the seam, for use in the next step.


Making sure I'm not confused as to which side of the adjoining jacket to use, I'll just say that as a rule of thumb, the side that I consider the front (flannel) goes face down. Which means I'll stitch that folded forward sashing piece to the back, in this case the fleece side, of the jacket.

quilt as you go method


After that step, this is the front, with sashing and two abutted jacket pieces,


and this is the back, with the sashing join complete.


That's as far as I've gotten, as I'm repeating the process on the next two rows. Before I finish securing the sashing on the front, I'll hand stitch a wide zigzag to hold the jackets together, preventing any curling within that sashing. There's still more to go, and I'll keep you updated with the progress in future posts.

Until then, Happy Quilting!


Follow on Bloglovin

Enjoyed this post? Don't miss out - get posts delivered directly to your inbox with follow.it.  

           
GET POSTS BY EMAIL


My Favorite Patterns