Showing posts with label quilting video. Show all posts

Friday, August 20, 2021

No Mark Triangle Quilt Motif

As promised, a new video on how I quilted the diamond/triangle motif used on Qubix.


This motif looks so pretty, especially on that star fabric! And yes, you read it correctly - no marking was involved to quilt this motif. It's all about putting ruler lines to good use.

That's what this tutorial is all about - how to use ruler lines as reference points to stitch a design. Check out my No Mark Triangle Quilt Motif video to see this diamond/triangle design stitched out in real time.

***

As far as rulers go, my favorite is the 2" x 7" Little Girl longarm ruler by The Gadget Girls, who unfortunately, have retired. But the ruler is still available through Hab and Dash, my favorite thread supplier. I like it because it's easy to control, and comes with several 1/4" lines horizontally, a few vertically, and 2 lines at 45 degree angles, all just enough to help map out a quilt design.

Those ruler lines plus the block corners are all I needed to create this motif. Starting my stitching 1/4" away from the sashing, in the center of the triangle, I liked the angle that occurred for the next stitching line when positioning my ruler edge at the block corner.


Then it's the customary stop 1/4" away from the seam, creating echo lines.

For the mirror angle on the other side, the stopping location is total guess-work. I'd rather stop short, test my ruler measurement/placement on that side to see how much further I need to go before starting the angled stitch line.


Once everything is lined up with the corner and the center point, the stitching can continue. And now I have a diamond shape in my triangle.

For the triangles on the sides of the motif, I played with the angle I wanted, taking note of where the block corner was in relation to the ruler lines. For this size block, it's 1 1/2 lines. I'm also using the ruler's 45 degree line to help placement.


That's an easy line to stitch, again stopping at the seam, echoing, then continuing with an echo along the sashing to get to the other side of the block.

Once again, it's guess-work as to where to stop but the ruler lines come in handy for placement. In this case, I was a couple stitches short, so after adding those, stitching the last angle to complete the triangle was a breeze.


Here's the motif again - oh so simple yet perfect for the space.


I hope this pretty little diamond/triangle motif has served as inspiration for using more rulers in your quilting.

Happy Quilting!


Follow on Bloglovin

Enjoyed this post? Don't miss out - get posts delivered directly to your inbox with follow.it.  

           
GET POSTS BY EMAIL


My Favorite Patterns

Monday, September 14, 2020

Freezer Paper Piecing The Great Outdoors Tent

I love the tent so much in The Great Outdoors quilt, that I'd thought I'd put together a video showing how I put the tent together using freezer paper.

orange freezer paper pieced tent on an aqua background by QuiltFabrication

The tent in the Great Outdoors quilt was Foundation Paper Pieced the traditional way. All the seams were stitched through the paper, which was fine. 

Note: the pattern has been updated since making the video, switching the labeling of the E and F units. The multi-fabric unit F in the video is now unit E, and the new F is old background E. Though the order doesn't really matter, it just makes for a better looking unfinished block. This is the before, and the after.

orange tents on an aqua background


Anyway, what I found was that for the large size fabric pieces in the F unit (now E), I had to use too many pins to hold it to the paper, which resulted in not only paper warping, but the fabric flopped all over the place.

Determined to continue using the traditional paper piecing method, I folded up a couple of pieces of tape and held the fabric to the paper that way. Certainly not the best idea, but it worked. 

And I kicked myself for not printing out the tent pattern onto freezer paper, my favorite way of paper piecing.

Why do I love freezer paper for paper piecing projects? Because it holds the fabric pieces firmly in place, the seams can be pressed open if needed, and there is no paper to rip off the back of the block when finished. Three big wins in my world!

In the Great Outdoors pattern, the tent can be made using either method, though I recommend freezer paper. And that recommendation brought about the idea for making a video to see how it's done, as a reference for those who have the  pattern. Of course, it can also be viewed to learn how to paper piece using freezer paper. 


The video starts out using the freezer paper foundation piecing method, where pieces of fabric are added to a unit that contains three fabrics (unit now labeled E in the pattern). The sewing takes place next to the folder freezer paper seam line, not through the paper. (Also see the written tutorial, Freezer Paper Foundation Piecing)

freezer paper foundation pieced tent unit F


And as the video goes along, the freezer paper seam allowances tend to get a bit in the way, and a switch to Freezer Paper Template Piecing would have worked better. In that method, the freezer paper seam allowances are removed before any fabric pieces are sewn, as seen in this example from another project.

green and pink fabrics with freezer paper templates ironed on


In re-watching this video, I will say I need to shift the piece against the machine bed more to the left, as I caught the paper underneath several times. That's ok in this block, as it's not crucial in getting things lined up, but if I had a more precise block I was working on, it would be an issue. 

Given that and all the folding back of paper seam allowances, the pieces go together to make a realistic tent. And as usual, there are tips and tricks along the way!

Enjoy watching the tent being created, and think about trying paper piecing with freezer paper, both as a foundation and as templates, on your next paper pieced project.

Happy Quilting!


Follow on Bloglovin

My Favorite Patterns

Friday, August 7, 2020

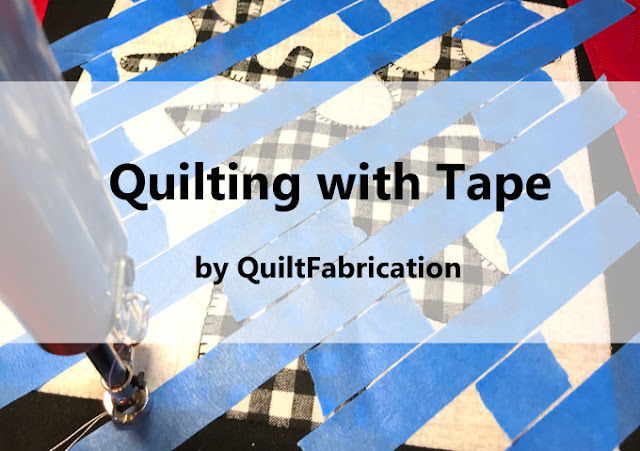
Quilting with Tape

Do you have difficulty quilting straight lines? Have you struggled with any of the following:
  • keeping lines consistent at the same angle?
  • maintaining even spacing across a block or quilt?  
  • matching lines on opposite sides of a motif or applique?
Then consider quilting with tape!

applique quilt block with blue painters tape to mark straight lines for quilting

Yes, tape. Painters tape, masking tape, or even quilters tape will keep those stitches in line!

I always have a couple of different widths on hand, usually a multi-sized pack of 1/4", 1/2", and 3/4" blue painters tape (affiliate link) giving me just the right amount of stickiness in an easy to see blue. A multi-size pack of masking tape (affiliate link) is another great choice, if I can't find the size I need in blue. Quilters tape (affiliate link) is limited to a 1/4" width, which, depending on the application, would also work fine.                                                                         

Of course, this is not the first time I've used tape, finding it very useful for stitching the straight line background fill on Light at the End, plus other quilts. Tape is so useful - it's what I recently used to create the straight line quilting behind the deer heads of Reindeer Wreath

Finding 3/4" blue painters tape provided the right scale for my design, I used it to mark and space my lines. 


The longest piece, the design anchor, is laid down corner to corner in the block. Short pieces are used as spacers since straight line quilting can be stitched on both sides of the long piece. No need to cover everything with tape!

Then all I needed to do was stitch next to the tape, lifting the end up here and there to travel to the next line via the block edges or motif. Super easy! Check out the Quilting with Tape video to watch it in action.


Notice that all of that straight line quilting is continuous - no stops, starts, and tie-offs to deal with. Here's a valuable tip: only travel over previous stitching 2 times, for a total of 3 layers of stitching. Any more than that and the thread buildup becomes noticeable.

Though quilting with tape may seem time consuming, it's worth it! Here's why:
  • the angle was always correct
  • the stitch lines on opposite sides of the head applique matched and lined up
  • the spacing between lines was consistent
  • the line was straight, not wobbly or shifted as sometimes happens with long rulers
  • the ruler and my hand was always safely in front of the needle and not awkwardly trying to align stitch lines with ruler markings behind the needle
  • the whole design stitched continuously by traveling around the applique and block edges
Need I say more?

If you watched the Quilting with Tape video, you'll see I did all of this straight line stitching on an Innova longarm. But this technique is also possible on a domestic machine. The steps are the same: use the tape to mark the stitching lines, stitch, and travel to the next line using the block edges or motif. What an easy way to take your quilting to the next level - nothing like having a few more tools in the quilting toolbox!

Happy Quilting!

Follow on Bloglovin

My Favorite Patterns

Monday, July 13, 2020

Making Blocks from Crumbs

Hi all! It's a tutorial day and all about making blocks from crumbs!

making blocks from crumbs youtube QuiltFabrication


Every time I post my RSC2020 pinwheel blocks made from crumbs, they always receive a lot of love, as they should. Not only are they fascinating to look at because of all the different fabrics in them, but they are such a great way to use up all those small bits and pieces leftover from other quilt projects. My favorite is the pink one from June.

pink pinwheel block made from crumbs


Ever since I launched the Celilo quilt pattern, I've been wanting to make the rainbow lap version. And what better way to do that than with block units created from the scrap bag, especially those crumbs. So I've pulled out the bags that are ROY G BIV, and like RSC2020, hope to sew a color a month. I've got some squares, rectangles, strips, etc, but there's also those oddities that lurk there too.

ROY G BIV color scrap collection

I love this method of creating blocks from my scrap bag, as all those small, odd pieces give such dimension to the block. And I'd thought I'd share my process with a video tutorial of Making Blocks from Crumbs. You can watch as I group and stitch pieces together, offering suggestions and tips along the way. At the end, I show a few quilts made from crumbs, along with some construction hints too.

Enjoy the video, and embrace those crumbs - they have every right to go into a quilt and get the love they deserve!

Happy Quilting!


Follow on Bloglovin

My Favorite Patterns

Monday, June 29, 2020

How to Reduce Bulky Quilt Corners - Step by Step Video

Tired of having thick, lumpy quilt corners? Or fighting to pull enough fabric to the back because of multiple fabric layers in the corner? Want to learn how to avoid that? 

Quilt Binding - Reducing Bulky Corners - tutorial with video by QuiltFabrication
 

All that's needed is a simple change in stitching the binding at the corner, a snipping of a bit of fabric, and that corner binding will fold nicely, making flat, beautiful quilt corners!

I learned this fabulous binding trick several years ago, and it's how I finish all of my binding corners. I've demonstrated this technique several times to members of my guild, most recently via a Zoom meeting. After several quilters tried it, many raved and excitedly thanked me for sharing how easy it is to now make beautiful corners - this corner binding trick is certainly all the rage!

Having recently posted my favorite binding tutorials, in the written-with-photos form, I thought of an even better way to share them: by making a video! With a video, it's more than a front row seat - it's the opportunity to see exactly how I'm demonstrating the technique, right on my own quilts. How awesome is that??

Have a look at the first video in the binding series, How to Reduce Bulky Quilt Corners - Step by Step. It's full of up close, detailed video footage showing how to sew the binding at the corner, and clipping the excess fabric. Just check out those beautiful flat corners in the picture!

flat beautiful quilt corners using the reduce bulky corners tutorial from QuiltFabrication

I'm excited to bring my tutorials to video, to share with everyone quilting techniques that not only save time and frustration, but to also show new or different methods to advance everyone's quilting skills. 

And now it's time to share! Here's the link to How to Reduce Bulky Quilt Corners - Step by Step video! Feel free to share this with your quilt friends, and please consider subscribing to my YouTube channel. There's more quilting tutorials I plan to share!

Happy Quilting!


Follow on Bloglovin

My Favorite Patterns

Friday, April 24, 2020

Curly Quilt Fill

In my joy of sharing my mouth watering Chocolate Dipped Strawberries early this month, I completely forgot to talk about the quilting, especially the curly quilt fill used in the background.


Curly Quilt Fill on the Chocolate Dipped Strawberries runner by QuiltFabrication

Isn't it sweet? How about adorable? Cute? Charming? Delightful? Downright lovely? However it's described, the curly quilt fill is easy to stitch, whether using a longarm or a domestic sewing machine - let's see how!

First, some drawings. Start near a seam or an edge, working outward with a circle that curls into the center. Let the curl move inside the circle just enough without overdoing it. Too much, and it becomes a spiral.


right and wrong curl length for the curly quilt fill

Backtrack over the curl to a spot to start the next the curl, which curls in the opposite direction. Think of ram's horns when doing this.


backtrack and start a new curl in the opposite direction


Keep making curls to fill in the area, backtracking either a little or a lot to get to the desired area. 


curly quilt fill drawn out to fill the area

Some areas really take on the ram horns idea, while other areas are more linear. The backtracking decides where the next curl will start. Let's see this curly quilt fill stitched out.


The size of the curls can also change for different looks, like on Ladybug Dance.


varying curl sizes on Ladybug Dance by QuiltFabrication

or stay a consistent size as in the background fill in Chocolate Dipped Strawberries.

consistent size curly fill on Chocolate Dipped Strawberries

It's totally up to the quilter and the quilt as to which one works better. Either way, that curly fill will be sweet, adorable, cute, charming, delightful, or downright lovely - you choose how to best describe it!

Happy Quilting!


Thank you for following!
Follow on Bloglovin

Monday, January 27, 2020

Chicken Wire Quilting

Grab a 1/4" quilting ruler and head to the sewing machine - let's stitch some chicken wire!
Chicken Wire Quilting tutorial

Super simple to stitch, with just a marked grid and a ruler, what barnyard quilt would be complete without it? In this tutorial, I'll go over the stitching sequence first, followed by a video showing the stitching in progress, then a final discussion about scale. Let's get started!


Chicken Wire Quilting

Once the grid is set up, stitching starts at the middle of the left line of the first grid square (red dot), then down to the grid intersection. The stitches back over that line, and stop at the middle (red dot) before angling up to touch the middle of the top line of the first grid square.


start row 1 for chicken wire quilting
Then it angles down to the middle of the next grid line, 

starting row 1 for chicken wire quilting


and continues straight on that line to the next grid intersection.


chicken wire quilting


And straight back up it goes, doubling the stitching and looking just like the twist in real chicken wire, before angling again into the next grid square. Repeating the same sequence of stitching lines all the way across within the grid forms the first row of stitching.

completed row 1 for chicken wire quilting

The next row starts with the peak of the design, and is offset by half the grid square. Work either from the right to left for continuous stitching, or left to right with a new start, as shown below.


beginning of row 2 for chicken wire quilting

This offset row starts stitching at an angle to the center of the grid square, then down to the center of the grid line, doubling back to angle over to touch the straight line from the row before, at the grid intersection.


start of row 2 for chicken wire quilting

At the finish of the second row, the chicken wire design starts to take shape.


two rows of stitching to complete one row of chicken wire

Continuing the design is easy - just alternate the row 1 and row 2 stitching lines.

Here's a video, showing both rows being stitched in the a continuous line method.


Chicken Wire Scale

It's important to check the chicken wire scale to the quilt before stitching, as the open space length is more than the width in this design, and could lead to chicken wire that's bigger than expected. 

Since the size of the grid determines the width of the chicken wire, it's helpful to draw a grid in several sizes on a piece of vinyl. Then sketch in the chicken wire design, overlaying the design on the quilt to test the scale. 


chicken wire size testing
In the picture above, there's testing of a 1 1/2" width at the top, 3/4" in the middle, 1/2" below that, and finally 1" at the very bottom. 

On my test, the 1/2" chicken wire fits the scale of the chicks and would certainly hold them in, but it's too small a the scale for the rest of the quilt. Three-fourths was still too small, but 1" works fine as a scale to fit both the chicks and the rest of the quilt.


Who Rules the Roost quilt quilting by QuiltFabrication

And that's all there is to finding a grid size for chicken wire that fits with the quilt.

Wasn't that easy? Now all those barnyard quilts can be full of chicken wire - have fun quilting!


Follow on Bloglovin

My Favorite Patterns

Friday, July 5, 2019

Straight Line Stipple Quilt Fill

Today it's about the quilting on the Holiday Stars place mat -


Straight Line Stipple on the Holiday Star place mat by QuiltFabrication

I'm calling it a Straight Line Stipple.


Straight Line Stipple on the Holiday Star place mat


Here's the basic idea: meander through the area to be filled using lines in parallel and perpendicular - no angles.


Straight Line Stipple quilt fill drawn out by QuiltFabrication

Add dimension by changing the line of stitching, creating open boxes here and there. Notice there's no crossing over on any of the lines - this is a geometric take on the traditional stipple. And don't worry about maintaining an exact distance between the lines. As long as the overall density stays consistent, it will look great!

For my place mat project, the space between lines is anywhere from 1/8" to 1/2". For a larger space to fill, the spacing could be somewhere between 
1 1/2" to 3". It's all up to what the quilt (and quilter) want.

Here's a video to see the Straight Line Stipple being stitched, using backtracking within the ditch to move through the space.


Quite a fun, easy, modern fill, suitable for a domestic or longarm machine, and perfect for a variety of quilts. Enjoy!


Follow on Bloglovin

My Favorite Patterns