Monday, February 26, 2018

Improv #4 Update

Here's a work in progress picture of the fourth Improv Patchwork (affiliate link) quilt -


Raspberry Cheesecake quilt in progress

you can kind of tell that my free-form cutting got a bit free-er as the quilt progressed from left to right, cause the left side of that first strip sure is straight! I think I'll unsew that and give it a few deeper curves, and maybe add another strip over there. Have to see how much of the strip set I have left.

So, how was this quilt made? Pretty much like the first set of wavy improv stripes, but cutting curves from a strip set and solid fabric. Check out this super long strip set, 


fuchsia strip set

approximately 54" long, 18" wide. Notice all the stored fabric underneath - all that yardage I sold off hardly made a dent!

And just like before, I cut matching curves from the strip set and the solid fabric,


cutting matching free hand curves for improv patchwork

using the 40" width of the solid, and moving the strip set up and down for each stripe so that the same fabrics didn't land at the same spot every time. After I fix that first section, this will probably be wide enough to call it finished.

By the way, I found this cutting technique especially useful for piecing batting scraps together. See how one edge is ragged and the other a smooth curve?


batting to join

Placing the smooth curve on top of the ragged, then cutting following that smooth edge, 


batting after smooth cut

makes for a well-fitting seam, easily zigzagged together.


joined batting scraps

Ta-da! Batting ready to go, though not for this project. 
So, even if you don't want to try free-hand cut stripes or curves with fabric, just know you can do it with batting!

Happy Quilting!


Follow on Bloglovin

Friday, February 23, 2018

Old Thread - Ok or No?

Everyone has it - old thread. But do we want to use it?
It's certainly a question I think about when choosing thread from my stash.


variety of thread

Above are a few of all the threads I have stored away, anywhere from 2-15 years old - are they still good? And how do I find out??

First, there are several factors that affect the lifespan of thread: light, humidity, and dust.


Light:

We all know what light does to quilts over time. Well, the same happens to thread, not only fading it, but weakening it.


Humidity:

Low humidity makes for dry, brittle thread. And high humidity invites mold.


Dust:

We all have it, no matter how clean we keep out space. Unfortunately, on thread, it's hard to remove. It too, can dry out the thread, and cause further lint buildup in your machine.


Storage:

The first step for keeping thread is to store it properly - out of light sources, in an even temperature and humid area, covered to be free from dust.


Testing:

Once all of the above conditions are met, how do I tell if questionable thread is still good? The best way is to unwind a bit and pull on it, trying to break it. If it snaps easily, then it's old, and should be saved for projects that DO NOT require thread for strength, such as basting, tacking, and other temporary hold projects. 

But what if you really don't want to part with that big, full spool? Then unwind a few layers, going up and down the spool, until a fresher layer of thread is exposed. Try the pull/break test again. Does it break now? It's up to you and your project as to whether the thread is usable. I personally have found that deeper down into the thread layers, the thread is fine.

But if you're totally unsure, then commit it to basting thread, or bite the bullet and toss it!

Happy Quilting!


Follow on Bloglovin

Monday, February 19, 2018

Improv Project #4

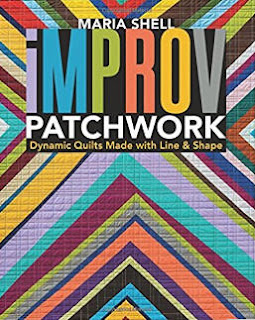
Yep, starting another improv project as there's still time left to explore the January/February Book of the Month selection, Improv Patchwork (affiliate link).


Improv Patchwork by Maria Shell

First, I need to start this post with a confession. In the fall, after working with the charm squares, I decided I had had enough of those charms, and sold the rest. This is all that remains.


Being in a 'clean out' kind of mood, I also sold off several bags of scraps, a couple containers of small squares, all fabric dyeing paraphernalia, and eight bags of yardage (25-30 yards each). It felt incredibly good to lighten the load, and relieve myself of the burden of using uninspiring fabric.

Unfortunately, of all the bags, the pinks and florals remained. Apparently, nobody likes those. The bags sit in the room, making it look cluttered, and causing an occasional twinge of guilt. Ugh.

Fast forward to last Friday. Thumbing through the Improv Patchwork (affiliate link) book seeking my next quilt to make, I came across Birch Stand - perfect!

Hmm, maybe I could use those pinks and florals for this one - I'll see if there's enough fabrics in there that work together. Adding a couple pieces from the keeper stash, I think I've got enough variety for this quilt.

fuchsia fabric pull for a birch stand style quilt

With the aid of my favorite Color Tool (affiliate link),

Ultimate 3 in 1 Color Tool

I'm pairing these fuchsia prints with the soft, buttery yellow of Kona Banana - yummy!

Now I'm off to make up strip sets - I'll keep you posted on my progress!

Happy Quilting!

Follow on Bloglovin