Showing posts with label art quilt. Show all posts

Friday, December 10, 2021

Tic Tac Cat

Here it is - my very special kitty applique quilt, Tic Tac Cat.
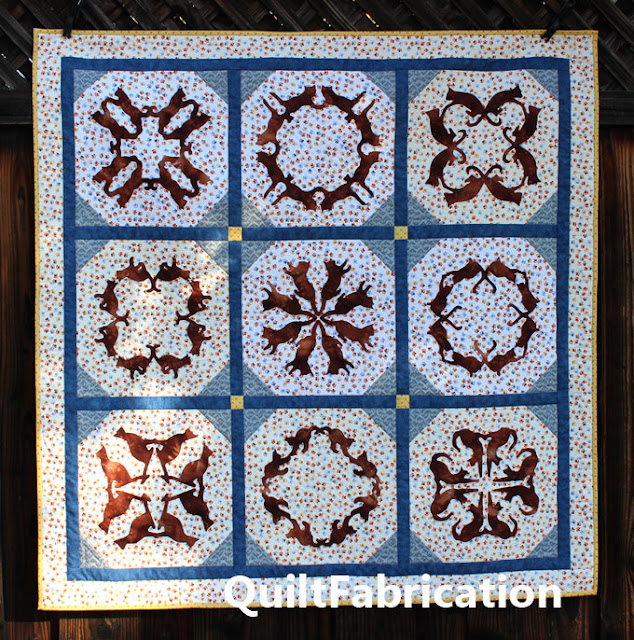
cat appliques in various arrangements

Though I don't know the exact year, I think these hand stitched cat appliques were probably started back in 2012, give or take a year or two. I say that because that was my hand stitching period, and, just like Mediterranean Rose, these sat in a drawer, waiting, this time for about 10 years.

I do remember what fun it was, tracing cat silhouettes in EQ6, then playing with the positioning so that they would make an interesting ring design. Unfortunately, due to EQ upgrades, I can't find my original files. All I have are some incomplete printouts, and no notes has to how I ultimately made the ring in fabric.

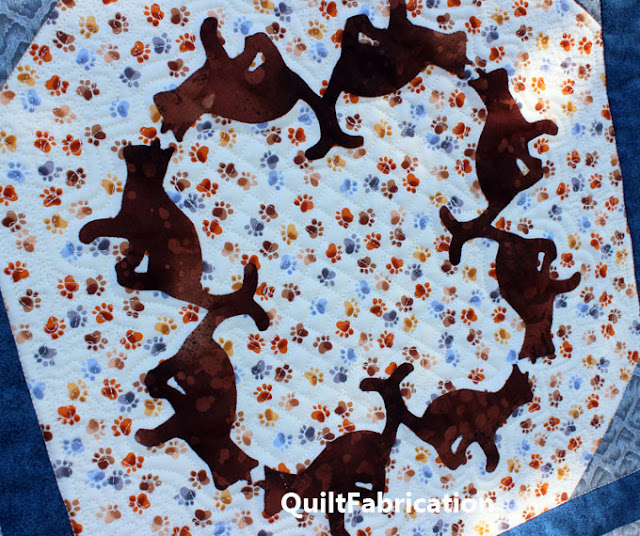
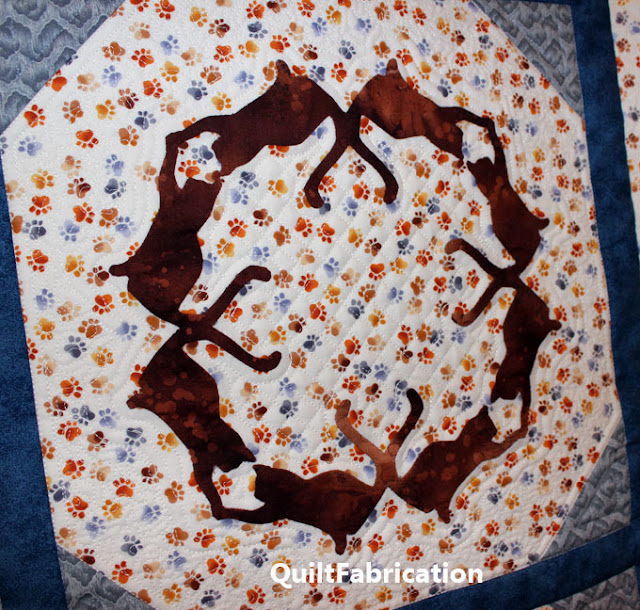
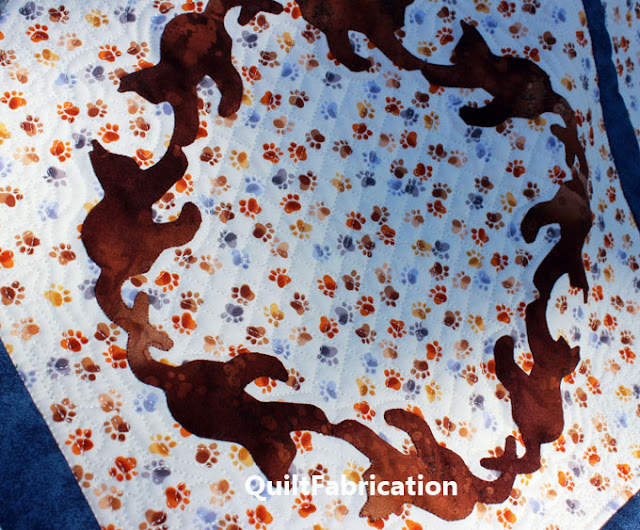
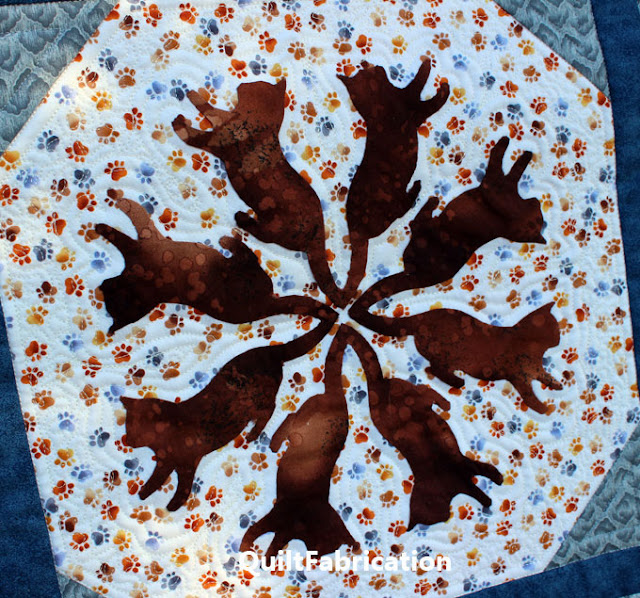
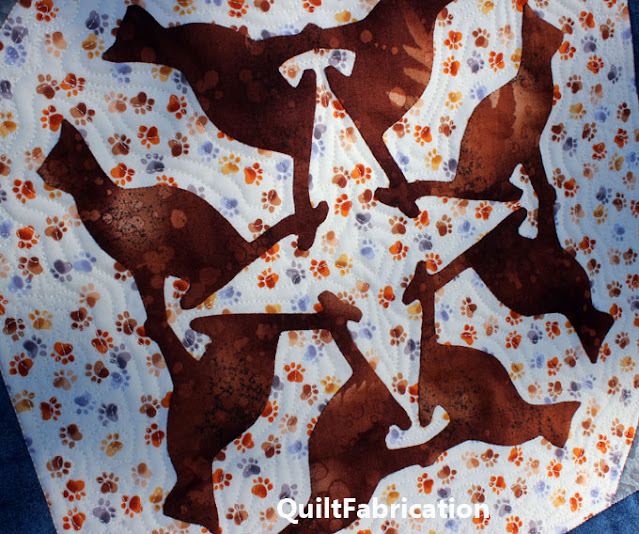
From the very first few blocks, this quilt has always been called Tic Tac Cat - the arrangement of the blocks reminds me of tic tac toe. If you look at, you'll see a ring made from the four middle blocks on each edge. Each of those blocks contains cat silhouettes that make a ring or the 'O'. There are big empty spaces inside, which I filled with crosshatching.
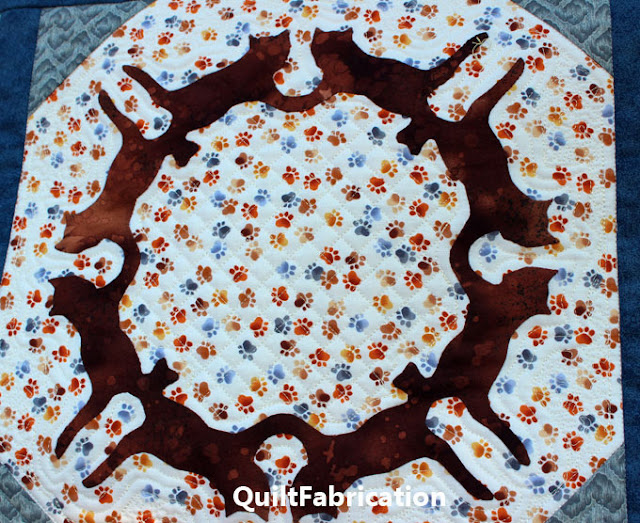
cat silhouettes in a ring

                                                    Ring 1


cat silhouettes in a ring

                                                     Ring 2


cat silhouettes in a ring

                                                       Ring 3


cat silhouettes in a ring

                                                         Ring 4


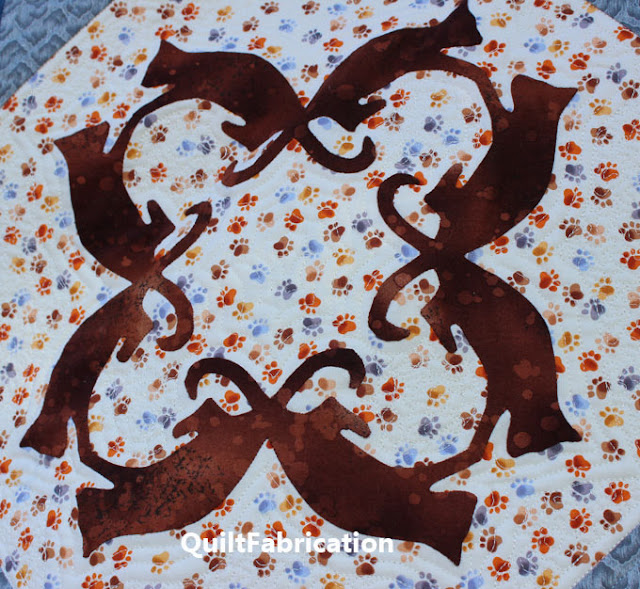
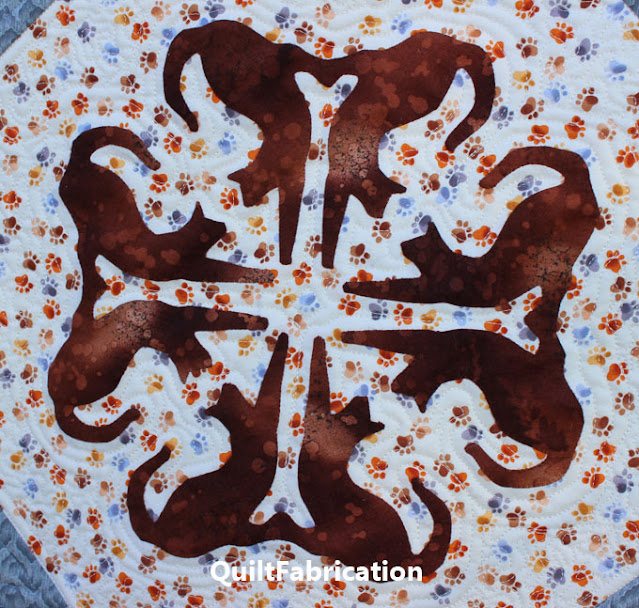
The 'X's are the five remaining blocks, in the corners and the very center. These blocks have (not so perfect!) echo stitching in the centers.
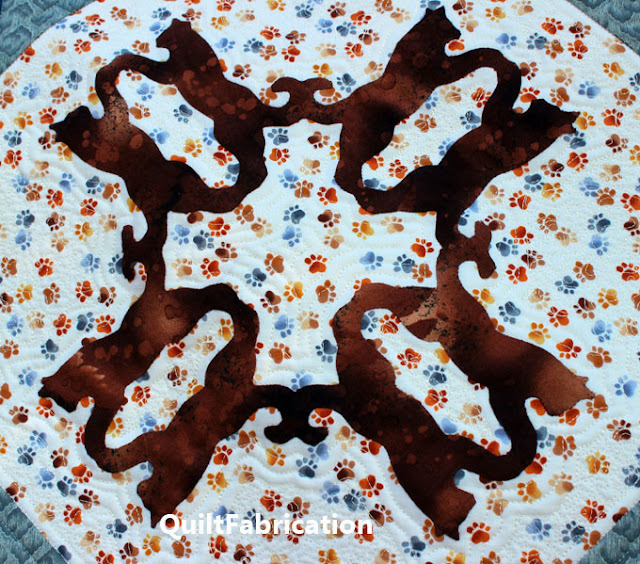
cat silhouettes in an x shape

                                                      X 1


cat silhouettes in an x

                                                     X 2


cat silhouettes in an x

                                                 X 3


cat silhouettes in an x

                                                     X 4


cat silhouettes in an x

                                                   X 5


As for the border quilting? Rather traditional, with swags, piano keys, and stippling.
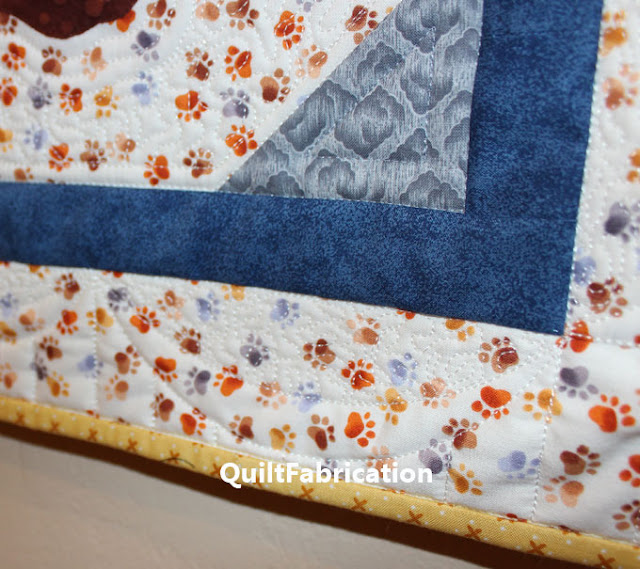
swag border quilting


And that pretty much wraps up Tic Tac Cat, a UFO now out of the drawer and hanging in my front entryway so that I can see it every day. Gotta love those kitties!!

Happy Quilting!


Follow on Bloglovin

Enjoyed this post? Don't miss out - get posts delivered directly to your inbox with follow.it.  

           
GET POSTS BY EMAIL


My Favorite Patterns

Saturday, May 29, 2021

Hold It Together - It's Paperclip Day!

Did you know today, May 29, is National Paperclip Day? I'm celebrating the humble paperclip, that indispensable office supply, with my delightful Hold It Together wall hanging.

several different colored paperclips on a quilt


Silly, I know, but I had a blast making this wall hanging full of fun, colorful paperclips. Take this wall hanging as seriously as you want!!

Some may see the humor in the Hold It Together statement in regards to paperclips. Some may see it as a representation of our busy lives. And of course, there's always the statement it makes regarding our past year of shelter-in-place. Any way you view it, Hold It Together is charming! 

9 different colored paperclips


Made with applique paperclips and lettering, the arrangement can be however you want. I chose to link the paperclips around in a circle, but they could be formed into a chain, or even a heap - the possibilities are endless! The Hold It Together pattern includes the full size paperclip and lettering applique templates - just print, trace, and fuse.

Now for some closeups. I went a bit wild on the quilting, doodling all sorts of designs. I think the craziness adds wonderfully to the mood of this quilt.


Hold It Together closeup 4


More closeups to show how all the areas are so different.


Hold It Together closeup 2


Hold It Together closeup 1

Here's a super close-up shot.


Hold It Together closeup 3


The border has simple piano keys, leaving all of the attention on the pretty quilting in the center.


Hold It Together border quilting

Don't you just love how black attracts all sorts of fuzz? Seems like removal is never-ending, though nothing that a lint roller won't take care of. I think I'll be able to hold it together!

Happy National Paperclip Day!


Follow on Bloglovin

Enjoyed this post? Don't miss out - get posts delivered directly to your inbox with follow.it.  

           
GET POSTS BY EMAIL


My Favorite Patterns

Monday, March 23, 2020

Using TAP or Transfer Artist Paper on Fabric

I'll admit, I'm pretty impressed with TAP or Transfer Artist Paper (affiliate link), used to create my super fun The Second Life of Quilts project!

windsurfer using TAP or transfer artist paper

Images are crisp, clear, and vibrant, better than printing directly on fabric, and even on paper. Transferring was easy too - just had to make sure I reversed images and ironed long enough. But yet to be tested is it's colorfastness and crinkling properties when washed. Once I do that, then I can really be a huge fan.

So, here's a few tips I learned before running TAP through the ink jet printer, and transferring to fabric. Some are highlights from two videos,
How to Use TAP Transfer Artist Paper,
How to Use TAP Transfer Artist Paper with Fabric, 

and others are my own observations. I totally recommend watching the videos to make sure of how the printing and transfer the process works. Certainly don't want to misprint or goof up a fused image and waste this product!

Here's a couple things I learned:


for image processing,

  • make images and lettering in reverse
  • fit as much as possible onto the page before printing
  • think about what color/print of fabric the image will look best on as TAP is transparent, allowing the background to come through on the image

TAP itself,

  • trim away as much blank space of TAP as possible before transferring to avoid image-free excess TAP from discoloring the background
  • protect the transferred TAP image with a piece of fabric or silicon sheet from the hot iron
  • be sure to press, with a hot, hot iron, for the required amount of time for complete image transfer
  • if the image doesn't completely transfer, keep ironing till it does
  • excess clear TAP can be removed by ironing over with a scrap fabric piece or a silicon sheet
  • TAP images can be ironed over as long as there is fabric or a silicon sheet covering the transferred image 
  • a matte finish is achieved by removing the paper while still very warm. A glossy finish happens when peeling the paper from a cold image.

Let's talk about image processing. For The Second Life of Quilts, the three black sports icon images were reworked in Photoshop to all have patchwork in their sails. I'm not a pro at image manipulation, and it took a few Photoshop video lessons to achieve what I wanted, but I got there. 


Once the images were done, I moved into Word, creating the lettering and testing out different fonts (there are 2). Then resizing everything to get it all to fit on one piece of paper, with a couple of print tests to check image size and such. 


The above is the normal printing orientation, so that I could do a test run of the quilt layout. 


images on printed on paper for quilt layout

Once I was happy with that, I made sure to reverse all images and double check, because TAP requires all lettering to be in reverse so that when it's transferred (ironed on), the words read correctly.


reversed images on printed on TAP for quilt layout

When that sheet came out of the ink jet printer, I was super impressed with the print quality on TAP - wow! And with that, I planned my attack.

First, I wanted the sail colors to stay vibrant and not get muted by the blue background. So, I cut the images apart, trimming away excess white TAP, and leaving just enough to keep some pieces connected.


reversed images cut out from TAP


The colorful sail portions were transferred onto white fabric, 


colorful sails transferred onto white


then a 1/4" of fusible was applied to the backside edges, with the front image protected by another piece of fabric. 


fusible web to backside of a TAP transferred image


Once cut out, they were fused, again with a piece of fabric on top of the image so that it didn't transfer to the iron.


TAP transferred image protected for fusing

There was a bit of stickiness peeling away the fabric, but the image remained intact. Adding in the black images required covering the fused image, 


protecting a TAP transferred image

and lots of hot iron pressing,


transferring a TAP image

for a great transfer!


transferred TAP images

The final result is a transfer with a slight sheen to it, and up close, it looks like it's been inked into the fabric. The hand is soft, though the appliqued sails, which are double fabric, are stiffer. And it was well worth cutting away as much excess TAP as possible, as there is a very slight value change on the background. If you look really hard, you can see a line between this guy's knees, though it's barely noticeable. So far, two thumbs up for TAP!

Someday I'll dream up another project using TAP, (affiliate link) with the plan to wash the item. I'm curious to see how images hold up - I'll keep you posted!

Happy Quilting!


Follow on Bloglovin

Friday, March 20, 2020

The Second Life of Quilts

What happens to old, retired quilts? Why, they find a useful, purposeful second life, such as any of these three possibilities!


The Second Life of Quilts mini by QuiltFabrication

Yes, any quilt can find a new, second life as a parachute, a hang gliding sail, or as the sail for a windsurfer! Certainly a perfect fit - just make sure to mend any holes!

Did this make you chuckle? Hope so! Welcome to my day of the Making Us Laugh Blog Hop hosted by Joan of MooseStash Quilting.

All of the images were transferred with TAP or transfer artist paper (affiliate link), which was not only really easy to use, but provided great transferred images. Can you tell I had a lot of fun? Weee!

parachute man image transferred using TAP or transfer artist paper


quilted hang glider


quilted wind surfer

I was lucky to find the perfect background fabric in the stash - a blue ombre, grading from the sky


The Second Life of Quilts top portion by QuiltFabrication


down to sea.


The Second Life of Quilts lower portion by QuiltFabrication


Notice the sails are appliqued on. That's because I wanted them to keep their vibrant colors and not get muted by the background blue, which is something to consider when using TAP (affiliate link). I'll have more on working with TAP, (affiliate link) and how I did the applique part on Monday's post.

And did you also notice the border? See any seams? 


seamless picture frame border

This is a 'picture frame border', a technique I learned from Noriko Endo's class in Houston. I actually remembered how to do it, and very happy with how it turned out. There's a tutorial coming on making this picture frame border next week!

I hope you've enjoyed this fun little project, and that it made you think about your quilt's second lives. I know I have a couple that would work great for sails!

Happy Quilting!


Follow on Bloglovin

Monday, March 2, 2020

March 2020 Book of the Month

This month's Book of the Month feature is something a bit different. It's not a book, but a new, re-formulated product for transferring images to natural surfaces:  Transfer Artist Paper or TAP (affiliate link).


Transfer Artist Paper

Graciously provided to me by C&T Publishing, I'm quite intrigued by this product, and inspired by our guild's recent speaker, Lisa Thorpe. She prints directly onto fabric with an inkjet printer, manipulating images and creating compositions before printing. With Transfer Artist Paper, (affiliate link) images are also manipulated before printing, then ironed onto any natural surface such as fabric, paper, wood, glass, or metal, making endless opportunities for creativity.

Images can also be drawn, painted, or stamped onto Transfer Artist Paper (affiliate link)- whatever the creative heart desires! Colorfast and crisp, the transferred images are washable and crack resistant on fabric. Not sure if I'll be testing that quality, as my project is probably for hanging. But someday I'll test it!

Lisa passed around all of her works so we got to see and feel them, and her compositions were quite lovely. She left her talk with 'just play' - something I'd like to try this month. With the upcoming Making Us Laugh blog hop, hosted by Joan of Moosestash Quilting, I'm thinking of a small collage piece using the Transfer Artist Paper.(affiliate link) I have no other details to share right now as there is no plan, but I will share more later on using this paper. 
  
Happy Quilting and Creating!


Follow on Bloglovin

Monday, May 6, 2019

Celebrate with Cake!

Our guild's quilt show was this past weekend, full of our members beautiful quilts, plus challenge quilts from those who desired to participate. Introducing 'Celebrate with Cake!', my creation for the guild's 
'How Do You Celebrate' challenge. 


Celebrate with Cake! by QuiltFabrication


Remember this fabric I wasn't too fond of?


SCVQA challenge fabric

Our little packages included not only these two challenging fabrics, but also the following rules: 
no larger than 24" x 24"
75% of the front is from the two fabrics
any additional fabrics ok, except white, black, or grey. 
Hmmm.

Celebrations - birthday's, weddings, baby showers, holidays, heck, even family BBQ's always involve cake. And having taken up cake decorating as a teenager, no occasion for a decorated cake passed me by. 

Thinking cake, then seeing the fabric, I was immediately struck by the tent roofs, and how one would make a perfect cake stand base. And lucky for me, one of those tent roofs was close enough to the center of the fabric along the bottom, making it the perfect spot to start building my cake.


cake base over a tent roof

With the addition of a few fused fabric scraps, ric rac, gold and silver lame, plus other trims, my tiered cake came together.


fused cake and decorations

Now for the quilting, which plays a big part in making this cake look real. I wanted this cake to puff up from the background, which meant trapunto work plus all of the quilting details on just the cake.


trapunto and detail cake quilting

With the details done, the extra batting got trimmed away,


trapunto on the cake


excess batting trimmed

and the whole top put on another piece of batting. Now to deal with that background!


echoed triangle quilting in the background

Quilting in earnest, I went for a dense, echoed triangle fill, to mute that background. Notice the dark maroon areas are even more densely quilted. The viewer gets to still feel the celebration with the circus tent background, without it overwhelming the cake. 

Check out how the cake puffs up away from the background - one could almost cut into it! And what cake isn't complete without roses? I found the perfect rose buttons - they look just like I would make them out of icing!


rose buttons on top of cake

Celebrate with Cake! looks like a delicious treat to me and another great challenge quilt to add to my collection!


Celebrate with Cake! guild challenge

I wish that I had pictures of the other entries to show - we have a lot of creative quilters in our guild. But, unfortunately, I could not attend due to an early birthday celebration for hubby - and yes, we had cake! And even if I did have pictures, I don't have permission from the creators to post them online. So, let's have cake instead!

Have a great day quilting!


Follow on Bloglovin