Showing posts with label longarm quilting. Show all posts

Friday, August 20, 2021

No Mark Triangle Quilt Motif

As promised, a new video on how I quilted the diamond/triangle motif used on Qubix.


This motif looks so pretty, especially on that star fabric! And yes, you read it correctly - no marking was involved to quilt this motif. It's all about putting ruler lines to good use.

That's what this tutorial is all about - how to use ruler lines as reference points to stitch a design. Check out my No Mark Triangle Quilt Motif video to see this diamond/triangle design stitched out in real time.

***

As far as rulers go, my favorite is the 2" x 7" Little Girl longarm ruler by The Gadget Girls, who unfortunately, have retired. But the ruler is still available through Hab and Dash, my favorite thread supplier. I like it because it's easy to control, and comes with several 1/4" lines horizontally, a few vertically, and 2 lines at 45 degree angles, all just enough to help map out a quilt design.

Those ruler lines plus the block corners are all I needed to create this motif. Starting my stitching 1/4" away from the sashing, in the center of the triangle, I liked the angle that occurred for the next stitching line when positioning my ruler edge at the block corner.


Then it's the customary stop 1/4" away from the seam, creating echo lines.

For the mirror angle on the other side, the stopping location is total guess-work. I'd rather stop short, test my ruler measurement/placement on that side to see how much further I need to go before starting the angled stitch line.


Once everything is lined up with the corner and the center point, the stitching can continue. And now I have a diamond shape in my triangle.

For the triangles on the sides of the motif, I played with the angle I wanted, taking note of where the block corner was in relation to the ruler lines. For this size block, it's 1 1/2 lines. I'm also using the ruler's 45 degree line to help placement.


That's an easy line to stitch, again stopping at the seam, echoing, then continuing with an echo along the sashing to get to the other side of the block.

Once again, it's guess-work as to where to stop but the ruler lines come in handy for placement. In this case, I was a couple stitches short, so after adding those, stitching the last angle to complete the triangle was a breeze.


Here's the motif again - oh so simple yet perfect for the space.


I hope this pretty little diamond/triangle motif has served as inspiration for using more rulers in your quilting.

Happy Quilting!


Follow on Bloglovin

Enjoyed this post? Don't miss out - get posts delivered directly to your inbox with follow.it.  

           
GET POSTS BY EMAIL


My Favorite Patterns

Monday, January 27, 2020

Chicken Wire Quilting

Grab a 1/4" quilting ruler and head to the sewing machine - let's stitch some chicken wire!
Chicken Wire Quilting tutorial

Super simple to stitch, with just a marked grid and a ruler, what barnyard quilt would be complete without it? In this tutorial, I'll go over the stitching sequence first, followed by a video showing the stitching in progress, then a final discussion about scale. Let's get started!


Chicken Wire Quilting

Once the grid is set up, stitching starts at the middle of the left line of the first grid square (red dot), then down to the grid intersection. The stitches back over that line, and stop at the middle (red dot) before angling up to touch the middle of the top line of the first grid square.


start row 1 for chicken wire quilting
Then it angles down to the middle of the next grid line, 

starting row 1 for chicken wire quilting


and continues straight on that line to the next grid intersection.


chicken wire quilting


And straight back up it goes, doubling the stitching and looking just like the twist in real chicken wire, before angling again into the next grid square. Repeating the same sequence of stitching lines all the way across within the grid forms the first row of stitching.

completed row 1 for chicken wire quilting

The next row starts with the peak of the design, and is offset by half the grid square. Work either from the right to left for continuous stitching, or left to right with a new start, as shown below.


beginning of row 2 for chicken wire quilting

This offset row starts stitching at an angle to the center of the grid square, then down to the center of the grid line, doubling back to angle over to touch the straight line from the row before, at the grid intersection.


start of row 2 for chicken wire quilting

At the finish of the second row, the chicken wire design starts to take shape.


two rows of stitching to complete one row of chicken wire

Continuing the design is easy - just alternate the row 1 and row 2 stitching lines.

Here's a video, showing both rows being stitched in the a continuous line method.


Chicken Wire Scale

It's important to check the chicken wire scale to the quilt before stitching, as the open space length is more than the width in this design, and could lead to chicken wire that's bigger than expected. 

Since the size of the grid determines the width of the chicken wire, it's helpful to draw a grid in several sizes on a piece of vinyl. Then sketch in the chicken wire design, overlaying the design on the quilt to test the scale. 


chicken wire size testing
In the picture above, there's testing of a 1 1/2" width at the top, 3/4" in the middle, 1/2" below that, and finally 1" at the very bottom. 

On my test, the 1/2" chicken wire fits the scale of the chicks and would certainly hold them in, but it's too small a the scale for the rest of the quilt. Three-fourths was still too small, but 1" works fine as a scale to fit both the chicks and the rest of the quilt.


Who Rules the Roost quilt quilting by QuiltFabrication

And that's all there is to finding a grid size for chicken wire that fits with the quilt.

Wasn't that easy? Now all those barnyard quilts can be full of chicken wire - have fun quilting!


Follow on Bloglovin

My Favorite Patterns

Monday, January 13, 2020

Jump Stitch Quilting

Want to alleviate the tedium of pulling threads to the top at every start, when the next start is just stitches away? Want to make stitching a quilting design more efficient? Then try jump stitch quilting!


jump stitches used in quilting

For owners of embroidery machines, this should be familiar.
Digitized designs employ 'jump stitches' to get from one area to another in a design. Sometimes the design uses stitches, but most of the time it's a jump stitch. That's un-stitched thread between different design areas, with lock stitches at each end.

In this picture from Brother, USA, the circled areas show how jump stitches are used in this embroidered design. 


brother usa embroidery jump stitches


I'm all about efficiency, so the jump stitch concept really came in handy yesterday when I was quilting overlapping lines. It was far easier to make jump stitches with lock stitches at each end, than to clip threads and start again pulling up and holding threads.

Below shows stitching up to the line, adding lock stitching at the line, then jumping over and restarting, with lock stitches, on the other side.

lock stitches after a jump stitch

Then it's easy to continue the design, 

stitching continued after a jump stitch

and repeat the process in the other direction, creating two jump stitches over the previous quilting.

jump stitches within a design

Since each end is locked, those jump stitches can now be trimmed away, on the front and the back.

removed jump stitches

My design also required some straight lines behind these crossed bars, which meant more jump stitches. Because they're so flat, they're hard to see - just follow the white arrows, which shows half of them.

numerous jump stitches

After stitching, they're all clipped to clean up the design.

clipped jump stitches

And what a time saver! This was so much easier than locking, clipping the threads, moving to the new area, pulling up threads, and locking, just to stitch a few stitches. I could have backtracked to stitch this design, but one thread pass looks much nicer.

So, that's my tip for today - make use of jump stitches in a quilting design to get the needle where it needs to be, and to make more efficient use of quilting time.

Happy Quilting!

Follow on Bloglovin

Thank you for following!

Friday, January 3, 2020

January 2020 Book of the Month

It's been a while for a new Book of the Month, but I'm starting the year off right with another featuring quilting designs. Thanks to C&T Publishing, the honor goes to Straight Line Quilting Designs (affiliate link),


Straight Line Quilting Designs book

with contributions from numerous well known quilters - Natalia Bonner, Charlotte Warr Andersen, and Angela Walters, just to name a few.

A couple reasons why I chose the Straight Line Quilting Designs (affiliate link) book:

1) Everyone should have as many quilting resources available to them as possible, and Straight Line Quilting Designs (affiliate link) book is another tool to add to the library. I really think that the quilting part of this fabulous hobby of ours is probably the most frustrating, not only in trying to figure out what to quilt, but how to quilt a design that doesn't require major wrestling. And this book helps with both of those.

2) I love straight lines, and find them the easiest to stitch, either with a walking foot, or freemotion by following a guide (tape, ruler, water soluble mark, etc). There are unlimited possibilities in designs - check out a sampling from the book.


straight line quilting designs

Some look pretty complex, but upon close inspection, the design is made by repeating the same line horizontally and vertically - sneaky!


straight line quilting designs

Other designs require backtracking, or stops and starts, but they are so worth it for the texture they give to the quilt.

Besides all the 75+ designs to choose from, the Straight Line Quilting Designs (affiliate link) book features the design on two pages, and is spiral bound so the book lays flat. That way, the design is represented in a more-to-scale version, making it easier to both envision the design on a quilt, and to track the quilting direction. 

One note about the quilting direction: the Straight Line Quilting Designs (affiliate link) book does not provide any instruction on stitching the design. No 1-t0-2-t0-3 dots, no color highlighted lines, no 'start here'. It's completely up to the quilter to figure out the stitching sequence, which is pretty easy for a majority of the designs. As a seasoned quilter, I don't have a problem with that, though a beginner might. But once a quilter plays with straight lines, the possibilities are endless!

As for me, I'm looking to do some straight line quilting this month, and happy to add the Straight Lines Quilting Designs (affiliate link) book to my growing list of quilting design book titles!

Happy Quilting!


Follow on Bloglovin
Thanks for following!

Friday, November 1, 2019

November 2019 Book of the Month

Though I enjoyed last month's book feature, it's time to move on to a new selection. Continuing with quilting ideas for finishing quilts, how about the Rulerwork Quilting Idea Book (affiliate link) by Amanda Murphy?


I'm a big fan of ruler quilting, because for me, it adds order to a quilt design, and it's easy to execute. Plus, it's perfect for a quilt that needs that special quilting design to really enhance the quilt top.


This book is the second by Amanda Murphy that has a ton of ideas for quilting designs. The first was the Free Motion Quilting Idea Book (affiliate link), another resource on my shelf.


Now to dream up a project to stitch some ruler designs on - we'll see what I come up with!

Happy Quilting!


Follow on Bloglovin

Tuesday, October 1, 2019

October 2019 Book of the Month

Here it is, October, and time to turn the page, literally, and move onto a new Book of the Month selection. This month's choice is Step-by-Step Texture Quilting (affiliate link) by Christina Cameli.


step by step texture quilting by Christina Cameli

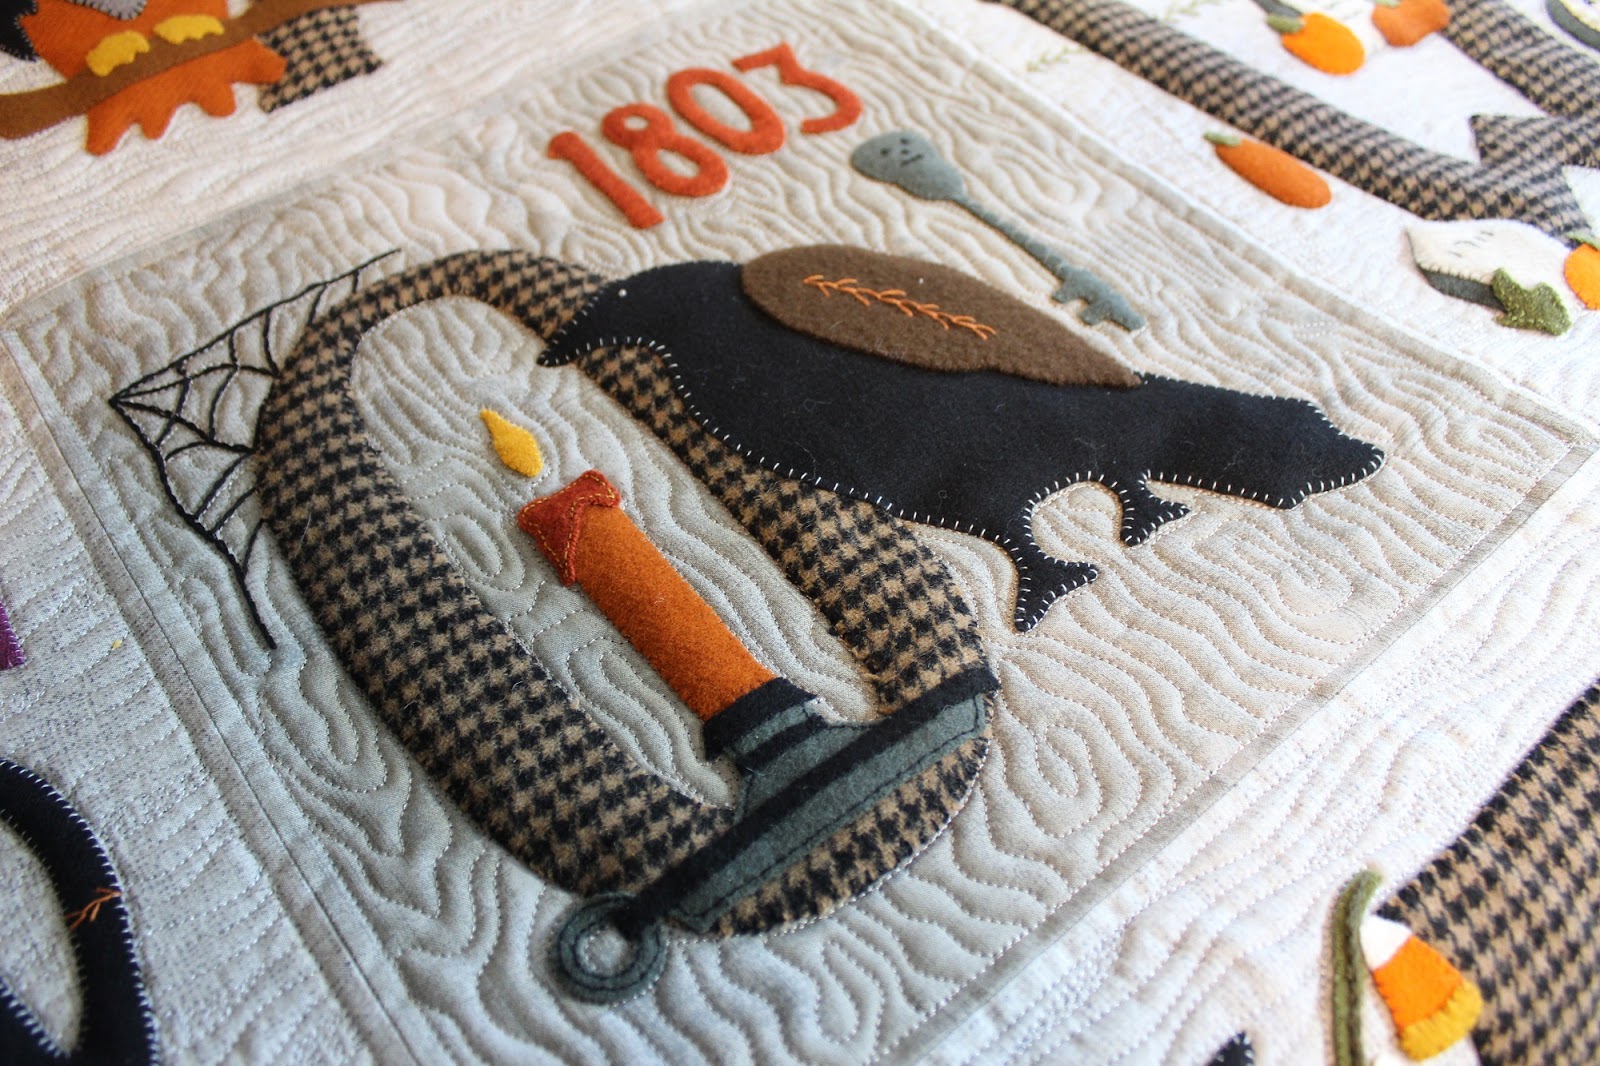
Full of both freehand designs and those requiring a grid structure, this book has a bit of everything. I know I was happy to find it, as it provided some design ideas for a client's Halloween applique quilt. And ultimately, we chose two designs, Fog,


fog quilting motif

and Wood Grain.


wood grain quilting

Here's a sneak peek at some other quilting ideas from Step-by-Step Texture Quilting (affiliate link):

Topography, which I like very much,


Topography quilting

and the use of scale, which really makes an impact.


quilting scale

As for other ideas, well, you're just going to have to get the book - I know I'll be adding it to my bookshelf.

Update: here's sharing the quilting motifs on a client's quilt.


Fabulous, don't you think?

Happy Quilting!


Follow on Bloglovin

Friday, August 2, 2019

Watermelon Twist Table Runner

I'm all ready to celebrate National Watermelon Day tomorrow with my new Watermelon Twist table runner!


Watermelon Twist Table Runner by QuiltFabrication

Doesn't that make your mouth water??? These juicy red watermelon slices are set off beautifully on a light aqua background, then accented with stripes and tiny watermelons - so fun!

This is project number 1 that's made from my watermelon wedges, with project number 2 coming next week. Yes, two projects this year, cause these watermelon wedges are like potato chips - can't have just one! Last year, I celebrated with Whatamelon, a single, large watermelon runner,


Whatamelon table runner by QuiltFabrication

a pattern also available in my Etsy shop, along with Watermelon Twist. 

How about some closeups of Watermelon Twist's mouth-watering sweetness?


Watermelon Twist table runner closeup 1

For the background fill, I once again quilted my Straight Line Stipple, and added some curls in the juice droplets.


Watermelon Twist table runner detail

The watermelon seeds are outlined, but I chose not to quilt a fill in the watermelon slices so that they would stay puffed up against the background.


Watermelon Twist table runner closeup 2

And finally, there's a stipple fill around all the little watermelons, making them stand out.

For fun, here's a pic of the back, showing the Straight Line Stipple - check out the video on YouTube on how it's done.


Watermelon Twist backside showing Straight Line Stipple

I'm so excited to have this ready for tomorrow - and yes, I've got a watermelon waiting in the fridge!

Happy Quilting!


Follow on Bloglovin

My Favorite Patterns